

During the development lifecycle of a software project, you probably create different builds at various stages. At the early stage, there will be the one that conforms to your local configuration. When you are ready to move to the next stage, there is another build that will be utilized by your QA group to test the features and bug fixes. When the app passes all tests and got the QA team’s approval, you will create another version which is sent to your customers for beta test before pushing it to App Store. At last, there will be the production-ready application, once the client is satisfied with the build that you have sent. All of these builds are not exactly the same, each of which usually has some specialties and a slightly different configuration.
For example, if the app needs to connect to a backend, it is very likely the app is connected to the test environment during QA tests. The build is probably configured with a test URL. When you move to the next stage, the other build will have another URL for connecting to the staging/production server. On top of that, you may not be showing the same level of information when an error occurs in the application for all the builds.
How can you efficiently manage all these build variants with the same code base in Xcode? This is what I want to discuss in this tutorial and show you how to create multiple configurations with the help of Xcode.
How Can You Manage Multiple Builds?
There are different approaches that can achieve it. One is to create different targets, each one of which employs different Info.plist. Each time a target is selected, a different Info.plist will be used, hence we will be able to differentiate variables like token, URLs for different builds.
It could also be achieved by using Bundle Identifiers. Defining different preprocessor macros will control the conditional compilation of various chunks of code.
Eugene Trapeznikov has already covered this approach in this excellent tutorial. If you haven’t read that, please do his tutorial – How to Use Xcode Targets to Manage Development and Production Builds that covers all the key concepts.
The alternative approach is to put your build configuration settings into .xcconfig files and refer those in your project info. Then you can build a different version of an app by simply changing the scheme. This is what I am going to walk you through in this tutorial. Putting build configuration settings into files is a huge win for configuration management.
Creating the Build Configuration
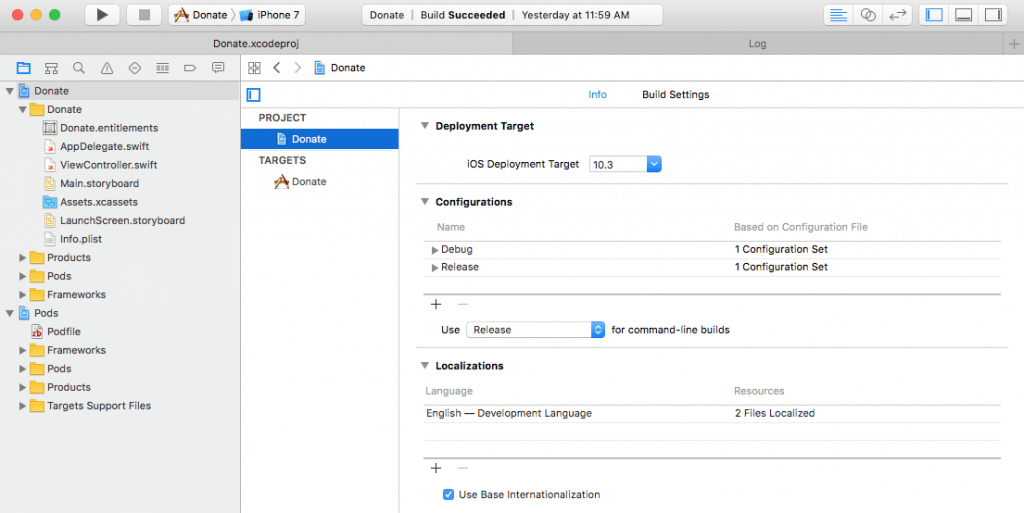
First, let’s create a new project using Xcode. Or if you prefer, start with an existing one that is available on your computer. Select the top-level element in the project navigator and make sure the “YOUR_PROJECT_NAME” item in the Project section is selected. Once done, you should see that Xcode already provides you two different configuration levels: Debug and Release. If you didnt’ aware that before, this means you can create a build for debug and another one for release with a different setting.
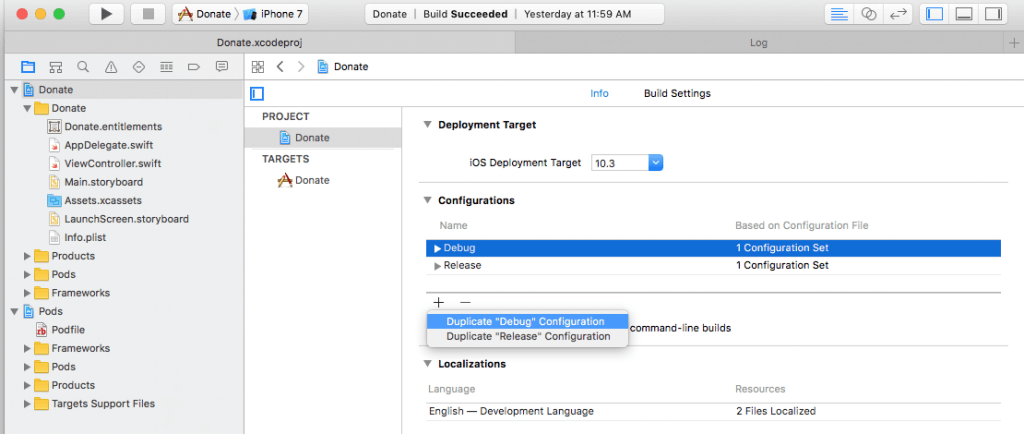
Now we are going to create a new configuration. Let’s just call it “Staging”. Click on the + sign right beneath the configuration list and select “Duplicate Debug configuration” as it’s much easier to remove the things we don’t want from the Debug configuration than putting back in those we need to the Release configuration.
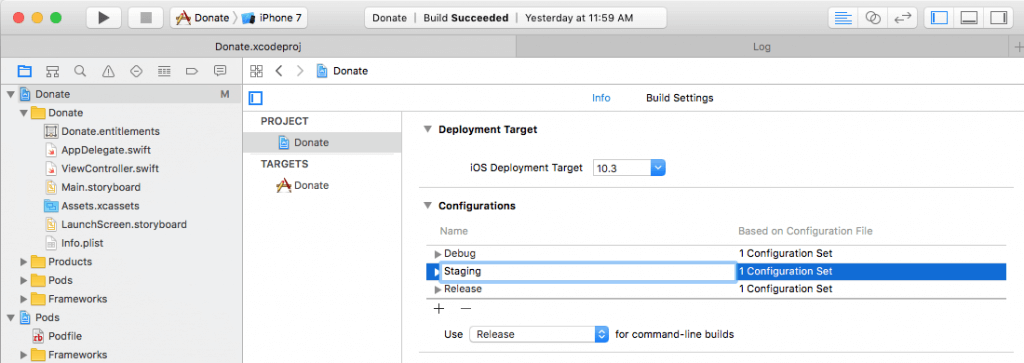
In the first cell of the row that just appeared, fill in Staging. Once done, you now have three levels of configuration.
Using Xcode Configuration File (.xcconfig)
As mentioned we use Xcode configuration file (.xcconfig) instead of using conditional compilation blocks to manage the build settings (such as which tokens, api keys, urls of backends should be used).
If you don’t know what an Xcode Configuration file (.xcconfig) is, it is actually a key/value based file. You can store your build settings in the form of key/value pairs, similar to what you did in dictionaries. By using a .xcconfig file, it is very easy to define build parameters for each build. You will understand what I mean in a while.
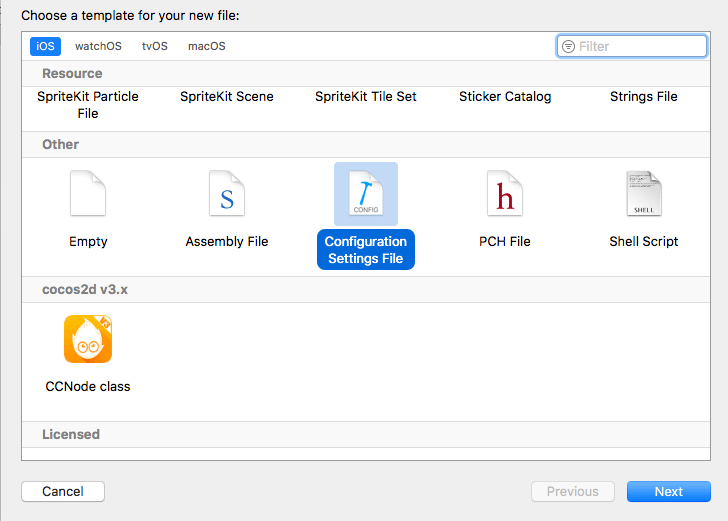
Now go back to the project to create a .xcconfig file. In the project navigator, right click the project folder and chooose New file…. In the dialog that pops up, select the Configurations Settings File. In the next screen, give it the name “Staging” and make sure the targets checkboxes are all unchecked, because you don’t want to include this in your app’s bundle.
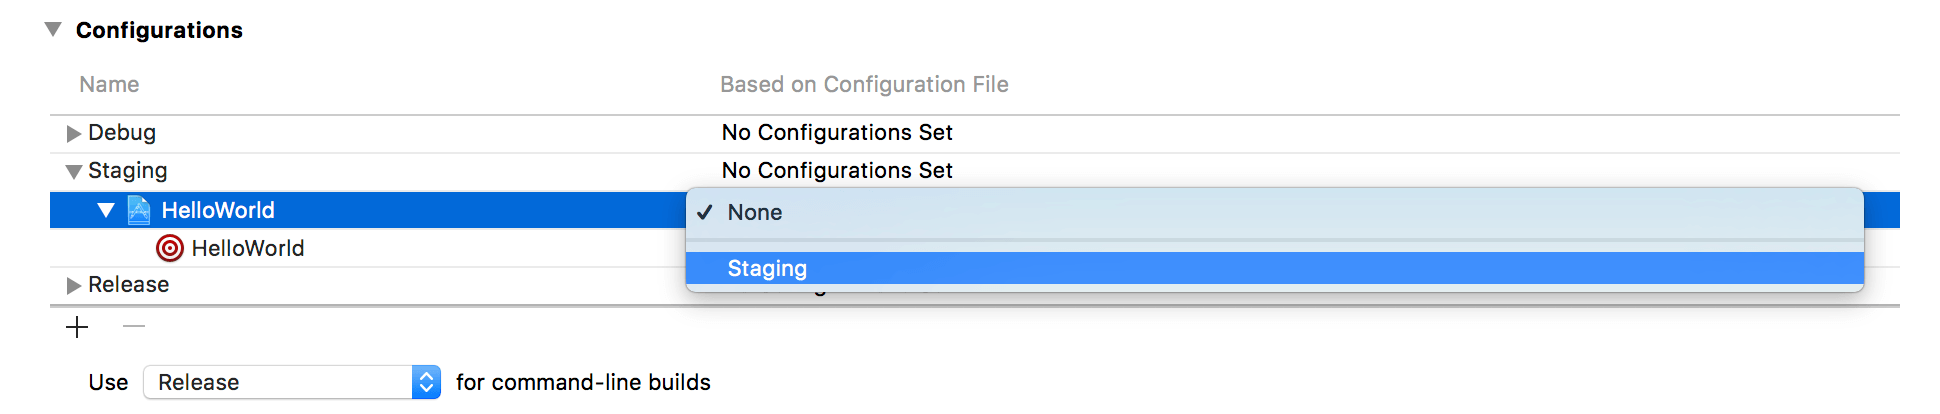
Now go to your project’s info screen, under the configurations section expand the list and select the xcconfile “Staging” from the drop down box.
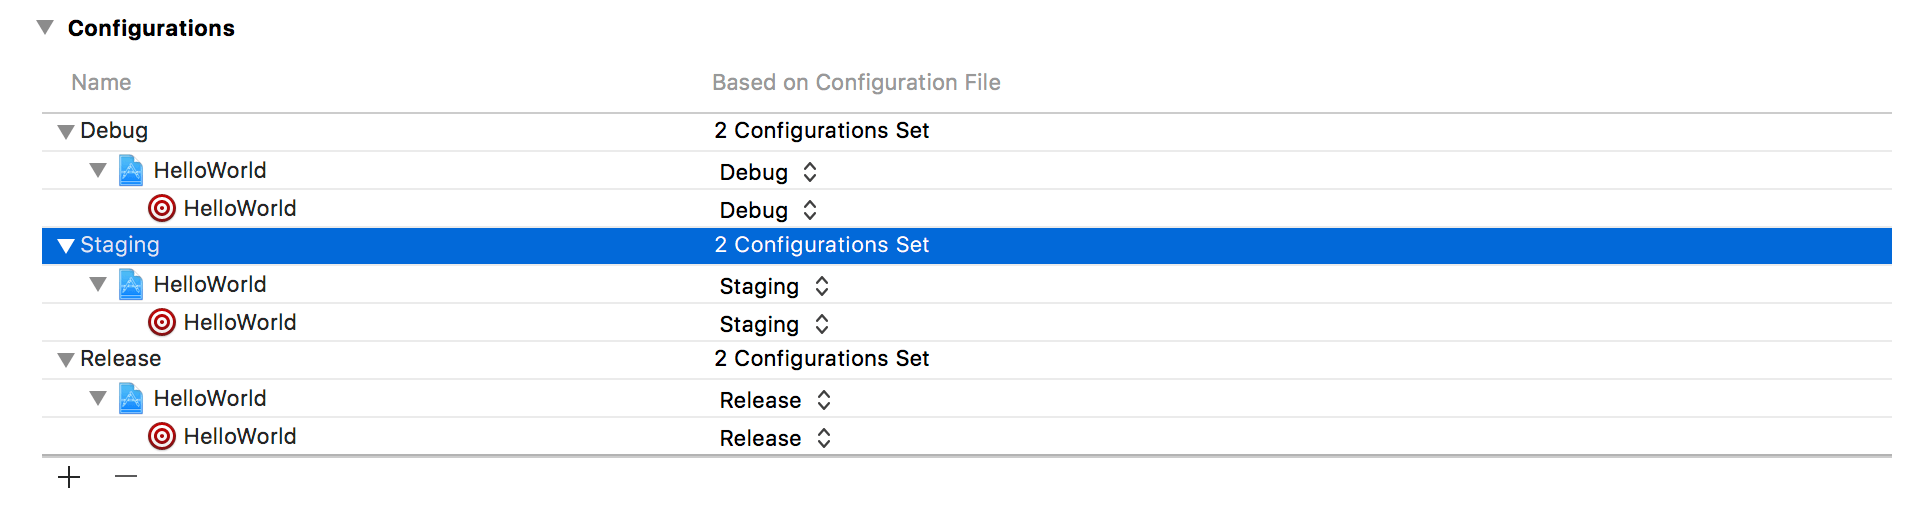
Once done, you can repeat the process for the main target and choose the Debug file. Also, repeat the process for the Release Target.
Changing the Build Information
Once you have the Xcode configuration files setup, it is pretty straightforwad to change the build. Say, you want to change the build information like app name, app version, bundle identifier, and bundle version for each build, you can edit each of the .xcconfig file like this:
Debug.xcconfig:
IS_APP_NAME = Donate Debug
IS_APP_VERSION = 0.3
IS_APP_BUNDLE_ID = com.intensifystudio.DonateDebug
Staging.xcconfig:
IS_APP_NAME = Donate Staging
IS_APP_VERSION = 0.2
IS_APP_BUNDLE_ID = com.intensifystudio.DonateStaging
Release.xcconfig:
IS_APP_NAME = Donate
IS_APP_VERSION = 0.1
IS_APP_BUNDLE_ID = com.intensifystudio.DonateRelease
You can use your configuration variables in project settings, info.plist and entitlement files. In this example, we will use it inside info.plist to change app name,app version, and bundle identifier like shown below:
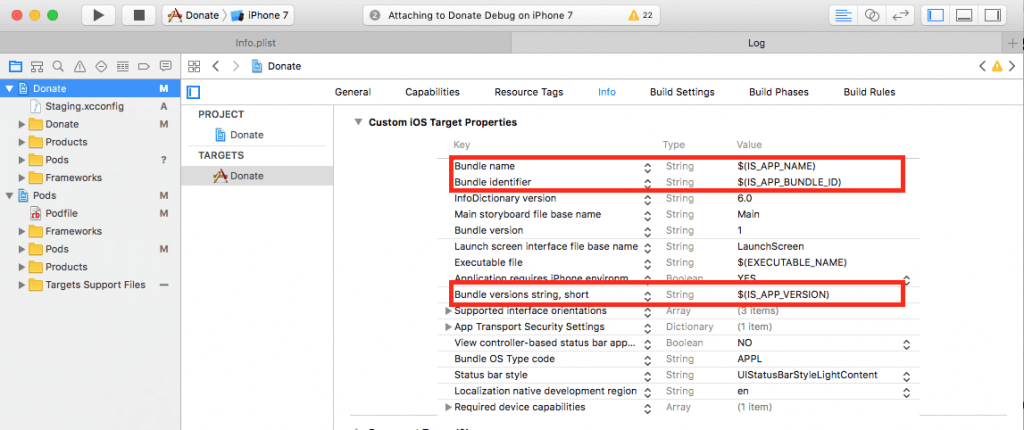
For clarity, I am using a custom prefix “IS” for IntensifyStudio as the name of my little development studio to distguish the custom key from the default one.
Changing App Icon
With the Xcode configuration files, you can now easily configure the app icon for different builds. The procedures of customizing the App Icon for different builds are the same as the one as we discussed in the previous section, except that the variable will be used inside Build settings. Edit each of the .xcconfig file with an entry like this:
Debug.xcconfig:
IS_APP_ICON = AppIconDebug
Staging.xcconfig:
IS_APP_ICON = AppIconStaging
Release.xcconfig:
IS_APP_ICON = AppIconRelease
Once done, switch to Build Settings and replace AppIcon with the variable ${IS_APP_ICON}:
Then create a couple of the new iOS App Icon sets in Assets.xcassets and rename them accordingly.
![]()
Drag and drop your images in and you’re good to go!
Accessing Variables from Code
Xcode configuration files are really powerful and can be used for other settings as well. Say, if you have different API key and backend URL for different builds, you can specify them in each of the .xcconfig file. Then in your code, you can retrieve them back. Here is an example:
Debug.xcconfig:
BACKEND_URL = http:\/\/api.intensifystudio.com/development
CONSUMER_KEY = ck_a57e4fa2e14c12ae3f400371cf2951ec3dea5_dev
CONSUMER_SECRET = cs_c847caa35ce1041e9c69d239141f13f63bb22b_dev
Staging.xcconfig:
BACKEND_URL = http:\/\/api.intensifystudio.com/staging
CONSUMER_KEY = ck_a57e4fa2e14c12f400371cf2951ec3dea5_staging
CONSUMER_SECRET = cs_c847caa35ce1041e9c69d239141f13f63bb22b_staging
Release.xcconfig:
BACKEND_URL = http:\/\/api.intensifystudio.com/
CONSUMER_KEY = ck_a57e4fa2e14c12f400371cf2951ec3dea5
CONSUMER_SECRET = cs_c847caa35ce1041e9c69d239141f1f63bb22b
Next, add those variables to Info.plist by creating additional fields like this:
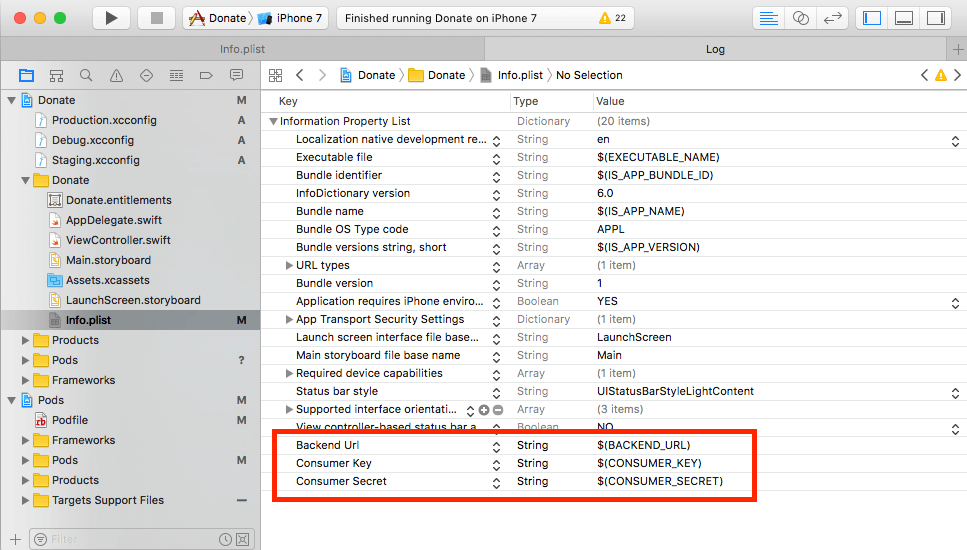
You can read the values from the plist file at runtime using the sample code below:
func infoForKey(_ key: String) -> String? {
        return (Bundle.main.infoDictionary?[key] as? String)?
            .replacingOccurrences(of: "\\", with: "")
 }
The code is pretty straightforward. We are accessing the Main Bundle to retrieve the information that we would like to use. Then, we remove all the backslashes from the string if the value returned is a URL.
Switching Between Build Configurations
To switch between build configurations, you can simply change the scheme by holding the option key and click on the scheme at the top. You can then select your preferred build configuration.
Conclusion
Xcode Configuration file is a powerful way for configuring different build configuration, allowing you to manage build variant easily. What do you think about the tutorial? Please let me know in the comment section if you have any question about xcconfig 😉


