

Swift DocC is a documentation compiler introduced by Apple in Xcode 13, designed to help developers create elegant and interactive documentation for their iOS and macOS projects. The compiler converts your Markdown-based comment into rich documentation. With Swift Docc, you can incorporate code snippets, diagrams, and even interactive tutorials directly into your documentation, enabling readers to gain a deeper understanding of your code and how it works.
The generated documentation is displayed directly in the Xcode documentation window, giving developers a seamless and integrated experience. In addition to being able to display your documentation in Xcode, you can also host it on a website. This is a great way to share your documentation with a wider audience and make it more accessible.
In this tutorial, I’ll give you a quick walkthrough of Swift DocC and show you how to publish the code documentation onto your own web page or share it on GitHub Page.
Documenting Your Swift Code with DocC
To create documentation using DocC, you’ll need to use a custom variant of Markdown called documentation markup. The syntax is similar to Markdown but it adds functionality for code documentation-specific features such as cross-symbol link and term lists. Assuming you have some experience with Markdown, you should know how to use documentation markup.
To document your source code in Xcode, you can hold the command key and click the method name.
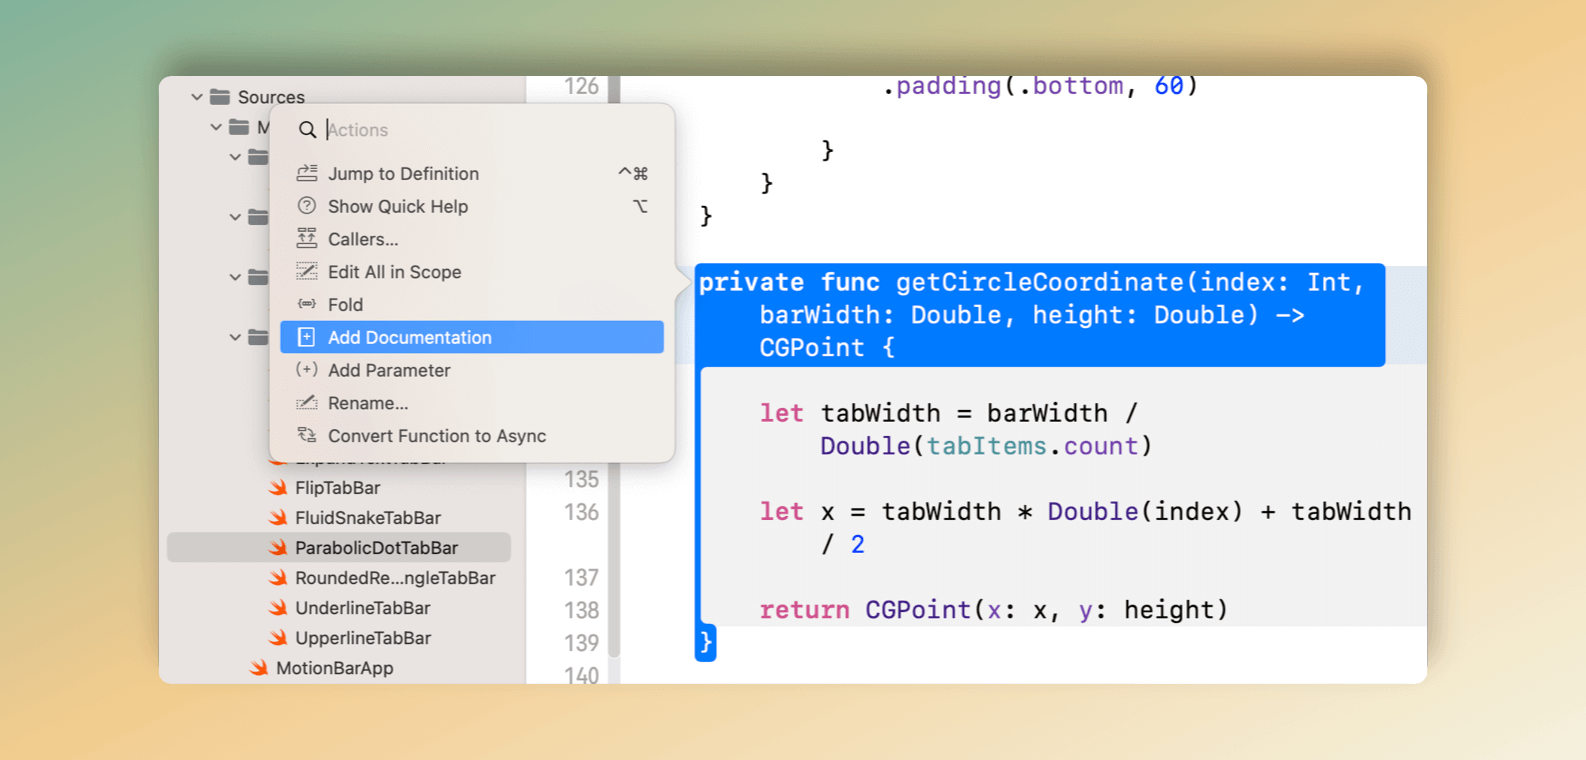
By choosing the Add Documentation option, Xcode will generate a template that includes placeholders for all the necessary elements. You can then write your own description to provide information about the function and parameters.
/// <#Description#>
/// - Parameters:
/// - index: <#index description#>
/// - barWidth: <#barWidth description#>
/// - height: <#height description#>
/// - Returns: <#description#>
private func getCircleCoordinate(index: Int, barWidth: Double, height: Double) -> CGPoint {
let tabWidth = barWidth / Double(tabItems.count)
let x = tabWidth * Double(index) + tabWidth / 2
return CGPoint(x: x, y: height)
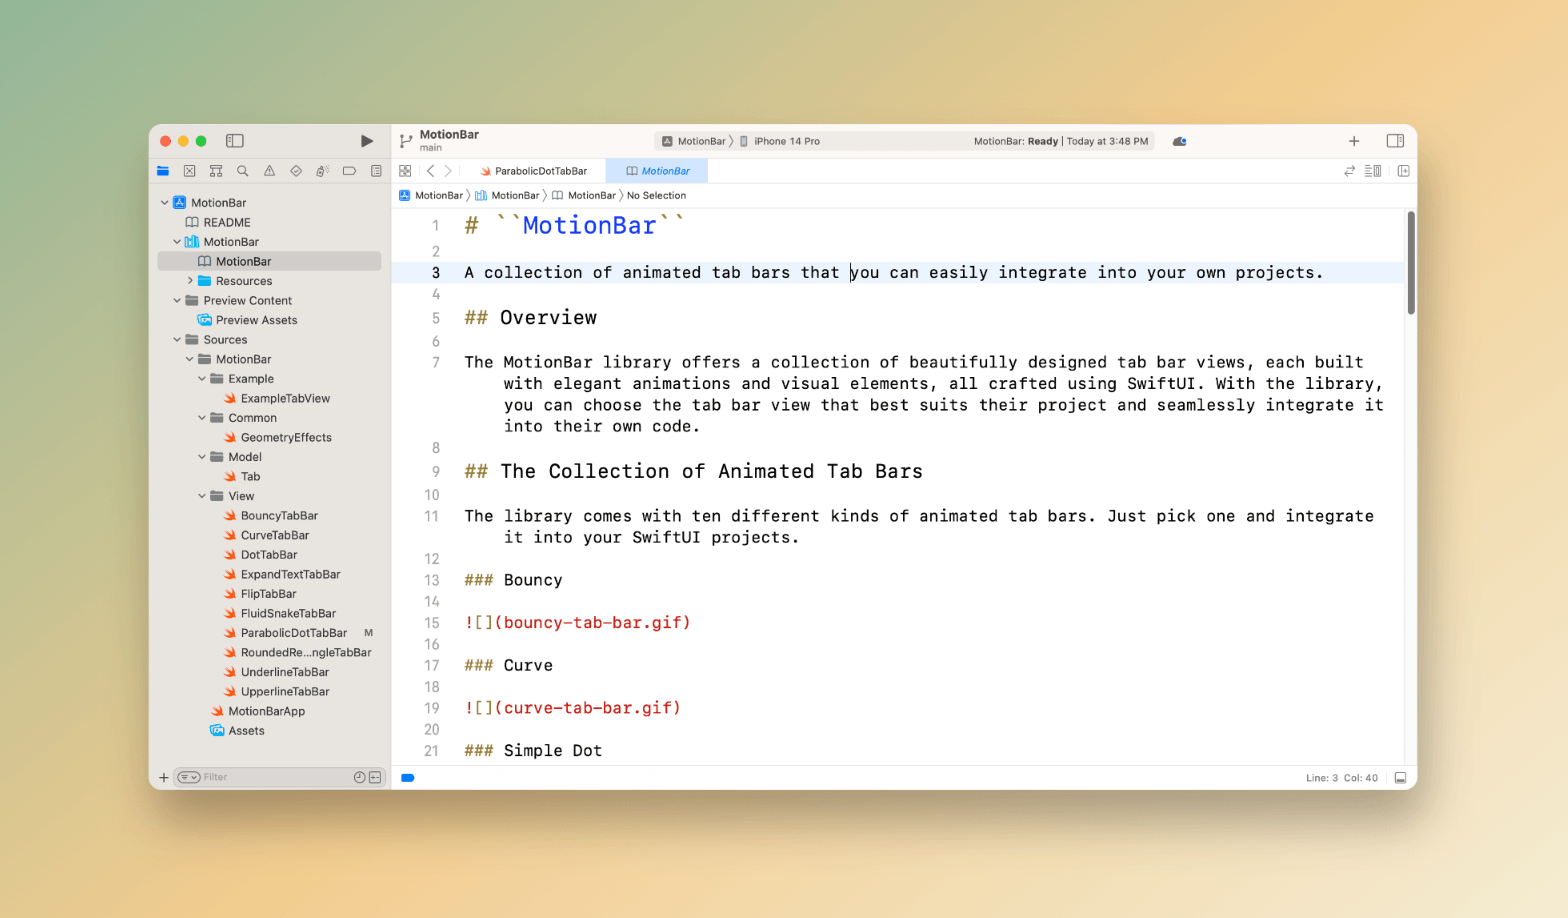
}On top of the documentation of your Swift files, DocC allows you to create a landing page (or a top-level page) that provides an overview of your project and serves as an entry point of your code documentation.
Although DocC can generate a basic landing page for you, it’s always recommended to create your own entry page to give your documentation a unique and personalized touch. Xcode makes this easy by automatically creating an empty landing page when you add a documentation catalog to your project.

Below is the Markdown file for the landing page of our MotionBar project. The first line of the documentation file is the project name with an H1 heading. In the content part, you provide an overview about your project and any additional information that helps other understand your code.
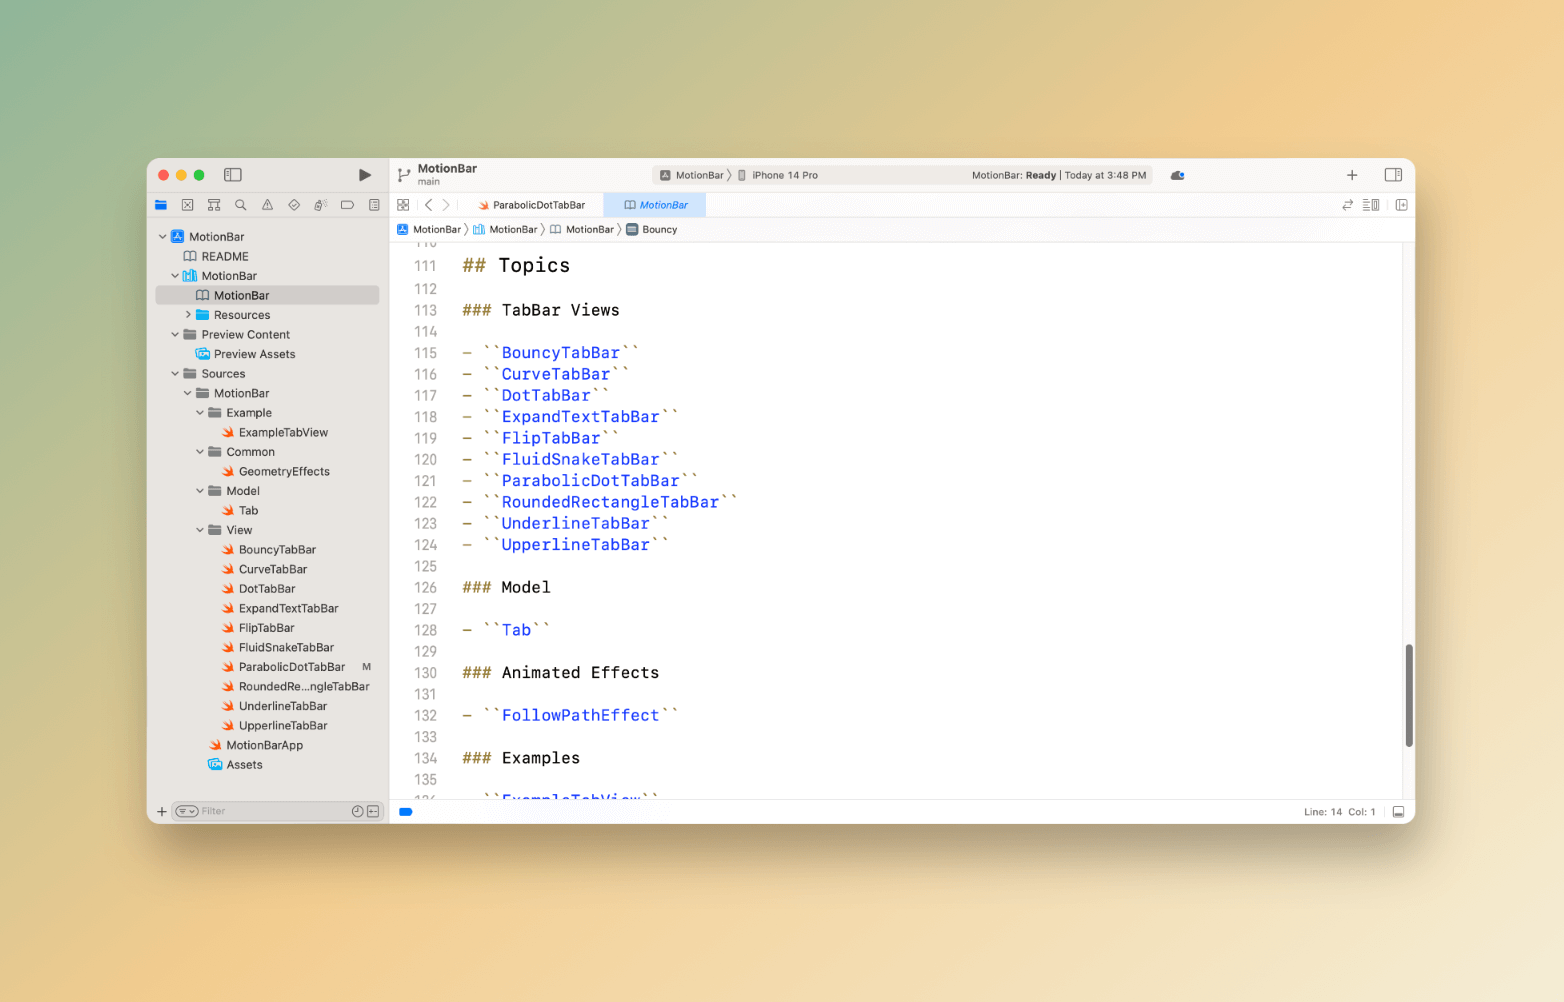
To help your reader navigate through the source code, you can group your structure and classes into different topics. You start with the Topics keyword, followed by section names for each group of class/structure.
This is just a quick walkthrough of how you format your code documentation using documentation markup. If you want to dive deeper into the markup language, you can refer to the official documentation of DocC.
Generating DocC Documentation from Xcode
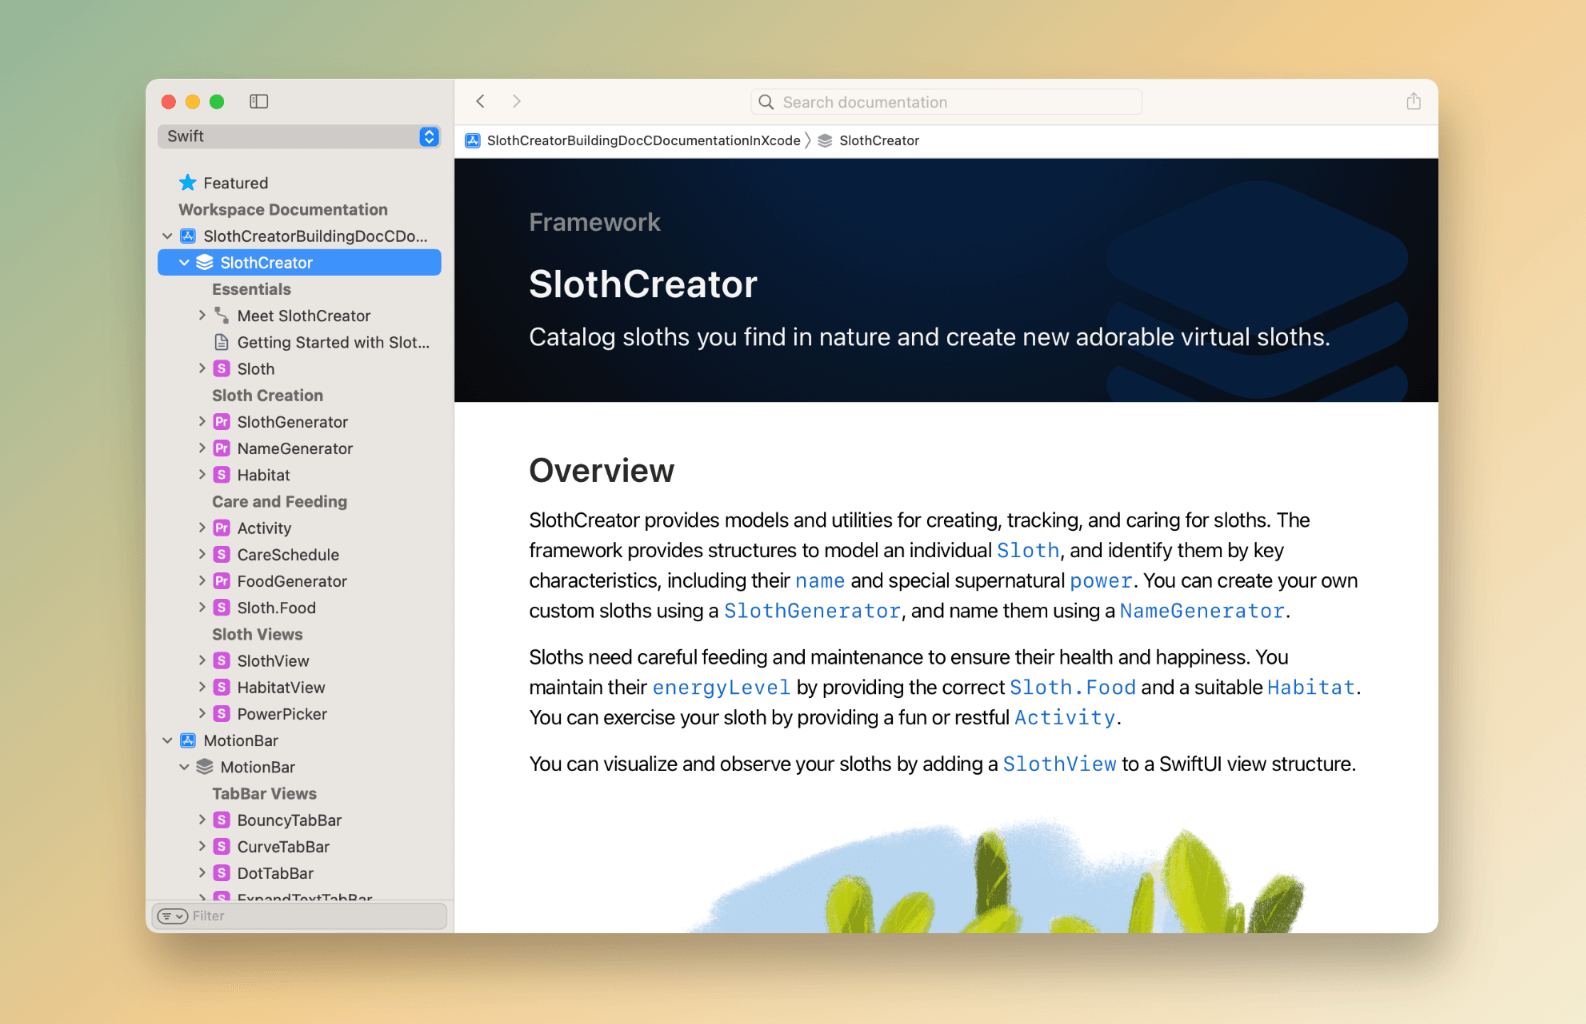
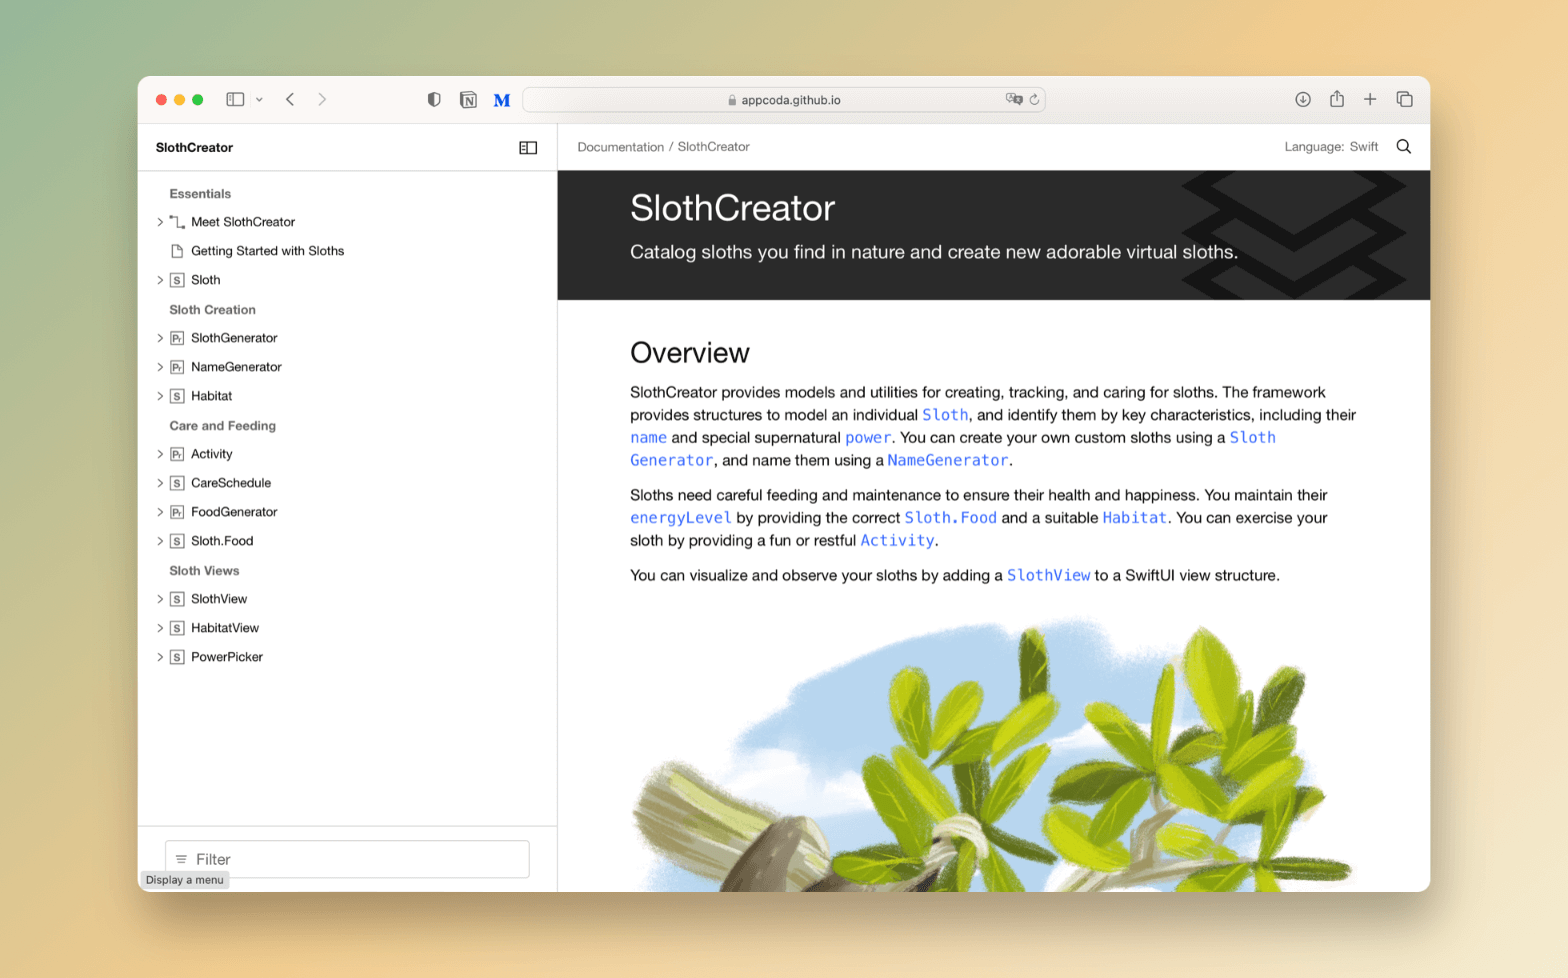
To follow the rest of the tutorial, I suggest you to download the demo project SlothCreator developed by Apple. The sample project shows you how to make use of DocC to create code documentation and tutorials.
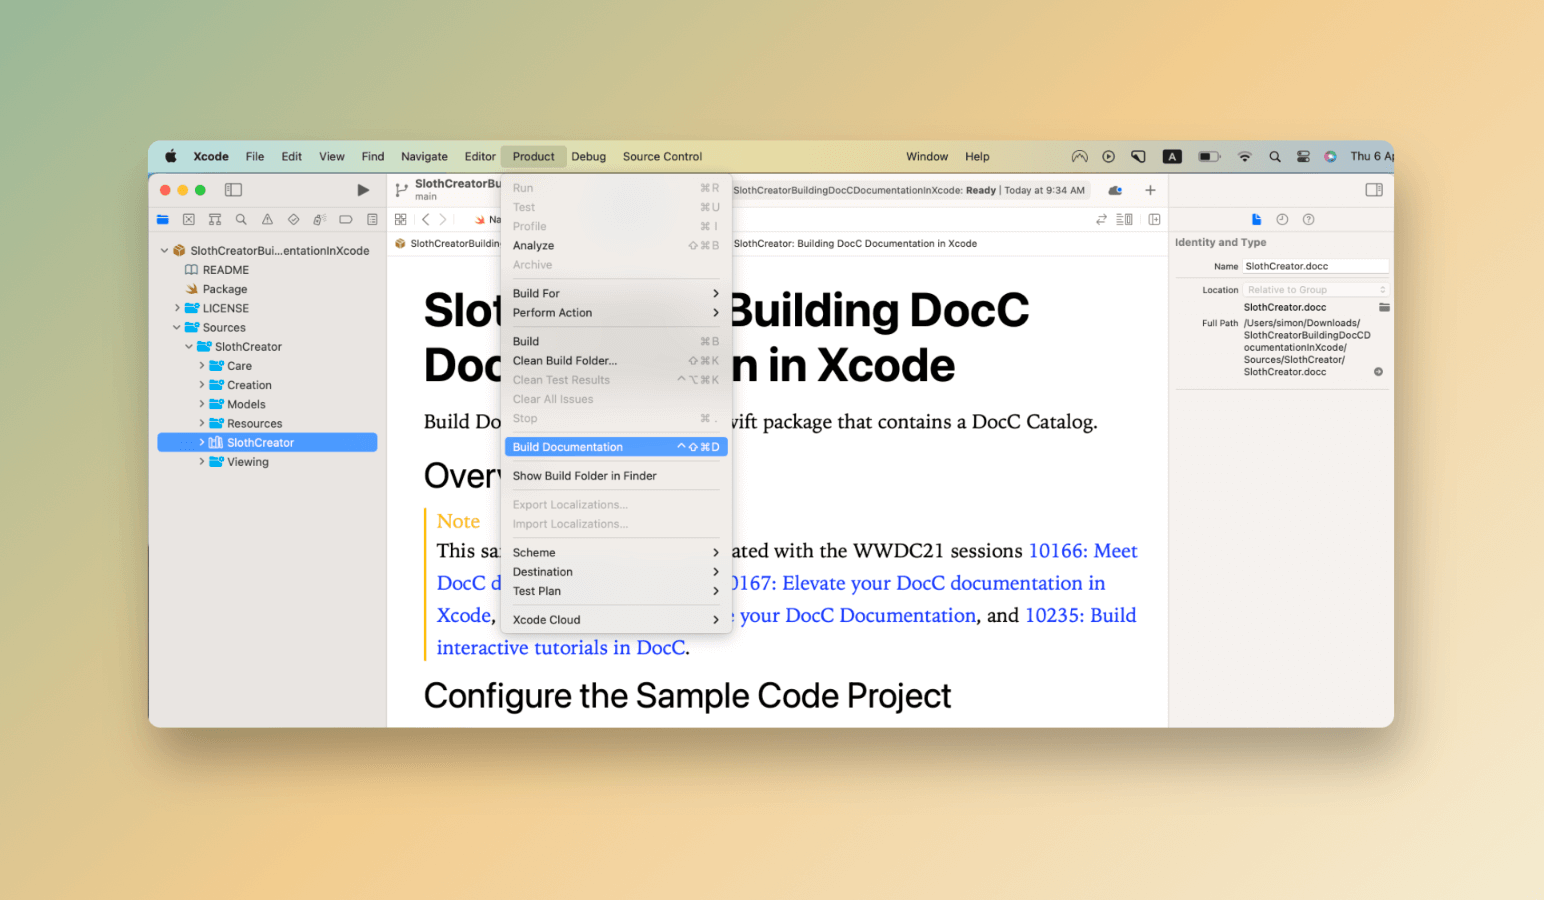
Building your documentation is a breeze with Xcode’s built-in capabilities. To do so, simply navigate to the Xcode menu and select Product > Build Documentation. Xcode will then convert your Markdown-based comments into a beautifully designed documentation that looks similar to the official Apple API documentation.
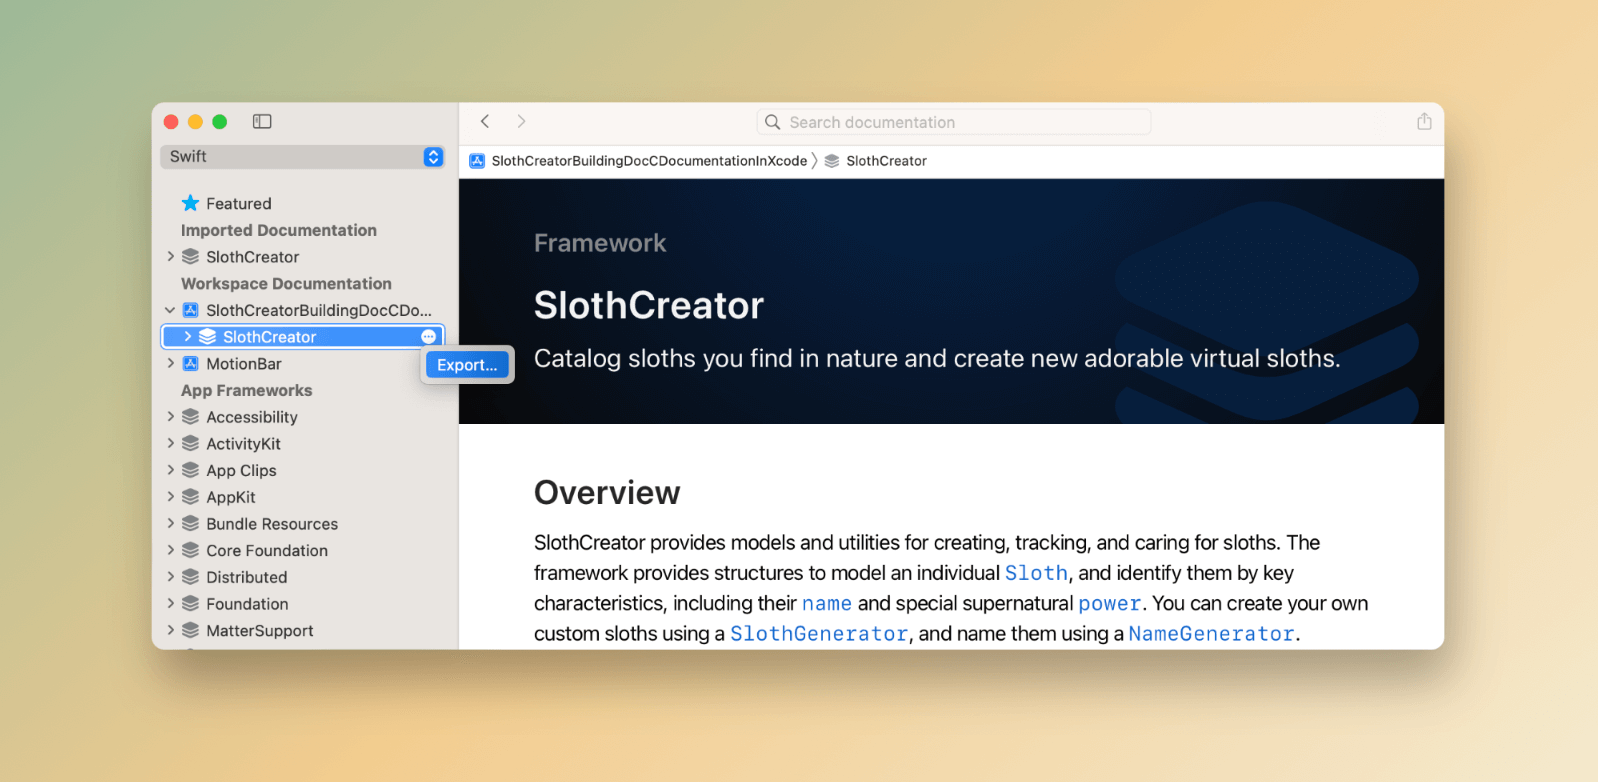
If you’re looking to export your documentation as a doc archive, simply click the ... button located next to SlothCreator and select Export. This will allow you to choose your desired location and save the exported documentation with a .docarchive file extension.
Building a DocC Archive Using Command Line
If you prefer building documentation using Terminal, the document compiler also provides the following command to create a doc archive:
xcodebuild docbuild -scheme <SCHEME_NAME> -destination <DESTINATION> -derivedDataPath <YOUR_OUTPUT_PATH>Let’s use the SlothCreator project as an example. Open Terminal and change to the SlothCreator directory (for me, I store the project under my Downloads folder):
cd ~Downloads/SlothCreatorBuildingDocCDocumentationInXcodeType the following command to build the documentation:
xcodebuild docbuild -scheme SlothCreator -destination 'name=iPhone 14 Pro' -derivedDataPath ./buildThe Doc Builder tool should then generate the document and save it under the build folder. You will find several subfolders under the build folder. The doc archive is located under build/Build/Products/Debug-iphonesimulator.
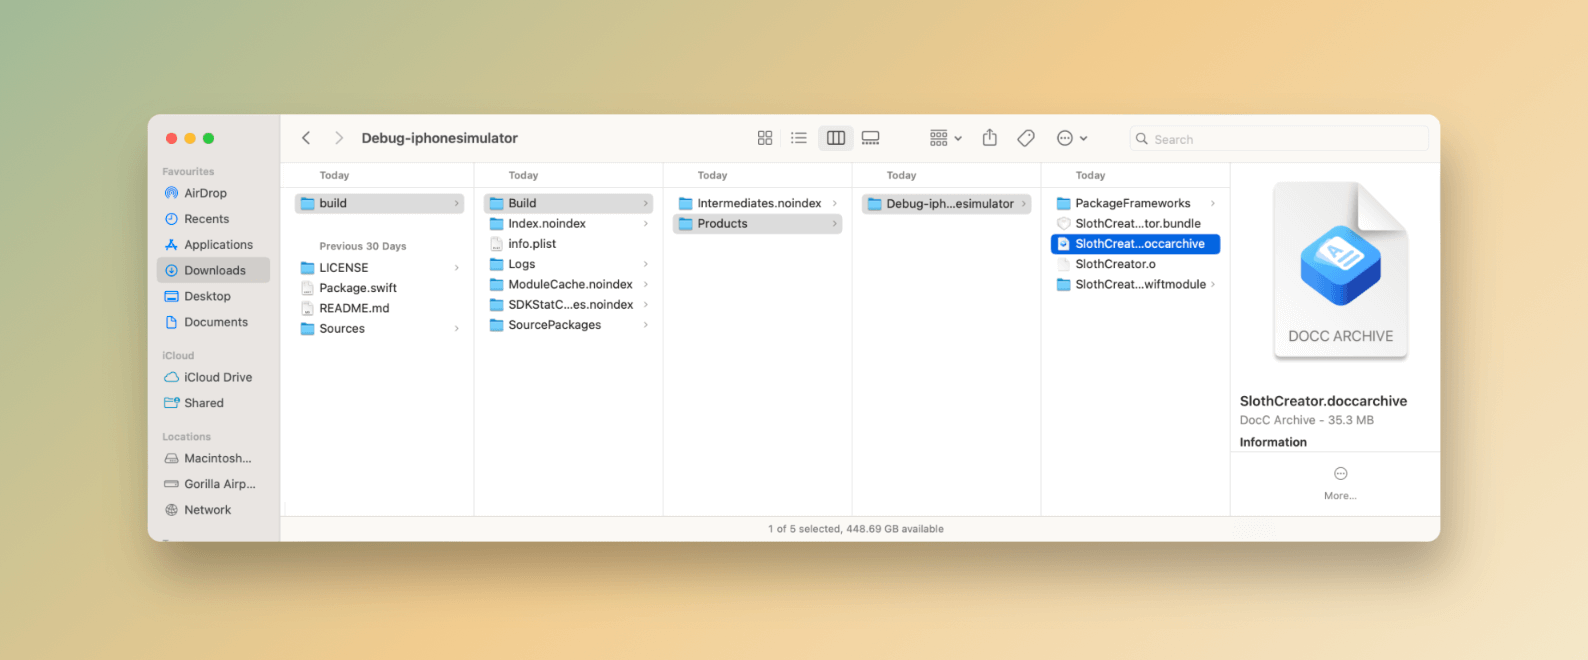
If you can’t locate the doc archive file, you can use the find command to search for it:
find ./build -type d -name '*.doccarchive'Converting DocC Archive for Static Hosting
Once you successfully locate the doc archive, you can zip it and share it directly with your team members via email or AirDrop. They can open the DocC archive using Xcode.
When Xcode exports a documentation archive, it includes a single-page web application within the bundle. This web app is designed to render the documentation content as HTML. However, to host the archive on a web server, you’ll need to modify your web server configuration and add some routing rules. Here is a sample configuration of Apache (i.e. .htaccess) provided by Apple:
# Enable custom routing.
RewriteEngine On
# Route documentation and tutorial pages.
RewriteRule ^(documentation|tutorials)\/.*$ SlothCreator.doccarchive/index.html [L]
# Route files and data for the documentation archive.
#
# If the file path doesn't exist in the website's root ...
RewriteCond %{REQUEST_FILENAME} !-f
RewriteCond %{REQUEST_FILENAME} !-d
# ... route the request to that file path with the documentation archive.
RewriteRule .* SlothCreator.doccarchive/$0 [L]
If you do not want to edit the server configuration, DocC also allows you to convert the doc archive for static hosting by using the following command:
$(xcrun --find docc) process-archive transform-for-static-hosting <DOCC_ARCHIVE> --output-path <OUTPUT_PATH>By using the transform-for-static-hosting option, DocC can generate static links without requiring you to set up custom routing rules.
To continue with our SlothCreator demo, you can convert the doc archive by running the following command:
$(xcrun --find docc) process-archive transform-for-static-hosting ./build/Build/Products/Debug-iphonesimulator/SlothCreator.doccarchive --output-path ./htmldocIf everything runs smoothly, DocC generates the HTML files under the htmldoc folder. You can copy the files to your web server and access the documentation like this:
http://<your_domain>/documentation/slothcreatorFor the tutorials, it is available here:
http://<your_domain>/tutorials/slothcreatorBy default, DocC assumes you host the files under the root / path. If you prefer to host the documentation under a subfolder, you can add the option hosting-base-path when executing the command above like this:
$(xcrun --find docc) process-archive transform-for-static-hosting ./build/Build/Products/Debug-iphonesimulator/SlothCreator.doccarchive --output-path ./htmldoc --hosting-base-path /demoWe set the base path to /demo. In this case, you’ll access the documentation using the following URL:
http://<your_domain>/demo/documentation/slothcreatorHosting the DocC Documentation on GitHub Pages
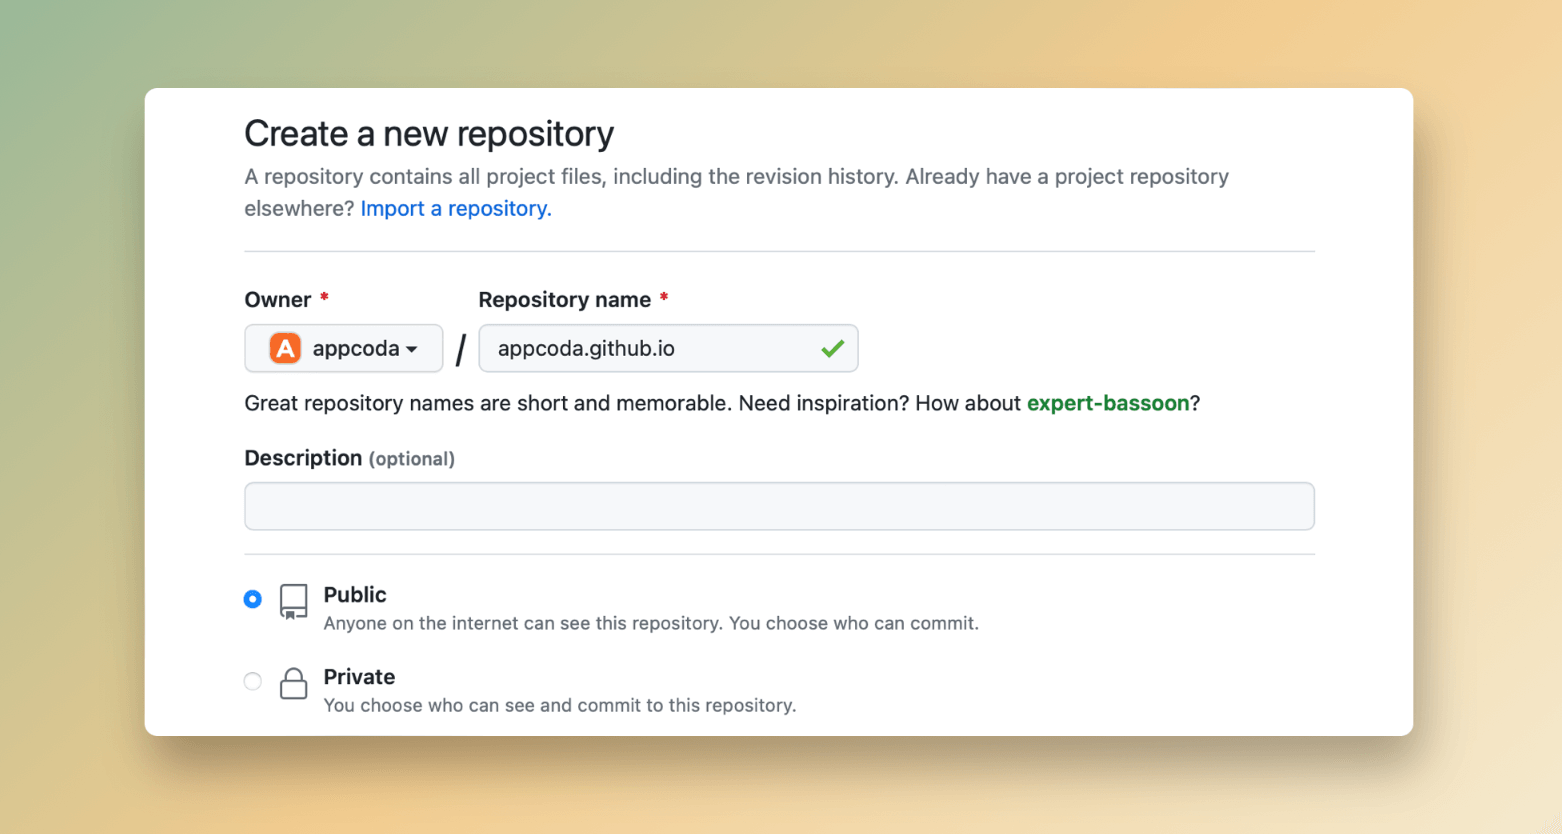
To host the documentation on GitHub page, you first create a new repository named username.github.io, where username is your username (or organization name) on GitHub.
Next, clone the new repository and store in your preferred project folder using the command below:
git clone https://github.com/appcoda/appcoda.github.ioYou’ll need to replace the example username and repository name with your own. Once your repository is set up, you can then copy the documentation files that you previously prepared into the project folder.
For me, since I use the root path as the base path, I just copy all of your DocC files into the folder named appcoda.github.io.
Now it’s ready to add and upload the files to your remote repository. Key in the following commands under your project folder:
git add --all
git commit -m "Initial commit"
git push -u origin main
Once all files are uploaded onto GitHub, you should be able to access your documentation at https://.github.io/documentation/slothcreator.
Summary
Hosting your Swift DocC documentation on a web server is an excellent way to share your documentation with a wider audience and make it more accessible. By following the steps in this tutorial, you can easily create elegant documentation for your iOS and macOS projects. And yo’ve learned how to publish it on your own website or on GitHub Pages. With DocC, you can incorporate diagrams and even interactive tutorials directly into your documentation, enabling readers to gain a deeper understanding of your code and how it works. So give DocC a try and make your documentation more interesting!


