

In iOS 8, Apple introduces a new feature for UITableView known as Self Sizing Cells. To me, this is seriously one of the most exciting features for the new SDK. Prior to iOS 8, if you want to display dynamic content in table view with variable height, you would need to calculate the row height manually. Now with iOS 8, Self Sizing Cell provides a solution for displaying dynamic content. In brief, here are what you need to do when using self sizing cells:
- Define auto layout constraints for your prototype cell
- Specify the estimatedRowHeight of your table view
- Set the rowHeight of your table view to UITableViewAutomaticDimension
If we express the last two points in code, it looks like this:
tableView.estimatedRowHeight = 44.0
tableView.rowHeight = UITableViewAutomaticDimension
With just two lines of code, you instruct the table view to calculate the cell’s size matching its content and render it dynamically. This self sizing cell feature should save you tons of code and time. You’re gonna love it.
Building a Simple Demo Using Self Sizing Cell
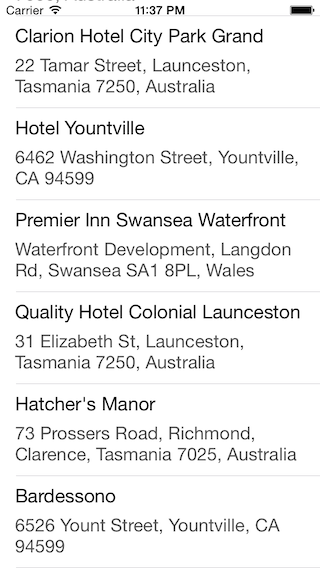
There is no better way to learn a new feature than using it. We’ll develop a simple demo app to demonstrate self sizing cell. We’ll start with a project template. It’s just a simple table-based app showing a list of hotels. The prototype cell contains two one-line text labels for both name and address. If you download the project and run it, you’ll have an app like below:
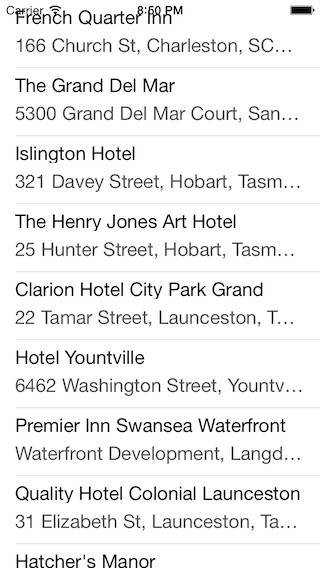
As you can see, due to fixed row height, some of the hotel addresses are truncated. You may have faced the same issue when developing table-based apps. In the past, you may simply reduce the font size or increase the number of lines to fix the issue. Starting from iOS 8, all you need to do is to use Self Sizing Cells and the cell content can be displayed properly, regardless of content length.
Adding Auto Layout Constraints
You may hate Auto Layout and avoid using it. However, without auto layout, self sizing cells won’t work as it relies on the constraints to determine the proper row height. In fact, table view calls systemLayoutSizeFittingSize on your cell and that returns the size of the cell based on the layout constraints.
If this is the first time you work with Auto Layout, I recommend you to check out our Auto Layout Introduction before moving on.
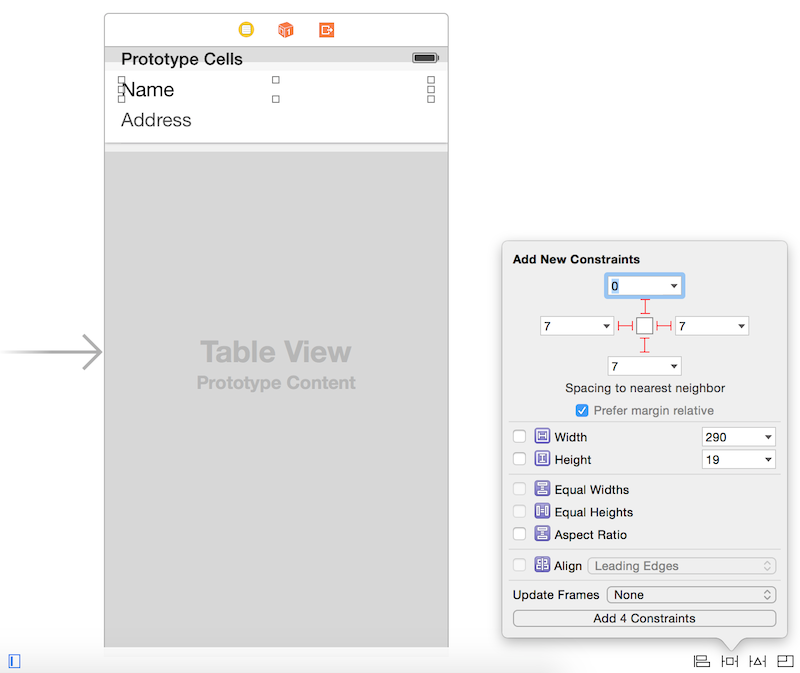
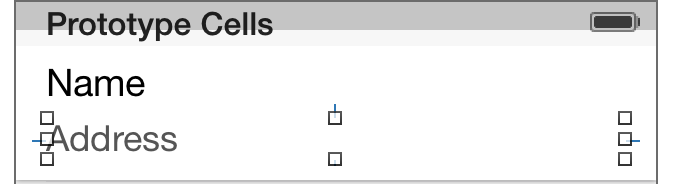
For the project template, I haven’t defined any auto layout constraints for the prototype cell. So let’s add a few constraints for the cell first. For the name label, click the Pin button of the auto layout menu and add four spacing constraints.
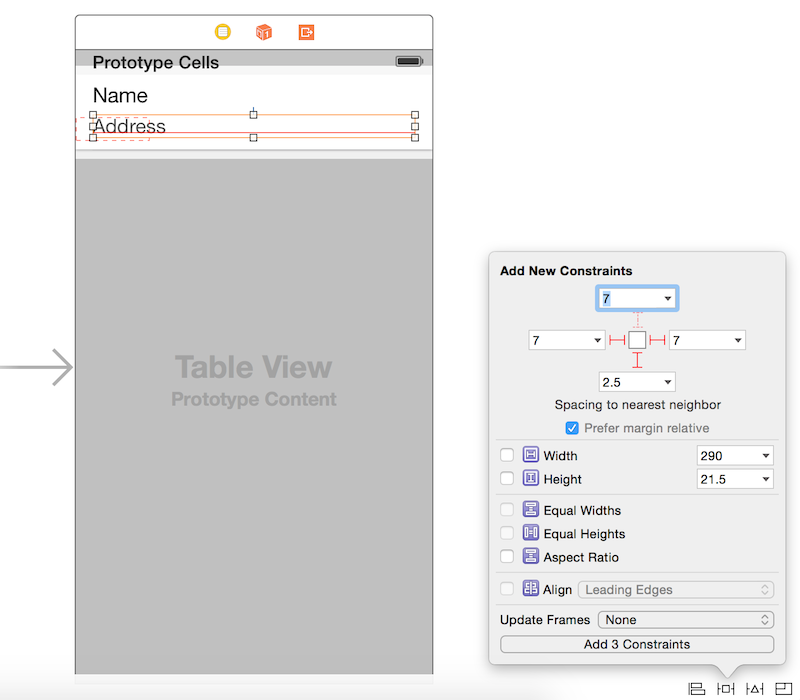
For the address label, add further three spacing constraints for the left/right/bottom side.
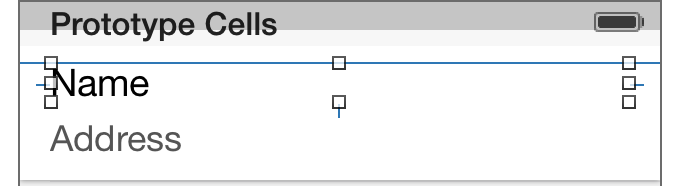
If you have configured the constraints correctly, they should look something like below:
Setting Estimated Row Height
With the auto layout configured, the rest is to add the following code in the viewDidLoad method of the ViewController:
tableView.estimatedRowHeight = 68.0
tableView.rowHeight = UITableViewAutomaticDimension
The first line of code sets the estimated row height of the cell, which is the height of the existing prototype cell. The second line changes the rowHeight property to UITableViewAutomaticDimension, which is the default row height in iOS 8. In other words, you tell table view to figure out the cell size based on other information.
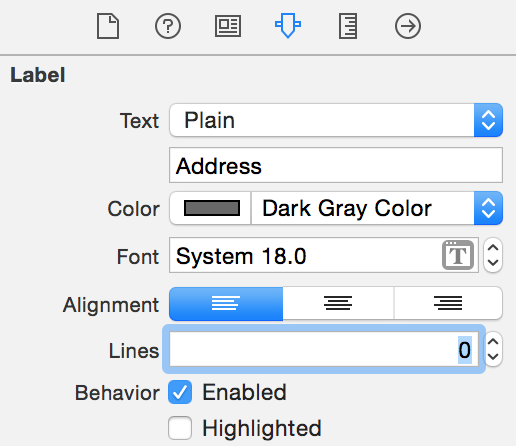
If you test the app, the cell is still not resized. The reason is that both name and address labels are set to 1-line. So set the number of lines to zero and let the label grow automatically.
Now compile and run the app again. The table view cells are resized according to the content.
A Bug?!
I’m not sure if it is a bug or not. But the problem was also mentioned by UseYourLoaf. When the table view is first displayed, you may find some of the cells are not sized properly. But when you scroll the table view, the new cells are displayed with correct row height. To workaround this issue, you can force a reload after the view appears:
    override func viewDidAppear(animated: Bool) {

        tableView.reloadData()

    }
Dynamic Type
Self Sizing Cell is particularly useful to support Dynamic Type. You may not have heard of Dynamic Type but you probably see the following screen in Settings:
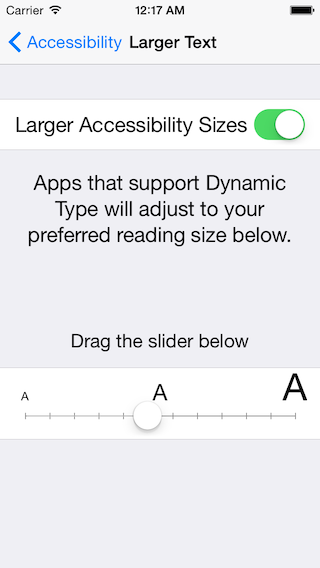
Dynamic Type was introduced in iOS 7. It allows users to customise the text size to fit their own needs. However, only apps that adopt Dynamic Type respond to the text change. I believe only a fraction of third-party apps have adopted the feature.
Starting from iOS 8, Apple wants to encourage developers to adopt Dynamic Type. As mentioned in the WWDC session, all of the system applications have adopted Dynamic Type and the built-in labels have dynamic fonts on them automatically in iOS 8. As the user changes the text size, those labels are going to change size.
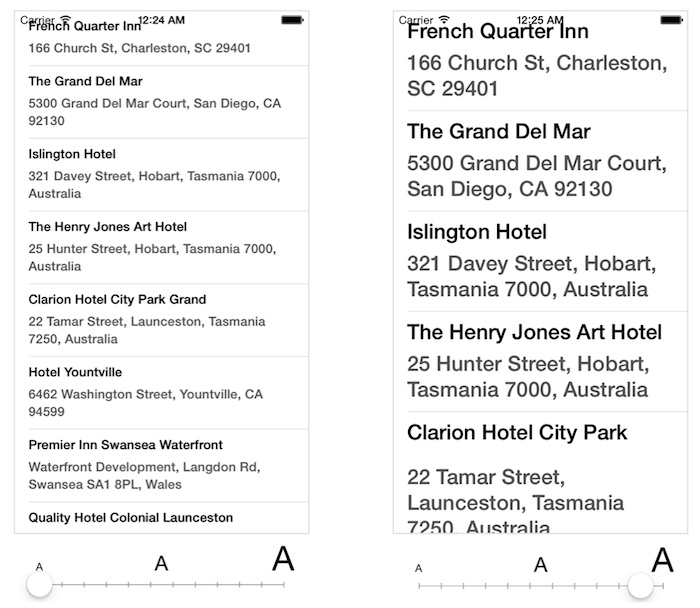
Further, the introduction of Self Sizing Cell is a way to facilitate Dynamic Type adoption. It saves you tons of code from developing your own solution to adjust the row height. Once the cell is self-sized, it is very straightforward to adopt Dynamic Type.
In the demo project, you just need to change the font from a custom font of fixed size to a preferred font for text style (e.g. headline, body, etc). That’s it. When you run the app, it adapts to the text size change.
Summary
In this tutorial, I have walked you through the basics of Self Sizing Cells and Dynamic Type. You’re encouraged to use the feature and update your app to adopt Dynamic Type. Self Sizing Cell is seriously one of my favorite features in iOS 8. With just a couple lines of code, you can easily fit dynamic content in a cell. This is truly fabulous. What do you think? Leave me comment and share your thought.
For your reference, you can download the complete project from here. Please note that I used Xcode 6 Beta 7 to create the project.


