

Maps are becoming increasingly popular in apps as time goes on. You can see maps in all kinds of apps, from Uber to Instagram to my new app, peek. Although maps are common, adding more complex features to them can be a challenging process. In this tutorial, we’re going to talk about annotations and shape rendering in MapKit, Apple’s map library for iOS. Many of the maps you see on iOS are powered by MapKit, including the map in Apple’s own Maps app! MapKit is a powerful, tried and tested mapping library. It’s also really easy to use, so let’s get started!
Getting Started
To get started, download the sample project. Open it, and you’ll find a few things:
Places.plist: This is a property list file that stores the places we will be rendering.Places.swift: This Swift file loads the places inPlaces.plistand exposes them to the rest of our Swift code.Main.storyboard: This is the main storyboard our app uses. If you look into the storyboard, it has a view controller with a map view. I have already set up the UI and auto layout for you.ViewController.swift: This is the view controller that our app will use to control the map. I have already created an outlet that connects with the map view in the storyboard.
Before we can build and run our app, we have to do one more thing: embed MapKit.framework in our project. This is a mandate for using MapKit. You have two ways to do this. One way is to manually add the library. Click on MapKit starter in the project navigator. Once you’ve selected MapKit starter, scroll down to the section that says Linked Frameworks and Libraries:

Click the plus icon and add MapKit.framework. Do the same in Embedded Binaries if Xcode doesn’t add it for you automatically.
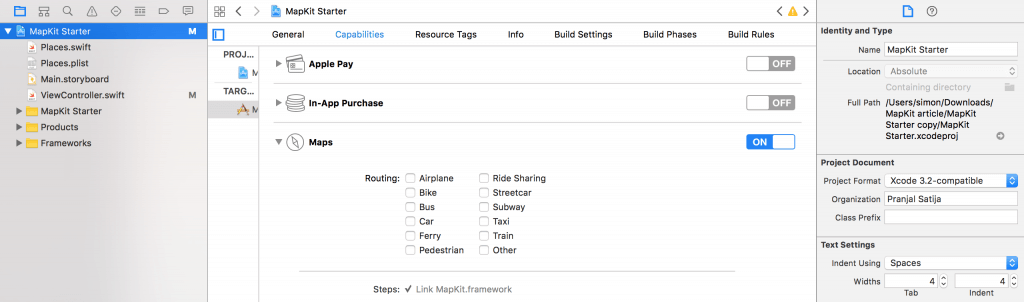
Alternatively, you can go to the Capabilities tab and switch the Maps option to ON.
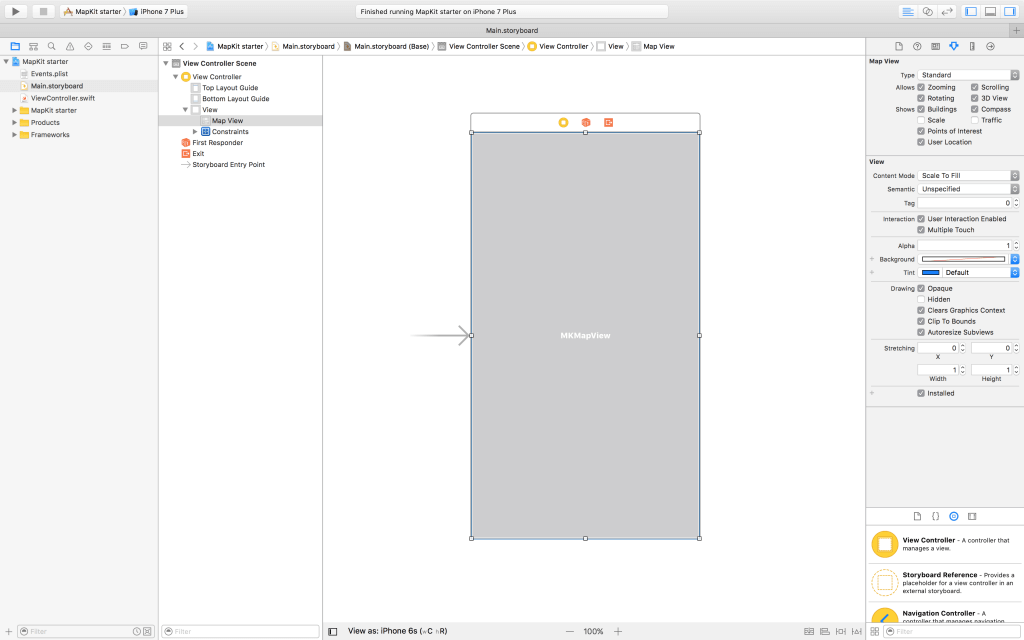
Now we’re ready to go! Build and run the app and see what happens! You should see an MKMapView taking up the whole screen. By default, this map view supports zooming, rotating, scrolling, and 3D mode. It also shows points of interest where applicable and displays buildings in 3D in major cities. Cool stuff! We’re going to be working with this map in our tutorial, so grab some coffee, sit down, and let’s get to work!
Displaying the User’s Location
First things first, it’s really important to show the user where they are on a map so that they can get a sense of their location relative to the things around them. Luckily, this is pretty easy with MapKit. Open the Storyboard, select our map, and check the box that says User Location:
In case you want to do it programmatically, just place this line of code in the viewDidLoad method of ViewController:
mapView?.showsUserLocation = true
We need to take a few more steps before this works. Currently, MapKit will try to display the user’s location, but we haven’t requested location access from the user yet! Let’s fix that.
Open ViewController.swift and add a function called requestLocationAccess():
func requestLocationAccess() {
    let status = CLLocationManager.authorizationStatus()

    switch status {
    case .authorizedAlways, .authorizedWhenInUse:
        return

    case .denied, .restricted:
        print("location access denied")

    default:
        locationManager.requestWhenInUseAuthorization()
    }
}
This function has a simple task: it checks the current status of location authorization and then acts accordingly. If the user has already authorized the use of his or her location, it returns, as nothing needs to be done. If location access is denied or restricted, this function prints an error message. Otherwise, we request access to the user’s location when the app is in use.
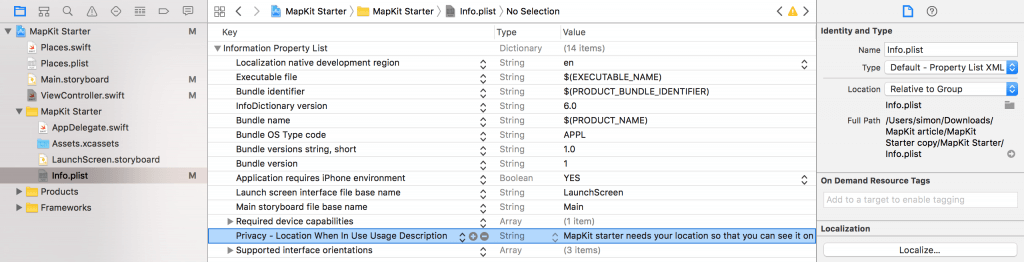
One last thing! Head over to Info.plist. We will add a key called NSLocationWhenInUseUsageDescription of type String. Set the following value for this key: “MapKit starter needs your location so that you can see it on a map.” This will tell the user why we are requesting their location, which makes it more likely that they will accept. As of version 8, iOS also requires that we provide this string.
One more step! Add a viewDidLoad() override in ViewController.swift and make it call requestLocationAccess():
override func viewDidLoad() {
    requestLocationAccess()
}
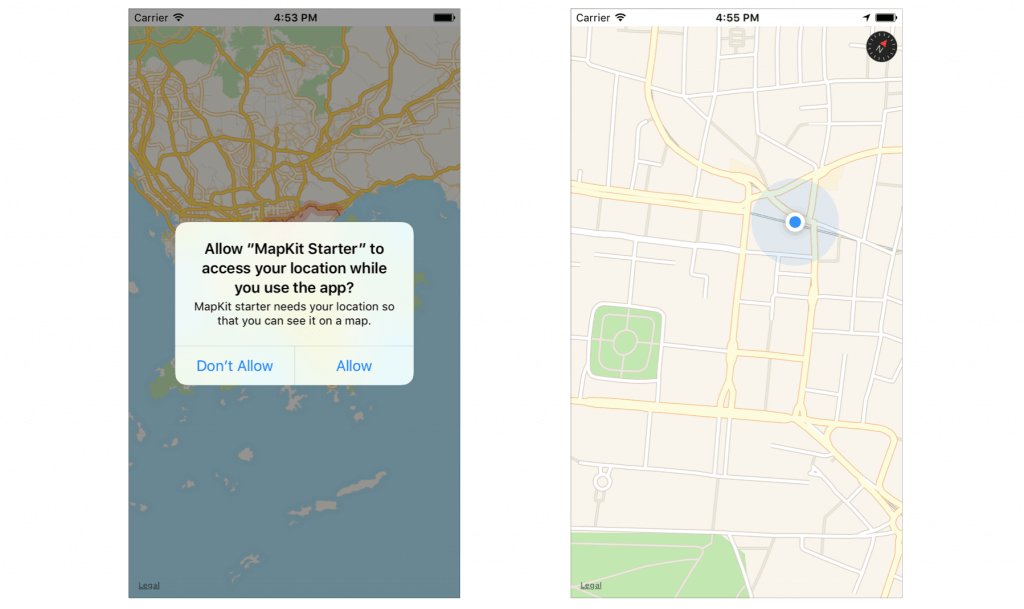
Build and run the app again. You should get a prompt asking for access to your location. Press accept, and voila. We can now display the user’s location. MapKit will automatically update this location as the user moves around.
If you use the simulator to test the app, you can click the location button in the debug area. Xcode provides a list of locations for you to simulate the user’s location.

Now, let’s look into displaying some more exciting content.
Displaying Custom Annotations
We learned how to display the user’s location already, but now, let’s display a custom annotation with our own image. Open Places.plist and take a look at what’s inside. You should see a brief list of cities. Since this is only for the sake of an example, we kept the list rather short.
        title
        New York
        description
        Welcome to New York City!
        latitude
        40.7128
        longitude
        -74.0059


        title
        San Francisco
        description
        Welcome to San Francisco!
        latitude
        37.7749
        longitude
        -122.4194


        title
        Los Angeles
        description
        Welcome to Los Angeles!
        latitude
        34.0522
        longitude
        -118.2437
The list has New York, San Francisco, and Los Angeles, along with their latitudes and longitudes. Although property lists are out of the scope of this tutorial, you should check out this tutorial if you want to read more about .plist files.
If you open Places.swift, you’ll see that it has a static method which retrieves all of the places in Places.plist. You don’t need to worry about the implementation, you just need to know that calling Place.getPlaces() will return all of the places in Places.plist. Let’s start by adding a property to ViewController to store all of the places we load:
let places = Place.getPlaces()
Just to make sure, here’s what your ViewController.swift file should look like right now:
import UIKit
import MapKit

class ViewController: UIViewController {
    @IBOutlet var mapView: MKMapView?
    let locationManager = CLLocationManager()

    let places = Place.getPlaces()

    override func viewDidLoad() {
        requestLocationAccess()
    }

    func requestLocationAccess() {
        let status = CLLocationManager.authorizationStatus()

        switch status {
        case .authorizedAlways, .authorizedWhenInUse:
            return

        case .denied, .restricted:
            print("location access denied")

        default:
            locationManager.requestWhenInUseAuthorization()
        }
    }
}
Now, let’s get to the good stuff. Here’s the general process for adding annotations to an MKMapView:
- Create an object that conforms to the
MKAnnotationprotocol, or extend an existing one. - Add the annotation object to an instance of
MKMapViewwithaddAnnotation(_:) - Create an object that conforms to
MKMapViewDelegateand assign that delegate to our map view. - Add an implementation for
mapView(_: viewFor:)to provide MapKit with the view to render for any given annotation.
We’re going to implement this in the 4 unique steps described above.
Creating an Object to Conform to MKAnnotation
MKAnnotation is a protocol defined by MapKit that allows us to provide data to MapKit. We’re going to implement the following requirements of MKAnnotation:
var title: String?
var subtitle: String?
var location: CLLocationCoordinate2D
To use the MKAnnotation protocol, you adopt it in any custom objects that store or represent annotation data. Each object then serves as the source of information about a single map annotation and provides critical information, such as the annotation’s location on the map.
As you might have guessed, we’re going to extend our Place class to conform to MKAnnotation. Import MapKit in Place.swift and add an extension to conform to MKAnnotation:
extension Place: MKAnnotation { }
Build and run and…nothing? That’s right. Nothing! Conveniently, our Place class already has all the requirements of MKAnnotation.
Cool. Let’s move onto to the next step.
Adding the Annotation to a Map View
This one isn’t tough. We just need to tell mapView to display each of the places we loaded. Let’s add a function to ViewController.swift. We’ll call it addAnnotations():
func addAnnotations() {
    mapView?.delegate = self
    mapView?.addAnnotations(places)
}
This isn’t too complex. We set our map view’s delegate to self. Next, we add our place annotations to our map view. Easy! Just make sure to add a call to addAnnotations() in your viewDidLoad() before proceeding.
Adopting the MKMapViewDelegate Protocol
The next thing we need is to create an object that conforms to the MKMapViewDelegate protocol. As we did with MKAnnotation, we’re going to extend an existing class to do this for us. If you’ve worked with UITableView before, this should be similar to using UITableViewDelegate and UITableViewDataSource. We use an extension of ViewController to adopt the MKMapViewDelegate protocol like this:
extension ViewController: MKMapViewDelegate {
    func mapView(_ mapView: MKMapView, viewFor annotation: MKAnnotation) -> MKAnnotationView? {

    }
}
This extends our ViewController class and it also adds the function we will use to return a view for each annotation. Let’s go ahead and populate it:
func mapView(_ mapView: MKMapView, viewFor annotation: MKAnnotation) -> MKAnnotationView? {
    if annotation is MKUserLocation {
        return nil
    }

    else {
        let annotationView = mapView.dequeueReusableAnnotationView(withIdentifier: "annotationView") ?? MKAnnotationView()
        annotationView.image = UIImage(named: "place icon")
        return annotationView
    }
}
Easy, right? First, we check whether or not the annotation being displayed is the user’s location. If it is, we don’t return our custom annotation, as we want the map to display the user’s location as usual. If it’s not, however, we create a new annotation by dequeuing it. This allows us to reuse annotation views efficiently. Then, we set the annotation view’s image (the image we’re using is in Assets.xcassets). Finally, we return the annotation view.
Reviewing the Code
Let’s take one last look at our ViewController.swift. Here’s how it should look if you followed all the steps:
import UIKit
import MapKit

class ViewController: UIViewController {
    @IBOutlet var mapView: MKMapView?

    let locationManager = CLLocationManager()

    let places = Place.getPlaces()

    override func viewDidLoad() {
        requestLocationAccess()
        addAnnotations()
    }

    func requestLocationAccess() {
        let status = CLLocationManager.authorizationStatus()

        switch status {
        case .authorizedAlways, .authorizedWhenInUse:
            return

        case .denied, .restricted:
            print("location access denied")

        default:
            locationManager.requestWhenInUseAuthorization()
        }
    }

    func addAnnotations() {
        mapView?.delegate = self
        mapView?.addAnnotations(places)
    }
}

extension ViewController: MKMapViewDelegate {
    func mapView(_ mapView: MKMapView, viewFor annotation: MKAnnotation) -> MKAnnotationView? {
        if annotation is MKUserLocation {
            return nil
        }

        else {
            let annotationView = mapView.dequeueReusableAnnotationView(withIdentifier: "annotationView") ?? MKAnnotationView()
            annotationView.image = UIImage(named: "place icon")
            return annotationView
        }
    }
}
If you run the app, you should find three annotations on the map that correspond to the locations specified the Place.plist file.
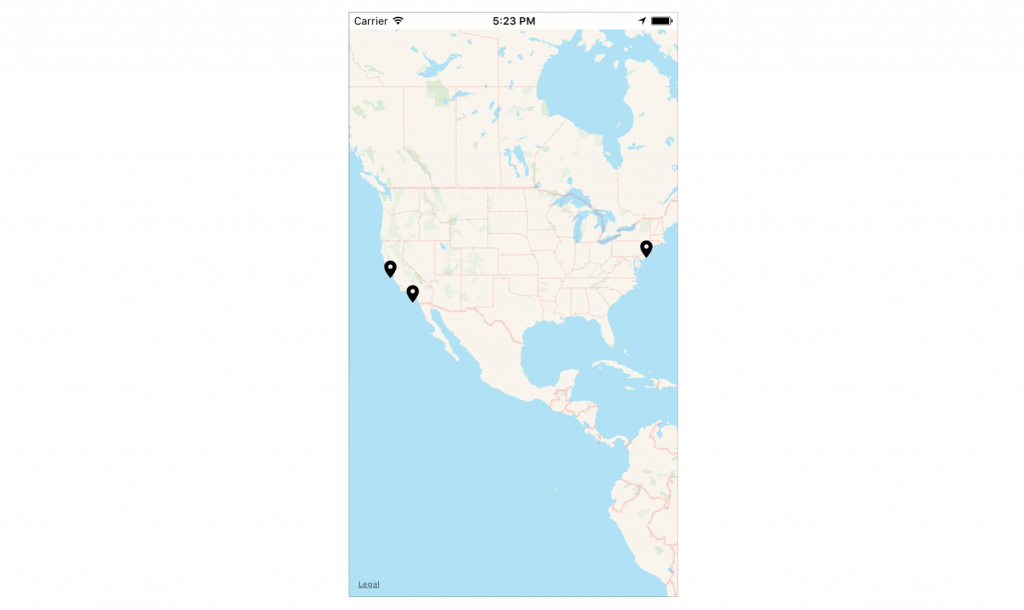
If you’re lost, please go back and check if you missed something. Feel free to comment below if you need help. So far, we learned how to properly add annotations to an MKMapView. We do this with peek to show users where events are located. Most apps that use maps use this technique so that they can show users specific locations.
Now let’s see how to add some shape rendering.
Displaying Shapes on Maps
So, you’ve learned how to display custom annotations that allow you to highlight locations on the map. Next, let’s explore how to draw shapes on the map. For our example, we will be rendering circles with radius of 100m around each of our places. To do this, we need to do two things:
- Add overlays to our map.
- Specify renderers for each overlay so that MapKit knows how to render the overlays.
Adding overlays
First things first, we need to tell MapKit that we want to display overlays on our map. Let’s modify our addAnnotations() functon like this:
func addAnnotations() {
    mapView?.delegate = self
    mapView?.addAnnotations(places)

    let overlays = places.map { MKCircle(center: $0.coordinate, radius: 100) }
    mapView?.addOverlays(overlays)
}
The first two lines should look familiar, but the last two lines of code are totally new. We start by using map, one of Swift’s collection manipulation functions, to generate an array of MKCircle objects based on our places. If you’re new to map, this is equivalent to writing a for loop. But you can do it in a single line of code.
Next, we add the overlays using mapView?.addOverlays(_:). This is very similar to adding annotations.
Rendering Overlays
Adding overlays is not good enough. MapKit will not display the overlays until you actually render them and make them visible on screen. We added circle overlays for each place, and we should render circles to correspond. Add the mapView(_: rendererFor:) function to ViewController extension:
func mapView(_ mapView: MKMapView, rendererFor overlay: MKOverlay) -> MKOverlayRenderer {
    let renderer = MKCircleRenderer(overlay: overlay)
    renderer.fillColor = UIColor.black.withAlphaComponent(0.5)
    renderer.strokeColor = UIColor.blue
    renderer.lineWidth = 2
    return renderer
}
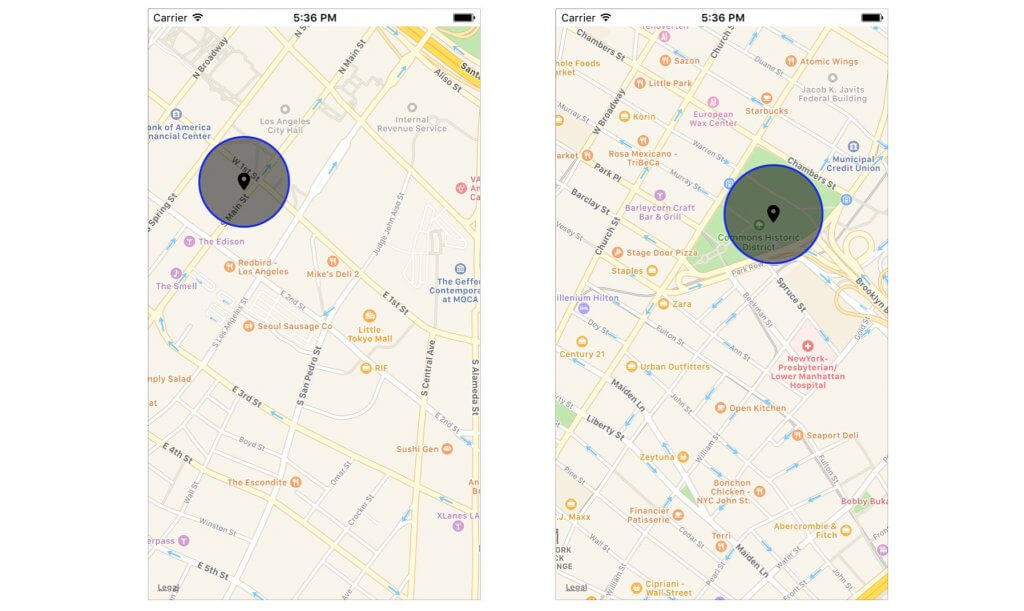
As the name specifies, this function allows us to return an MKOverlayRenderer to use for each of our overlays with an appropriate renderer. MapKit has a class for rendering circles, it’s called MKCircleRenderer. We create one of these renderers and configure it to match the appearance we want and then we return the renderer so that MapKit knows to use it.
Now you’re ready to test your app again. Zoom into New York, San Francisco, or Los Angeles. You will see the circular overlay.
Wrapping Up
We learned a lot about annotations and shape rendering in this tutorial. Armed with the knowledge you gained, you should be able to make apps that have beautiful maps in them! Feel free to comment if you have any questions.
For reference, you can download the Xcode project on GitHub.


