

In the following tutorial, I will show you how to make a fun Dominoes game using Swift and ARKit.
This is what we’ll be making:
Prerequisites
This is an intermediate tutorial and requires you to have a good understanding of Swift as well as some basic knowledge of ARKit and SceneKit.
To follow along, Xcode 9 (or later) and an ARKit supported device running iOS 11 (or later) are required.
Now let’s get started!
Setting up the initial ARKit scene
Open up Xcode and select File>New Project. Then, choose the Augmented Reality App template and press next.
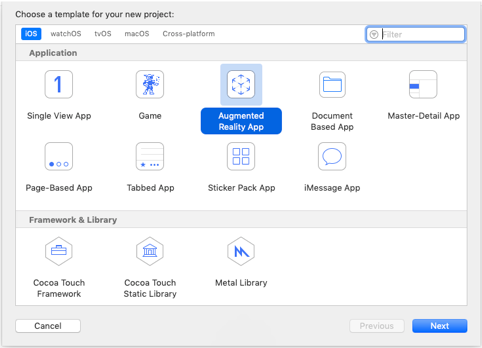
We’ll name our project ARDominoes, choose Swift as the language and SceneKit as the Content Technology.

The Augmented Reality App template we chose comes with some pre-written code that sets the scene up for us and is almost ready to use. We just have to change one line of code.
Please note that all code for this tutorial will be written in the ViewController class.
In viewDidLoad, the line where it says let scene = SCNScene(named: “art.scnassets/ship.scn")! needs to be changed to let scene = SCNScene() since we just want an empty scene instead of a spaceship!
Plane Detection
The first thing we have to do is add plane detection to our scene. Plane Detection, simply put, is finding any horizontal ( or vertical) flat surfaces in the real world.
First, let’s create an empty dictionary so we can keep a reference to the planes that ARKit detects. Add the following line to the top of your class:
var detectedPlanes: [String : SCNNode] = [:]
In viewWillAppear, add the following line under the line let configuration = ARWorldTrackingConfiguration(),
configuration.planeDetection = .horizontal
By setting the planeDetection value to .horizontal, ARKit attempts to automatically detect flat surfaces. Once a surface is detected, a call to the delegate method renderer:didAddNode:forAnchor is made.
Add the following method to your class:
func renderer(_ renderer: SCNSceneRenderer, didAdd node: SCNNode, for anchor: ARAnchor) {
      // 1
      guard let planeAnchor = anchor as? ARPlaneAnchor else { return }
      // 2
      let plane = SCNPlane(width: CGFloat(planeAnchor.extent.x), height: CGFloat(planeAnchor.extent.z))
      let planeNode = SCNNode(geometry: plane)
      planeNode.position = SCNVector3Make(planeAnchor.center.x,
                                          planeAnchor.center.y,
                                          planeAnchor.center.z)
      // 3
      planeNode.opacity = 0.3
      // 4
      planeNode.rotation = SCNVector4Make(1, 0, 0, -Float.pi / 2.0)
      node.addChildNode(planeNode)
      // 5
      detectedPlanes[planeAnchor.identifier.uuidString] = planeNode
}
- First, we have to make sure that our anchor is a plane anchor.
- The ARPlaneAnchor gives us the center and extent (width and height) values of the detected surface. We use the extent values to create the plane geometry and use the center value to position the node.
- We set the planes opacity to 30% so it won’t fully occlude the floor.
- As SCNPlanes are vertical when first created, we have to rotate our plane by 90 degrees. Once the plane is created, add it to the node attached to the anchor.
- Each anchor has an unique identifier. We add the plane node to our dictionary using its unique identifier as the key.
ARKit is constantly analyzing the scene and if it finds that the detected surface is now bigger or smaller, it will make a call to its another delegate method renderer:didUpdatenode:forAnchor: with the updated values.
Implement the following delegate method to be notified when a plane’s extent or center values have been updated:
func renderer(_ renderer: SCNSceneRenderer, didUpdate node: SCNNode, for anchor: ARAnchor) {
    // 1
    guard let planeAnchor = anchor as? ARPlaneAnchor else { return }
    // 2
    guard let planeNode = detectedPlanes[planeAnchor.identifier.uuidString] else { return }
    let planeGeometry = planeNode.geometry as! SCNPlane
    planeGeometry.width = CGFloat(planeAnchor.extent.x)
    planeGeometry.height = CGFloat(planeAnchor.extent.z)
    planeNode.position = SCNVector3Make(planeAnchor.center.x,
                                        planeAnchor.center.y,
                                        planeAnchor.center.z)
}
- Same as before, we first check to make sure the updated anchor is of type
ARPlaneAnchor. - Since we previously saved our detected planes in a dictionary, we can use the unique identifier of the anchor and retrieve our plane and update its values.
Run the app:
See how ARKit is constantly updating the plane?
We don’t need to see the ground plane anymore. In renderer:didUpdatenode:forAnchor:, set planeNode.opacity =0.0.
A more in-depth article on plane detection can be found here.
Creating dominoes and using hit-testing to place them on the floor
With our plane detection complete, we are now ready to do some hit-testing!
First, let’s add an empty array to our scene so that we can keep a reference to the dominoes we add. This will come in handy later. Add the following variable to the top of your class:
var dominoes: [SCNNode] = []
Hit-testing in its simplest form is determining if the 2D position of the screen touched by the user intersects with any virtual objects in the real world or in our case the plane. If an object is detected, the object along with the point of intersection will be returned. We use this data to add our dominoes at the exact location on the floor where the screen is touched.
We must add a pan gesture to our scene. Add the following code at the end of viewDidLoad:
let panGesture = UIPanGestureRecognizer(target: self, action: #selector(screenPanned))
sceneView.addGestureRecognizer(panGesture)
Add the following method to your code. It gets called every time when a pan gesture is detected on the screen:
@objc func screenPanned(gesture: UIPanGestureRecognizer) {
        // 1
        let configuration = ARWorldTrackingConfiguration()
        sceneView.session.run(configuration)
        // 2
        let location = gesture.location(in: sceneView)
        guard let hitTestResult = sceneView.hitTest(location, types: .existingPlane).first else { return }
        let currentPosition = SCNVector3Make(hitTestResult.worldTransform.columns.3.x,
                                             hitTestResult.worldTransform.columns.3.y,
                                             hitTestResult.worldTransform.columns.3.z)
        // 3
        let dominoGeometry = SCNBox(width: 0.007, height: 0.06, length: 0.03, chamferRadius: 0.0)
        dominoGeometry.firstMaterial?.diffuse.contents = UIColor.green
        let dominoNode = SCNNode(geometry: dominoGeometry)
        dominoNode.position = SCNVector3Make(currentPosition.x,
                                           currentPosition.y + 0.03,
                                           currentPosition.z)
        sceneView.scene.rootNode.addChildNode(dominoNode)
        // 4
        dominoes.append(dominoNode)
    }
- We need the ground floor to be stable, so we have to disable plane detection first. To disable plane detection, we reconfigure the session and run again.
- We get the 2D point on the screen where the user has touched and use that to perform our hit-test. If any objects are detected, an
ARHitTestResultwill be returned which we then use to get the exact position. - We create our dominoes using a simple SCNBox. Add a green color to it, create a node for it to be placed inside, and position it using the coordinates we detected with the hit-test. We add a value of “0.03” to the Y position of the node to move our dominoes upwards, otherwise half of the dominoes would be inside the floor!
- We add the domino node to our dominoes array for later use.
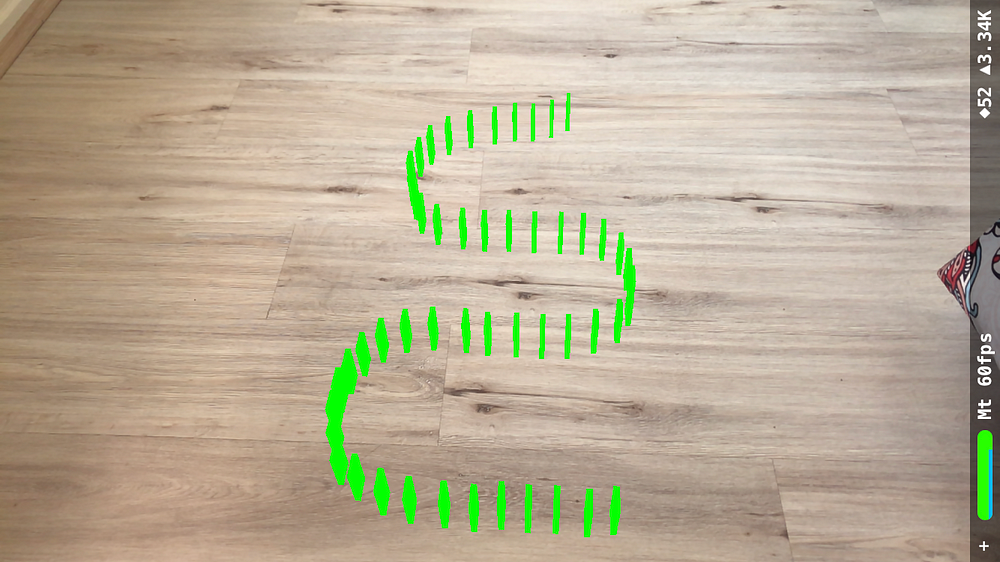
Now run the app. Move your phone around a bit, so ARKit can detect the floor and draw with your fingers across the screen:
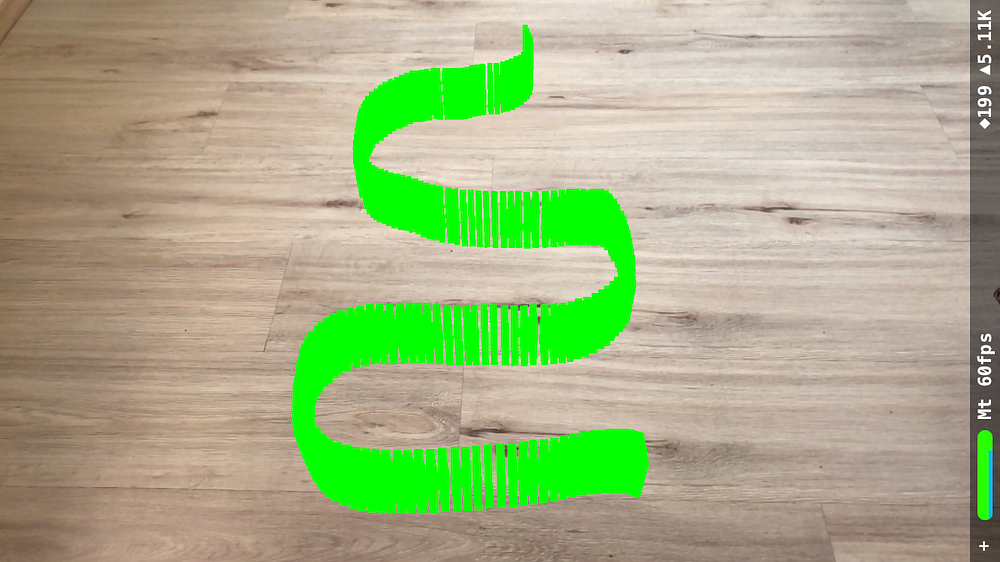
Well, the hit-testing is working, but now we have a new problem: so many dominoes!!! (Don’t worry about the dominoes all facing the same direction, we will fix that later).
Domino Distance
The pan gesture is called when the user moves his finger on the screen. Since this is a continuous movement, the method is called multiple times per second.
We need to figure out a way to leave some distance between each domino. To do that, we have to save the position of the previously placed domino and then calculate its distance to the current position of our hit-test. If the distance is greater than or equal to some minimum distance, we will place our new domino, otherwise, we will return out of the function and repeat the process until the minimum distance is met.
Create a new variable and add it to the top of the class. This will store the position of our most recently placed domino:
var previousDominoPosition: SCNVector3?
Add the following method to your class:
func distanceBetween(point1: SCNVector3, andPoint2 point2: SCNVector3) -> Float {
    return hypotf(Float(point1.x - point2.x), Float(point1.z - point2.z))
}
This is a helper method that will calculate the distance between two points in space.
Now, make the following changes to the screenPanned: method so it looks like this:
@objc func screenPanned(gesture: UIPanGestureRecognizer) {
        let configuration = ARWorldTrackingConfiguration()
        sceneView.session.run(configuration)

        let location = gesture.location(in: sceneView)
        guard let hitTestResult = sceneView.hitTest(location, types: .existingPlane).first else { return }
        // 1
        guard let previousPosition = previousDominoPosition else {
            self.previousDominoPosition = SCNVector3Make(hitTestResult.worldTransform.columns.3.x,
                                                   hitTestResult.worldTransform.columns.3.y,
                                                   hitTestResult.worldTransform.columns.3.z)
            return
        }
       // 2
        let currentPosition = SCNVector3Make(hitTestResult.worldTransform.columns.3.x,
                                             hitTestResult.worldTransform.columns.3.y,
                                             hitTestResult.worldTransform.columns.3.z)
       // 3
        let minimumDistanceBetweenDominoes: Float = 0.03
        let distance = distanceBetween(point1: previousPosition, andPoint2: currentPosition)
        if distance >= minimumDistanceBetweenDominoes {
            let dominoGeometry = SCNBox(width: 0.007, height: 0.06, length: 0.03, chamferRadius: 0.0)
            dominoGeometry.firstMaterial?.diffuse.contents = UIColor.green
            let dominoNode = SCNNode(geometry: dominoGeometry)
            dominoNode.position = SCNVector3Make(currentPosition.x,
                                               currentPosition.y + 0.03,
                                               currentPosition.z)
            sceneView.scene.rootNode.addChildNode(dominoNode)
            dominoes.append(dominoNode)
            // 4
            self.previousDominoPosition = currentPosition
        }
    }
- First, we check to see if a domino has already been placed or not. If it hasn’t, we set the
previousPositionproperty to the position of the hit-Test result and return. - We get the current position of the hit-test result.
- We calculate the distance between the previous position and current position. If the distance is greater than or equal to the minimum distance we have set (in this case 3cm), a new domino will get placed.
- Remember to set the
previousDominoPositionto thecurrentPosition.
Run the app:
Now the dominoes are placed at a nice and even distance.
Domino Orientation
Since no rotation value is given to the dominoes when they’re first created, they all face the same direction. To figure the direction each domino should be facing, we have to do a bit of math.
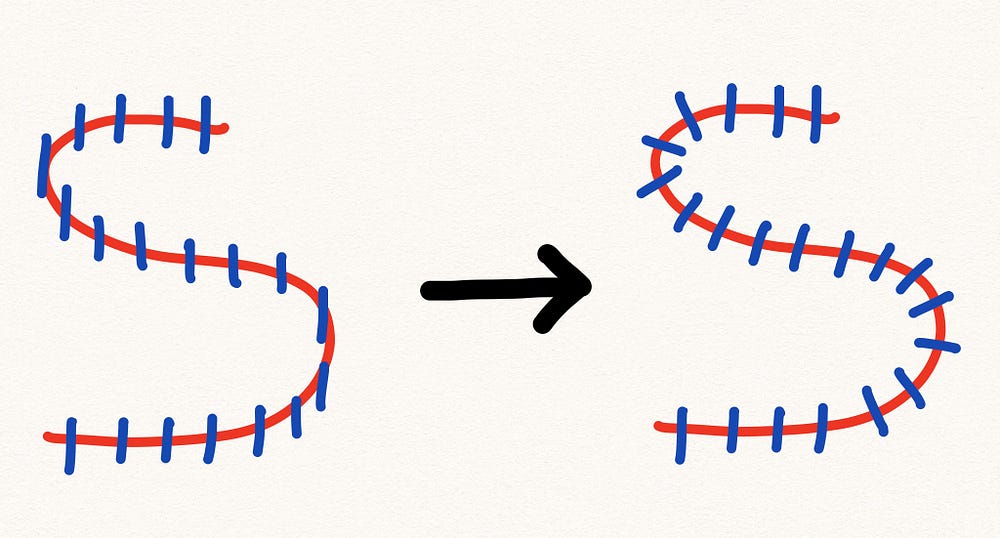
As you can see from the illustration above, our current situation is similar to the diagram on the left with each domino facing the same direction. We want to make it look like the diagram on the right so that each new domino we place is rotated correctly. To do this, we have to calculate the angle between the previous dominoes position and the current position, and rotate the new domino accordingly.
We can get the angle between two dominoes using the arcTan formula. This formula calculates the angle between two points relative to an axis (in this case the X-axis).
Add the following function to your class:
func pointPairToBearingDegrees(startingPoint: CGPoint, secondPoint endingPoint: CGPoint) -> Float{
    let originPoint: CGPoint = CGPoint(x: startingPoint.x - endingPoint.x, y: startingPoint.y - endingPoint.y)
    let bearingRadians = atan2f(Float(originPoint.y), Float(originPoint.x))
    let bearingDegrees = bearingRadians * (180.0 / Float.pi)
    return bearingDegrees
}
Original source from: https://stackoverflow.com/a/6065003/3975207
Once we have our angle, we can rotate the new domino around the Y-axis with the calculated angle.
In the screenPanned method, add the following three lines of code right before the line sceneView.scene.rootNode.addChildNode(dominoNode):
// 1
var currentAngle: Float = pointPairToBearingDegrees(startingPoint: CGPoint(x: CGFloat(currentPosition.x), y: CGFloat(currentPosition.z)), secondPoint: CGPoint(x: CGFloat(previousPosition.x), y: CGFloat(previousPosition.z)))
// 2
currentAngle *= .pi / 180
// 3
dominoNode.rotation = SCNVector4Make(0, 1, 0, -currentAngle)
- Get the angle between the current domino and the previous domino.
- Convert from radians to degrees.
- Rotate the node along the Y-axis.
Before we run our app, let’s quickly add a bit of color to the dominoes. Add the following property at the top of your class:
let dominoColors: [UIColor] = [.red, .blue, .green, .yellow, .orange, .cyan, .magenta, .purple]
It’s just a simple array with a few colors which we will randomly choose and assign to every new domino. Now, all we have to do is change the line in screenPanned: where we set a green color for the domino to the following line:
dominoGeometry.firstMaterial?.diffuse.contents = dominoColors.randomElement()
Run the app:
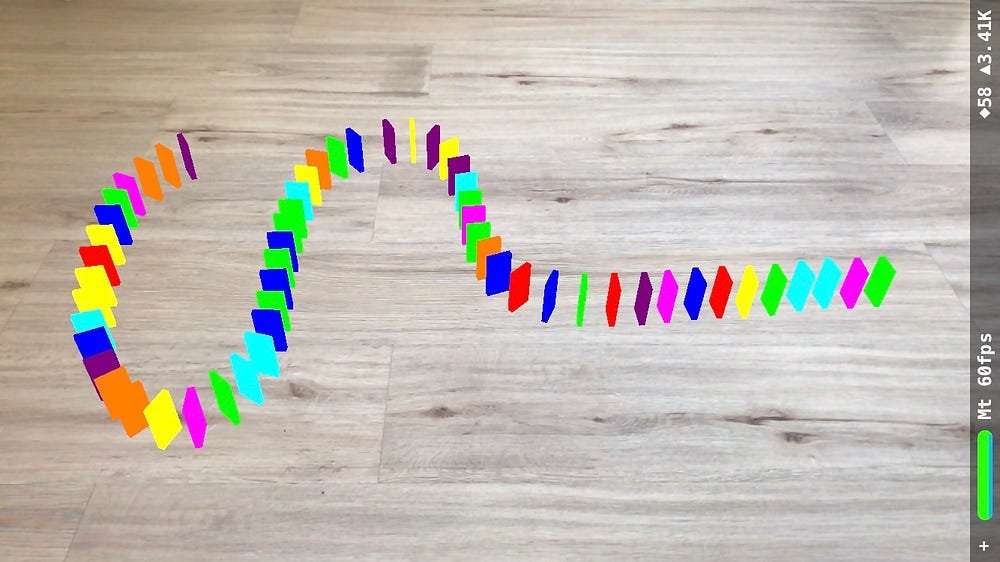
The random colors make a big difference in the way the dominoes look!
Our dominoes are now rotated nicely.
Now that we have our dominoes nicely set up, its time to make them interactive.
Physics
The SceneKit physics engines is actually pretty easy to use; You just have to let SceneKit know which objects to apply physics to and SceneKit will do the rest. In our case, we want to tell SceneKit that our dominoes should collide with each other and the floor.
To do that, we must add what’s known as a “physics-body” to our nodes. Adding a physics body to a node tells SceneKit to include that node in the physics simulations.
To create a physics body in SceneKit, we have to give it a type and a shape.
There are three different types of physics bodies:
Static: A physics body that is unaffected by forces or collisions and cannot move.
Dynamic: A physics body that can be affected by forces and collisions.
Kinematic: A physics body that is unaffected by forces or collisions but that can cause collisions affecting other bodies when moved.
In our case, we need to use a static body for the floor and a dynamic body for the dominoes.
The physics shape determines how SceneKit handles the collisions. In most cases, the actual geometry used to create the shape is good enough; but for advanced geometry, it is better to use simpler shapes so that they use less computing power and memory. This will make the simulations much smoother.
In viewDidLoad, add the following line under the line sceneView.scene = scene:
sceneView.scene.physicsWorld.timeStep = 1/200
TimeStep is the time interval between updates to the physics simulation. The small this number is, the more accurate the physics simulation will be. We want a more accurate simulation so we set this to 1/200 (The default value is 1/60).
Add the following lines to the renderer method, right before the line node.addChildNode(planeNode):
// 1
let box = SCNBox(width: CGFloat(planeAnchor.extent.x), height: CGFloat(planeAnchor.extent.z), length: 0.001, chamferRadius: 0)
// 2
planeNode.physicsBody = SCNPhysicsBody(type: .static, shape: SCNPhysicsShape(geometry: box, options: nil))
- We create a
SCNBoxas our physics body using the planeAnchor’s extent values. - We create a
SCNPhysicsBodywith the type set as .static and use theSCNBoxas its shape.
Great! Now our floor has a physics body. But it’s not done yet. Since ARKit plane detection constantly updates the floor’s size, the value of physicsShape should also get updated.
Add the following line at the end of the renderer method:
let box = SCNBox(width: CGFloat(planeAnchor.extent.x), height: CGFloat(planeAnchor.extent.z), length: 0.001, chamferRadius: 0)
planeNode.physicsBody?.physicsShape = SCNPhysicsShape(geometry: box, options: nil)
Next, let’s add physics to our dominoes. Add the following line in the screenPanned method, right before the line sceneView.scene.rootNode.addChildNode(dominoNode):
// 1
dominoNode.physicsBody = SCNPhysicsBody(type: .dynamic, shape: nil)
// 2
dominoNode.physicsBody?.mass = 2.0
dominoNode.physicsBody?.friction = 0.8
- For the dominoes, we will be using a
dynamictype physics-body and set the shape asnil. Why haven’t we given a shape to our physics-body? When we setnilas our value for the shape, SceneKit automatically uses the geometry of our node for the physics shape. This means less work for us! - Physics bodies have many different physical properties that you can change like Mass, friction, damping, and etc. We set the domino
massto 2 and thefrictionto 0.8. This makes the physics look more realistic. How do we know what values to use? It’s trial and error mostly. Just keep experimenting with different values and see what works best. This is what Apple has to say about physics-body properties:
Note that you need not attempt to provide realistic values for physical quantities — use whatever values produce the behaviour or gameplay you’re looking for.
Now build and run.
…
Well, nothing seems to be happening, and that’s exactly what we want! Since there is no other force except gravity affecting our dominoes, nothing will happen. To knock the dominoes over, we must apply a force to the first domino.
We are going to add two buttons to our scene. One button will remove all the dominoes in our scene, the other will topple the first domino.
In main.storyboard, create a button and name it “Remove All Dominoes”. Create an action outlet and name it removeAllDominoesButtonPressed.
Create another button and name it “Start”. Create an action outlet and name it startButtonPressed.
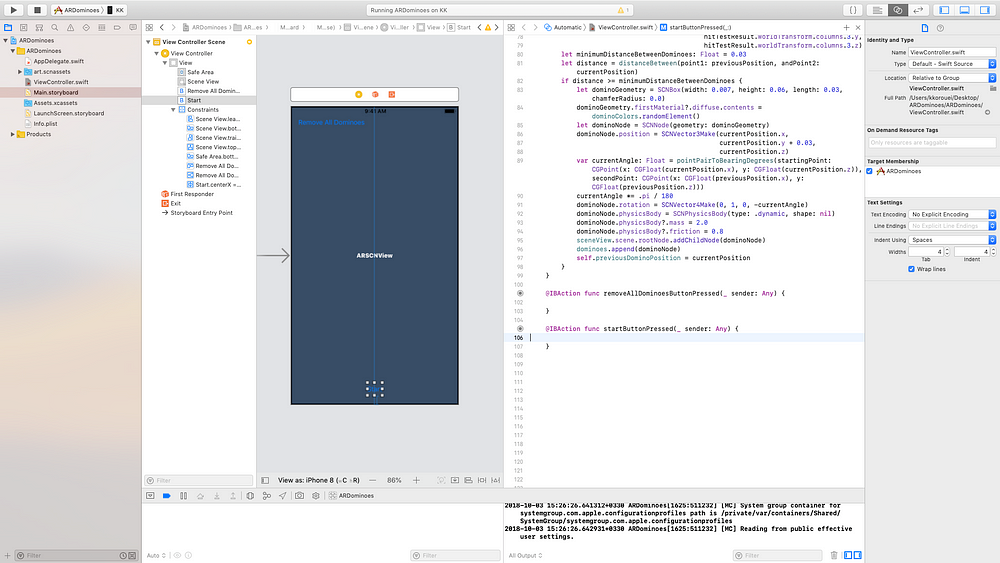
Add the following lines of code inside the startButtonPressed method:
// 1
guard let firstDomino = dominoes.first else { return }
// 2
let power: Float = 0.7
firstDomino.physicsBody?.applyForce(SCNVector3Make(firstDomino.worldRight.x * power,
                                                    firstDomino.worldRight.y * power,
                                                    firstDomino.worldRight.z * power),
                                    asImpulse: true)
- Here is where our list of dominoes becomes useful. Since the dominoes are added to the list in the order they were placed, we can easily get the first domino. If no dominoes exist, the method will return.
- Now that we have our initial domino, we must apply a force to it. We use SceneKits
applyForcemethod to do this. The first parameter takes aSCNVector3which it uses for both the direction and the magnitude of the force. The second parameter takes aBoolean, if true, it applies the force as an impulse (instantaneously). Since we want a flick like effect, we set the impulse to true.
Add the following code to the removeAllBominoesButtonPressed method:
for domino in dominoes {
    domino.removeFromParentNode()
    self.previousDominoPosition = nil
}
dominoes = []
This removes all our dominoes from the scene, sets the previousDominoPosition property to nil, and sets the dominoes array to empty so we can start fresh.
Now run the app:
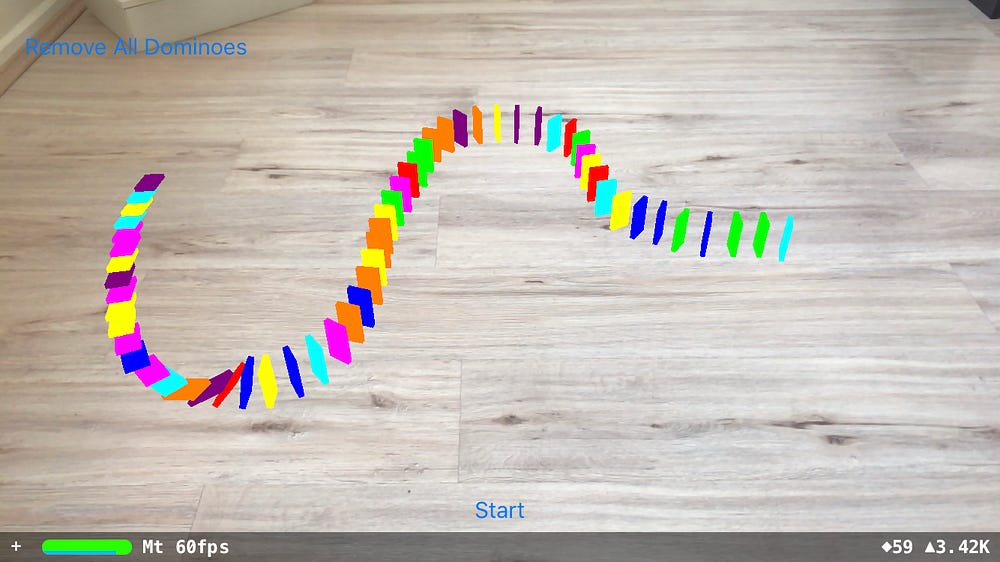
Yay, the dominoes are falling down nicely! We’re almost done.
Lighting
In computer graphics, one of the most significant aspects of making a scene looks real is good lighting. We want to make the dominoes look as real as possible, therefore lights and shadows are a must.
Currently in SceneKit, only two types of lights support shadows:
Spot — A light source that illuminates a cone-shaped area
Directional — A light source with a uniform direction and constant intensity. The position is ignored, only its orientation matters.
For this scene, we will be using a directional light.
The floor we added to our scene is opaque, so any shadows applied onto it will be invisible. How can we add shadows to the floor while still keeping it invisible? Since iOS 11, SceneKit has added a new strategy to achieve this. By setting the colorBufferWriteMask of the geometry to empty, SceneKit will not render any colors for that geometry but will allow it to receive shadows. Add the following line to renderer:didAddNode:ForAnchor: before the line letplaneNode = SCNNode(geometry: plane):
plane.firstMaterial?.colorBufferWriteMask = .init(rawValue: 0)
Then make sure you have deleted the line planeNode.opacity = 0.0. Otherwise, the shadows won’t render.
Add the following function to your class:
func addLights() {
    // 1
    let directionalLight = SCNLight()
    directionalLight.type = .directional
    directionalLight.intensity = 500
    // 2
    directionalLight.castsShadow = true
    directionalLight.shadowMode = .deferred
    // 3
    directionalLight.shadowColor = UIColor(red: 0, green: 0, blue: 0, alpha: 0.5)
    // 4
    let directionalLightNode = SCNNode()
    directionalLightNode.light = directionalLight
    directionalLightNode.rotation = SCNVector4Make(1, 0, 0, -Float.pi / 3)
    sceneView.scene.rootNode.addChildNode(directionalLightNode)
    // 5
    let ambientLight = SCNLight()
    ambientLight.intensity = 50
    let ambientLightNode = SCNNode()
    ambientLightNode.light = ambientLight
    sceneView.scene.rootNode.addChildNode(ambientLightNode)
}
- We create a light, sets its type as
.directionaland give it anintensityof 500. - We set
castShadowto true and setshadowModeto.deferredso that shadows are not applied when rendering the objects, but are applied as a final post-process (This is required for casting shadows on the invisible plane). - We create a black color with 50% opacity and set it as our
shadowColor. This will make our shadows look more grey and realistic as opposed to the default dark black color. - In order to add the light to our scene, it must be attached to a node. When a light is first created in SceneKit, it is pointing in the -Z direction by default (straight ahead). We want to rotate the light so it is facing the floor by a downward angle.
- A directional light by itself makes our scene quite dark. An ambient light illuminates all objects in the scene from all directions. It will lighten up the overall scene.
Now, all we have to do is add addLights() to the end of viewDidLoad and run the app:
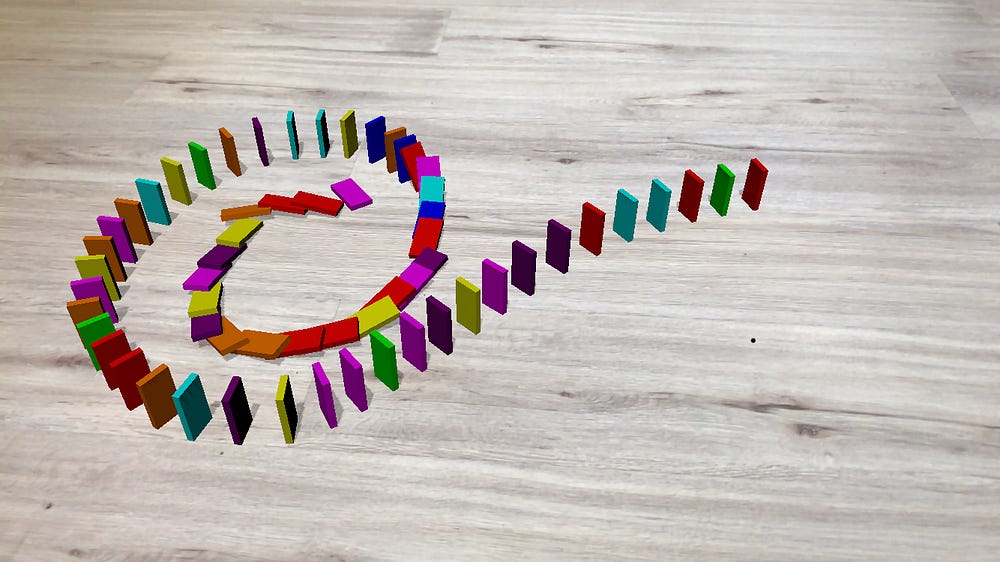
And we’re done!
Conclusion
Congrats on making it all the way through. This was a pretty long tutorial but I hope it helped you understand the process it takes to create an interactive ARKit application, and more importantly, I hope you had fun creating it.
If you have any questions or suggestions, please write in the comments below.
You can download the complete Xcode project here.

This is a guest post by Koushan Korouei, iOS Developer with a strong focus on ARKit. The article was first published on Medium.


