

With the release of iOS 18, Apple has unveiled a suite of exciting features under the Apple Intelligence umbrella, and one standout is the ImagePlayground framework. This powerful API empowers developers to generate images from text descriptions using AI, opening up a world of creative possibilities for iOS apps. Whether you’re building a design tool, a storytelling app, or just want to add some flair to your UI, ImagePlayground makes it seamless to integrate AI-driven image generation.
In this tutorial, we’ll walk you through building a simple app using SwiftUI and the ImagePlayground framework. Our app will let users type a description—like “a serene beach at sunset”—and generate a corresponding image with a tap. Designed for developers with some iOS experience, this guide assumes you’re familiar with Swift, SwiftUI, and Xcode basics. Ready to dive into iOS 18’s image generation capabilities?
Let’s get started!
Prerequisites
Before we get started, make sure you’ve got a few things ready:
- Device: Image Playground is supported on iPhone 15 Pro, iPhone 15 Pro Max, and all iPhone 16 models.
- iOS Version: Your device must be running iOS 18.1 or later.
- Xcode: You’ll need Xcode 16 or later to build the app.
- Apple Intelligence: Ensure that Apple Intelligence is enabled on your device. You can check this in Settings > Apple Intelligence & Siri. If prompted, request access to Apple Intelligence features.
Setting up the Xcode Project
First, let’s begin by creating a new Xcode project named AIImageGeneration using the iOS app template. Make sure you choose SwiftUI as the UI framework. Also, the minimum deployment version is set to 18.1 (or later). The ImagePlayground framework is only available on iOS 18.1 or up.
Using ImagePlaygroundSheet
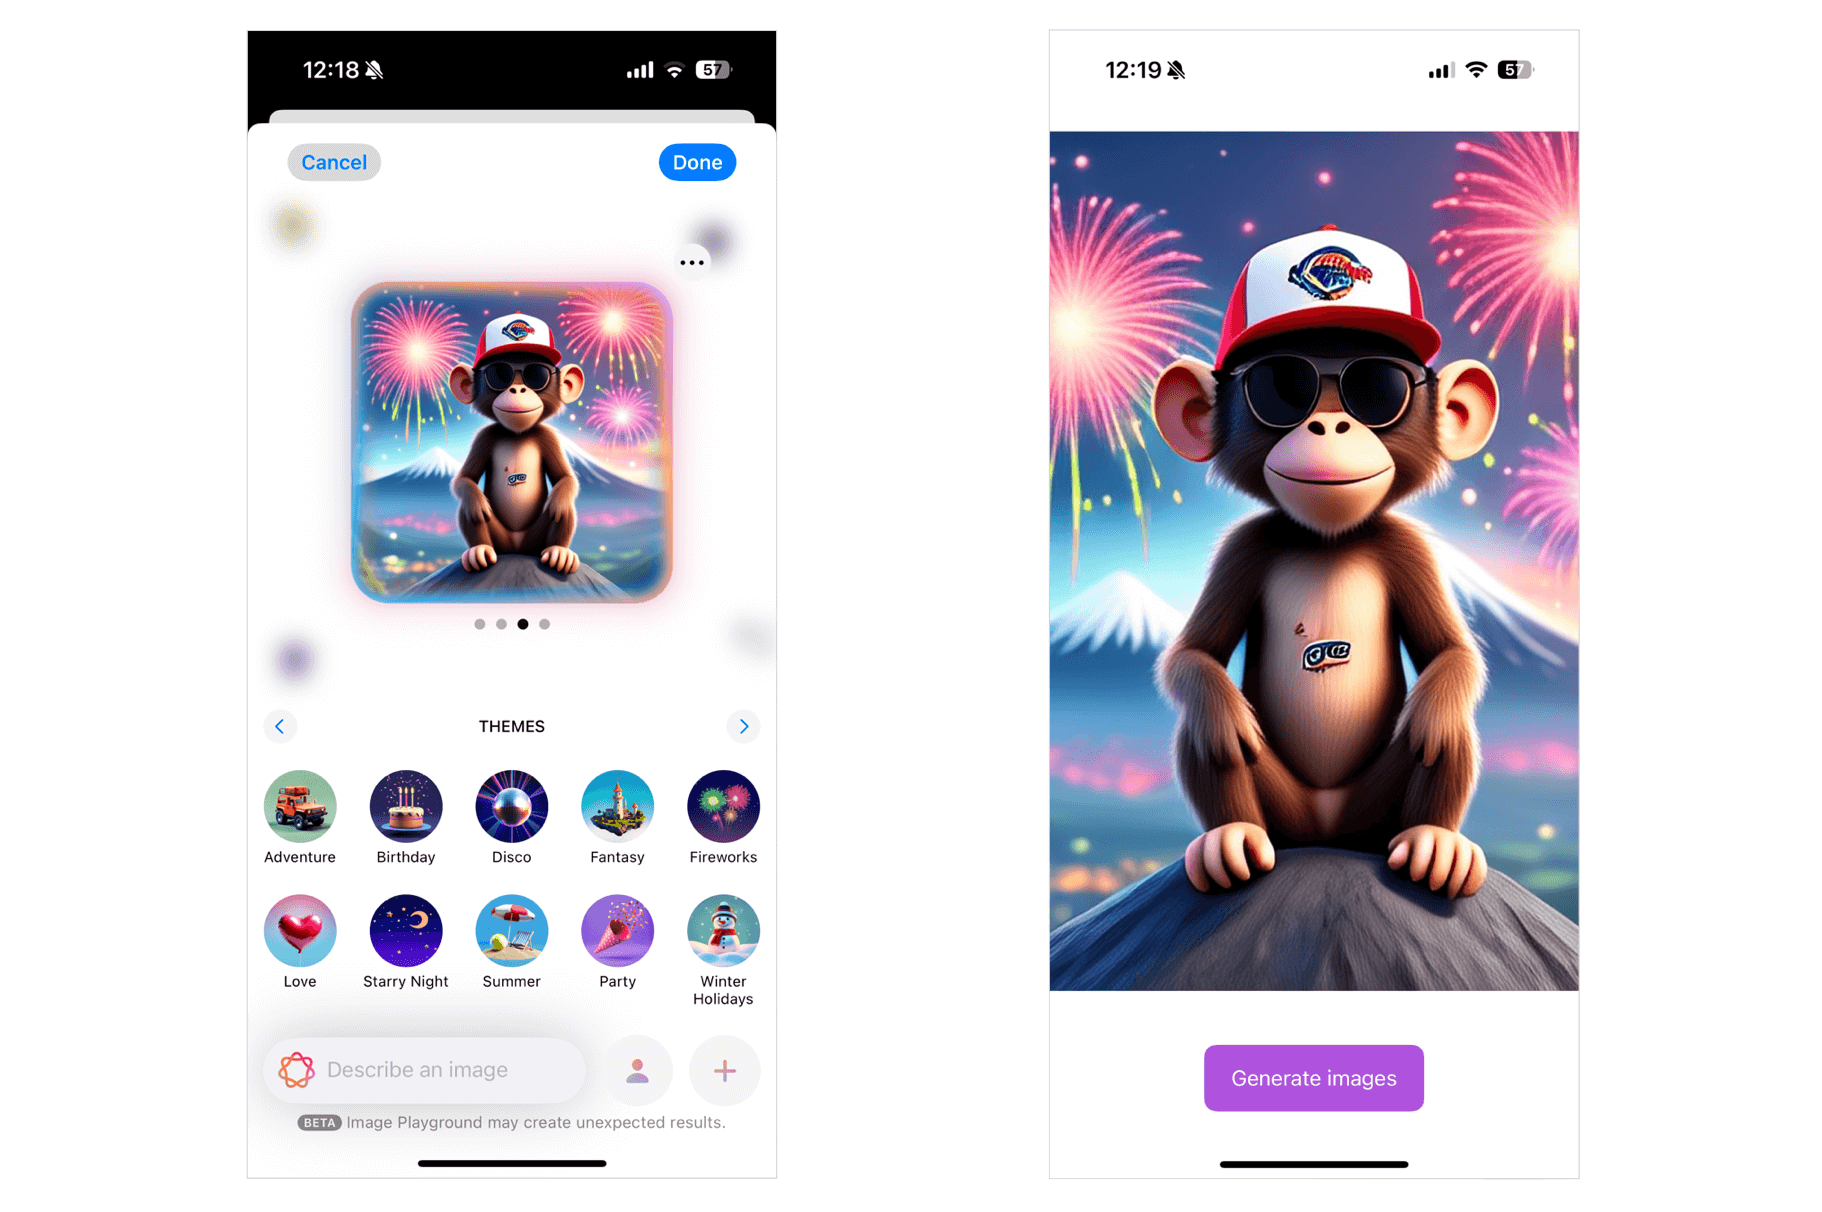
Have you tried Image Playground app in iOS 18 before? The app leverages Apple Intelligence to create images based on user inputs, such as text descriptions. While Playground is an independent app on iOS, developers can bring this functionality into your apps using ImagePlaygroundSheet, a SwiftUI view modifier that presents the image generation interface.
Let’s switch over to the Xcode project and see how the sheet works. In the ContentView.swift file, add the following import statement:
import ImagePlayground
The ImagePlaygroundSheet view is included in the ImagePlayground framework. For the ContentView struct, update it like below:
struct ContentView: View {
    @Environment(\.supportsImagePlayground) private var supportsImagePlayground

    @State private var showImagePlayground: Bool = false

    @State private var generatedImageURL: URL?

    var body: some View {
        if supportsImagePlayground {

            if let generatedImageURL {
                AsyncImage(url: generatedImageURL) { image in
                    image
                        .resizable()
                        .scaledToFill()
                } placeholder: {
                    Color.purple.opacity(0.1)
                }
                .padding()
            }

            Button {
                showImagePlayground.toggle()
            } label: {
                Text("Generate images")
            }
            .buttonStyle(.borderedProminent)
            .controlSize(.large)
            .tint(.purple)
            .imagePlaygroundSheet(isPresented: $showImagePlayground) { url in
                generatedImageURL = url
            }
            .padding()

        } else {
            ContentUnavailableView("Not Supported", systemImage: "exclamationmark.triangle", description: Text("This device does not support Image Playground. Please use a device that supports Image Playground to view this example."))
        }
    }
}
Not all iOS devices have Apple Intelligence enabled. That’s why it’s important to do a basic check to see if ImagePlayground is supported on the device. The supportsImagePlayground property uses SwiftUI’s environment system to check if the device can use Image Playground. If the device doesn’t support it, we simply show a “Not Supported” message on the screen.
For devices that do support it, the demo app displays a “Generate Images” button. The easiest way to add Image Playground to your app is by using the imagePlaygroundSheet modifier. We use the showImagePlayground property to open or close the playground sheet. After the user creates an image in Image Playground, the system saves the image file in a temporary location and gives back the image URL. This URL is then assigned to the generatedImageURL variable.
With the image URL ready, we use the AsyncImage view to display the image on the screen.
Run the app and test it on your iPhone. Tap the “Generate Image” button to open the Image Playground sheet. Enter a description for the image, and let Apple Intelligence create it for you. Once it’s done, close the sheet, and the generated image should appear in the app.
Working with Concepts
Previously, I showed you the basic way of using the imagePlaygroundSheet modifier. The modifier provides a number of parameters for developers to customize the integration. For example, we can create our own text field to capture the description of the image.
In ContentView, update the code like below:
struct ContentView: View {
    @Environment(\.supportsImagePlayground) private var supportsImagePlayground

    @State private var showImagePlayground: Bool = false

    @State private var generatedImageURL: URL?
    @State private var description: String = ""

    var body: some View {
        if supportsImagePlayground {

            if let generatedImageURL {
                AsyncImage(url: generatedImageURL) { image in
                    image
                        .resizable()
                        .scaledToFill()
                } placeholder: {
                    Color.purple.opacity(0.1)
                }
                .padding()
            } else {
                Text("Type your image description to create an image...")
                    .font(.system(.title, design: .rounded, weight: .medium))
                    .multilineTextAlignment(.center)
                    .frame(maxWidth: .infinity, maxHeight: .infinity)
            }

            Spacer()

            HStack {
                TextField("Enter your text...", text: $description)
                    .padding()
                    .background(
                        RoundedRectangle(cornerRadius: 12)
                            .fill(.white)
                    )
                    .overlay(
                        RoundedRectangle(cornerRadius: 12)
                            .stroke(Color.gray.opacity(0.2), lineWidth: 1)
                    )
                    .font(.system(size: 16, weight: .regular, design: .rounded))

                Button {
                    showImagePlayground.toggle()
                } label: {
                    Text("Generate images")
                }
                .buttonStyle(.borderedProminent)
                .controlSize(.regular)
                .tint(.purple)
                .imagePlaygroundSheet(isPresented: $showImagePlayground,
                                      concept: description
                    ) { url in
                    generatedImageURL = url
                }
                .padding()
            }
            .padding(.horizontal)

        } else {
            ContentUnavailableView("Not Supported", systemImage: "exclamationmark.triangle", description: Text("This device does not support Image Playground. Please use a device that supports Image Playground to view this example."))
        }
    }
}
We added a new text field where users can directly enter an image description. The imagePlaygroundSheet modifier has been updated with a new parameter called concept. This parameter accepts the image description and passes it to the creation UI to generate the image.
.imagePlaygroundSheet(isPresented: $showImagePlayground,
                      concept: description
) { url in
      generatedImageURL = url
}
The concept parameter works best for short descriptions. If you want to allow users to input a longer paragraph, it’s better to use the concepts parameter, which takes an array of ImagePlaygroundConcept. Below is an example of how the code can be rewritten using the concepts parameter:
.imagePlaygroundSheet(isPresented: $showImagePlayground,
                      concepts: [ .text(description) ]
) { url in
      generatedImageURL = url
}
The text function creates a playground concept by processing a short description of the image. For longer text, you can use the extracted(from:title:) API, which lets the system analyze the text and extract key concepts to guide the image creation process.
Adding a Source Image
The imagePlaygroundSheet modifier also supports adding a source image, which acts as the starting point for image generation. Here is an example:
.imagePlaygroundSheet(isPresented: $showImagePlayground,
                      concepts: [.text(description)],
                      sourceImage: Image("gorilla")
    ) { url in
    generatedImageURL = url
}
.padding()
You can either use the sourceImage or sourceImageURL parameter to embed the image.
Summary
In this tutorial, we explored the potential of the ImagePlayground framework in iOS 18, showcasing how developers can harness its AI-driven image generation capabilities to create dynamic and visually engaging experiences. By combining the power of SwiftUI with ImagePlayground, we demonstrated how simple it is to turn text descriptions into stunning visuals.
Now it’s your turn to explore this innovative framework and unlock its full potential in your own projects. I'm eager to see what new AI-related frameworks Apple will introduce next!


