

Every new iOS version brings along both new “goodies” and advancements to existing technologies for all developers around the globe. Obviously, the latest version, iOS 9, could not just stay out of this tradition, so once again developers have new frameworks and APIs at their disposal that let them leverage their applications to even higher levels. One of those is the Core Spotlight framework that contains some new great APIs that just wait for developers to put them in action.
The Core Spotlight (CS) framework is part of a greater collection of APIs, known as Search APIs, which give the opportunity to programmers to increase the discoverability, visibility and ease of access of their apps significantly, and in a fashion that wasn’t possible to be used in earlier versions of iOS. The Search APIs bring users and apps closer, as the first can reach the latter in new and faster ways, but also the latter can become more responsive and immediate to the first ones. Besides the Core Spotlight, the other new search capabilities in iOS 9 include (just for reference):
- New methods and properties in the NSUserActivity class (which is responsible for storing an app state for restoring at a later time).
- The web markup that makes web content searchable in a device.
- The universal links that let apps get launched directly from links in web content.
We won’t deal with the above three in this post, but we’ll see the details of the Core Spotlight framework. But before that, what exactly is it about?

The Core Spotlight framework makes the data of an app searchable on the Spotlight, and subsequently bring results regarding an app along with any other results that the system returns. That’s quite impressing and revolutionary, as for first time users can spot data for custom apps, not just Apple’s, and interact with them. By saying that users can interact with the results relevant to a custom app, I mean that not only the app will be automatically launched when such a result record gets tapped, but developers are also given the power to drive users to specific view controllers that are most appropriate and suitable for the data that were selected on Spotlight.
From the developer’s point of view, integrating the Core Spotlight framework and using the provided APIs doesn’t consist of a complicated process. As you’ll find out through the upcoming parts of this tutorial, doing so requires only a few lines of code. The “heart” of that process lies to the fact that developers have to “ask” iOS to index their app’s data, which must be described in a specific way prior to that.
As this tutorial is dedicated to the Core Spotlight framework, I don’t intend to get into the details in this introduction. If you’re interested in learning how to implement something that I personally find really awesome, then please continue reading. I’m confident that at the end of your reading you’ll be feeling satisfied by having learnt how easy it is to make your app spottable on the Spotlight.
About the Demo App
As always, we’re going to dig down to the details of our topic by using a demo application. In this one, we’ll populate a collection of data to the app, and that data will be searchable through the Spotlight of the device (or Simulator). But, even though this is the big picture, it’s necessary to mention more details about our app.
The purpose of our demo app is to display some movies along with some information about them, such as its summary, director, stars, rating, etc. All the movie data will be populated in a tableview, and when tapping on a row the details of the selected movie will be displayed in a new view controller. Nothing further, as this kind of functionality and the kind of data is all we need in order to see how the Core Spotlight API works. For your information, the source for our data is the International Movie Database (IMDB); that’s where I got the sample data from.
You can take a first taste of the demo app by taking a look at the following animated graphic:
In this tutorial we have two goals: The primary and most important one, is to make all the movie data contained in the app searchable from the Spotlight. By doing so, results relevant to the movies of our app will be shown to users when they perform searches by using keywords. Setting those keywords is a part of our job later, as it’s our responsibility to define them.
By tapping on a movie result, the app will be launched, and that brings us to our second goal. If we take no actions at all, the default view controller will be loaded and appear to users, which in our case is the one containing the tableview with the movies list. However, that doesn’t sound really good if we think of the user experience; in a better scenario our app should display the details of the movie picked on the Spotlight, and that’s exactly what we’ll eventually do. In short, not only we’ll make our movie data searchable through the Spotlight, but we’ll also present the proper movie details when a relevant result is tapped when searching. The following example will make it more clear:
In order to begin working in no time at all, you can download a starter project here. In it you’ll find the following:
- The UI part already made, along with all the necessary IBOutlet properties.
- A minimum implementation of the tableview.
- All the movie data existing in a .plist file. Additionally, there are images matching to each movie (5 in total).
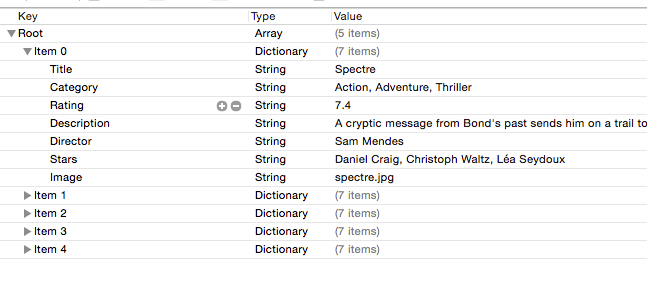
In case you’re wondering what kind of data the property list file contains for each movie, right next you can see a sample screenshot that explains everything:
Prior to seeing the details of the Core Spotlight API, we’ll perform two distinct tasks:
- We’ll load and populate the movie data to the tableview.
- We’ll show a selected movie’s data to the detail view controller.
I didn’t implement the above in the starter project, even though it would be faster that way to let you get into the point of our topic for one simple reason: I’m quite confident that by getting the spirit of the demo app and the sample data, it will make it quite straightforward for you to understand how the that specific data will become searchable by the Spotlight. No worries though, as all the preliminary work is going to be few and fast.
Loading and Displaying the Sample Data
So, let’s get started, assuming at this point that you have downloaded the starter project and seen the property list file with the movies data. In the MoviesData.plist file you’ll find in total five entries, matching to the five sample movies randomly picked in the IMDB website. Our first goal is to load this data from the .plist file into an array, and then populate it in the tableview.
Diving directly into code, open the ViewController.swift file which is the primary one for us here, and at the top of the class declare the following property:
var moviesInfo: NSMutableArray!
All movies are going to be loaded to that array, where a single movie will be represented as a dictionary of keys and values that match to those existing in the property list file.
Let’s write now a small custom function, where the data loading will take place. As you’ll see next, we just ensure that the property list file actually exists, and if so, we initialize the array with the contents of that file:
func loadMoviesInfo() {
    if let path = NSBundle.mainBundle().pathForResource("MoviesData", ofType: "plist") {
        moviesInfo = NSMutableArray(contentsOfFile: path)
    }
}
Next, we have to call it in the viewDidLoad() function. Just make sure that you’ll call it right before the configureTableView() function, as shown to the next code segment:
override func viewDidLoad() {
    super.viewDidLoad()

    // Load the movies data from the file.
    loadMoviesInfo()

    configureTableView()
    navigationItem.title = "Movies"
}
Note that instead of creating the above custom function we could have just loaded the file contents inside the viewDidLoad() function, but as fans of the tidy code, the chosen way is much better even for something small like this.
Knowing that the movies data will be loaded every time that the app starts, we can move on and modify the current tableview implementation so it displays our movies. There are no much to do here: We’ll define the number of rows based on the movies, and then we’ll display the proper data to the tableview cell.
Starting from the number of rows, obviously it has to be equal to the number of movies. However, we should not forget to make sure first that there are movies to show, otherwise the app will crash in case the contents of the file won’t be loaded to the array.
func tableView(tableView: UITableView, numberOfRowsInSection section: Int) -> Int {
    if moviesInfo != nil {
        return moviesInfo.count
    }

    return 0
}
Finally, let’s display the movie data. For the purposes of the demo app, in the starter project you’ll find a subclass of the UITableViewCell class named MovieSummaryCell, and a counterpart .xib file that represents a single movie cell:
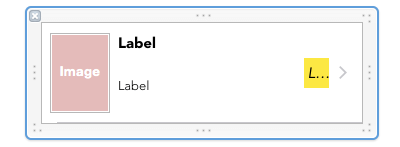
Such a cell shows the image, title, part of the description and the rating of each movie. All the UI controls have been connected to IBOutlet properties, and their names can be found in the MovieSummaryCell.swift file:
@IBOutlet weak var imgMovieImage: UIImageView!

@IBOutlet weak var lblTitle: UILabel!

@IBOutlet weak var lblDescription: UILabel!

@IBOutlet weak var lblRating: UILabel!
The above names suggest the purpose of each property, so now that we’ve seen them, let’s make use of them to display the relevant details for our movies. Back in the ViewController.swift file, update the following tableview function according to what you see in the next snippet:
func tableView(tableView: UITableView, cellForRowAtIndexPath indexPath: NSIndexPath) -> UITableViewCell {
    let cell = tableView.dequeueReusableCellWithIdentifier("idCellMovieSummary", forIndexPath: indexPath) as! MovieSummaryCell

    let currentMovieInfo = moviesInfo[indexPath.row] as! [String: String]

    cell.lblTitle.text = currentMovieInfo["Title"]!
    cell.lblDescription.text = currentMovieInfo["Description"]!
    cell.lblRating.text = currentMovieInfo["Rating"]!
    cell.imgMovieImage.image = UIImage(named: currentMovieInfo["Image"]!)

    return cell
}
The use of the currentMovieInfo dictionary isn’t necessary, however it makes the writing of the above simple code even easier.
Now you can give a first run to the app if you feel so, and see the movie details being listed in the tableview. What we’ve done so far it’s something familiar to everybody, so let’s go straight to the second preliminary step: To display the details of a selected movie.
Showing Data Details
In the MovieDetailsViewController class we’re going to show the details of a movie that gets selected in the tableview of the ViewController class. The respective scene in the Interface Builder already exists, so we have to do two things now: To pass the proper movie dictionary from the ViewController to this class, and then to populate the values from that dictionary to the proper UI controls for which you can find all the IBOutlet properties already declared and properly connected.
So, speaking of dictionary, let do the next declaration to the top of the MovieDetailsViewController class:
var movieInfo: [String: String]!
Let’s return in the ViewController.swift file for a while, and let’s see what we have to do when a movie row gets tapped. When that happens, we want to know the index of the tapped row, so we pick the dictionary from the proper position of the moviesInfo array and pass it to the next view controller when the segue between them gets performed (named idSegueShowMovieDetails). Getting the row index from the tableview delegate methods is easy, but we need a custom property to store it as well, therefore at the top of the ViewController class we need to declare this:
var selectedMovieIndex: Int!
Then, we have to handle the row selection in the tableview in the following way:
func tableView(tableView: UITableView, didSelectRowAtIndexPath indexPath: NSIndexPath) {
    selectedMovieIndex = indexPath.row
    performSegueWithIdentifier("idSegueShowMovieDetails", sender: self)
}
We do two really simple things here: First we store the tapped row index in our own property, and then we perform the segue that will make the details of the movie to be presented. However, that’s not enough, as we haven’t picked the proper movie dictionary from the moviesInfo array yet, and we haven’t passed anything to the MovieDetailsViewController class. What do we have to do? To override the prepareForSegue:sender: function and do what I just described. Let’s see it:
override func prepareForSegue(segue: UIStoryboardSegue, sender: AnyObject?) {
    if let identifier = segue.identifier {
        if identifier == "idSegueShowMovieDetails" {
            let movieDetailsViewController = segue.destinationViewController as! MovieDetailsViewController
            movieDetailsViewController.movieInfo = moviesInfo[selectedMovieIndex] as! [String : String]
        }
    }
}
Simple enough, as we just get access to the MovieDetailsViewController instance through the destinationViewController property of the segue, and then we assign the proper movie dictionary to the movieInfo one that we declared in the beginning of this part.
Now, open again the MovieDetailsViewController.swift file, where we’ll define only one custom function. In it, we’ll assign the values from the movieInfo dictionary to the proper UI controls, and our job here is over. The following is an easy implementation, so I avoid discussing any further:
func populateMovieInfo() {
    lblTitle.text = movieInfo["Title"]!
    lblCategory.text = movieInfo["Category"]!
    lblDescription.text = movieInfo["Description"]!
    lblDirector.text = movieInfo["Director"]!
    lblStars.text = movieInfo["Stars"]!
    lblRating.text = movieInfo["Rating"]!
    imgMovieImage.image = UIImage(named: movieInfo["Image"]!)
}
Lastly, let’s call the above function in the viewWillAppear: function that has already been defined in the file:
override func viewWillAppear(animated: Bool) {
    ...

    if movieInfo != nil {
        populateMovieInfo()
    }
}
This part has come to its end. You can try the app again, and see the details of a movie once you select it in the tableview.
Indexing Data For The Spotlight
By using the Core Spotlight framework in iOS 9 it’s possible to make the data of any application searchable through the Spotlight. The key for doing that is to ask specifically from the Core Spotlight API to index our data so it can be found on searches performed by the user. But neither our app, nor the CS API decides what kind of data this is going to be. It’s our responsibility to prepare that data and provide it to the API in a specific form.
To make that more clear, all the data that we want to make searchable through the Spotlight must be represented as CSSearchableItem objects, and then to be grouped together as an array and to be given to the CS API for indexing. A single CSSearchableItem object contains a set of attributes that make crystal clear to iOS the details of the searchable item, like what pieces of data should be displayed upon searching (for example, the name of the movie, its image and the description), and which the keywords that make data from our app appear on the Spotlight are. All the attributes for a single searchable item are represented by a CSSearchableItemAttributeSet object that provides many properties for assigning the values we need. For your reference, I give you the official documentation link so you can take a look to all the supported properties.
Indexing the data for the Spotlight is the last action that should be always done. The usual and normal flow involves the following steps (including indexing):
- Set the attributes for each single piece of data, for example a movie (CSSearchableItemAttributeSet object).
- Initialize a searchable item for each piece of data, using the attributes from the previous step (CSSearchableItem object).
- Collect all searchable items into an array.
- Index the data for the Spotlight using the above array.
We are about to follow the above steps one by one, and for our purposes we’re going to create a new custom function in the ViewController.swift file called setupSearchableContent(). At the end of our implementation in this part you’ll find out that it isn’t difficult at all to make your data searchable. However, we won’t get there directly, as I’m not going to give you the implementation all at once; instead, I’m going to break the code in pieces, so it’s easier for you to digest it. Don’t worry, it’s not that much.
Before we begin implementing the new function, we must import two frameworks first:
import CoreSpotlight
import MobileCoreServices
Let’s start defining our new method, and at the same time let’s declare the array that we’ll use to collect the searchable items:
func setupSearchableContent() {
    var searchableItems = [CSSearchableItem]()

}
Inside a loop now we’ll access each single movie:
func setupSearchableContent() {
    var searchableItems = [CSSearchableItem]()

    for i in 0...(moviesInfo.count - 1) {
        let movie = moviesInfo[i] as! [String: String]
    }
}
For each movie we’ll create a CSSearchableItemAttributeSet object, and then we’ll set the attributes for the data we want to be shown in the search results when searching on the Spotlight. In our demo, we’ll specify the movie title, description and image as the pieces of data that will be displayed to the user.
func setupSearchableContent() {
    var searchableItems = [CSSearchableItem]()

    for i in 0...(moviesInfo.count - 1) {
        let movie = moviesInfo[i] as! [String: String]

        let searchableItemAttributeSet = CSSearchableItemAttributeSet(itemContentType: kUTTypeText as String)

        // Set the title.
        searchableItemAttributeSet.title = movie["Title"]!

        // Set the movie image.
        let imagePathParts = movie["Image"]!.componentsSeparatedByString(".")
        searchableItemAttributeSet.thumbnailURL = NSBundle.mainBundle().URLForResource(imagePathParts[0], withExtension: imagePathParts[1])

        // Set the description.
        searchableItemAttributeSet.contentDescription = movie["Description"]!
    }
}
Note in the above snippet how we set the movie image as an attribute. There are two ways to do that: Either to specify the URL of the image, or provide the image as a NSData object. The easiest way for us is to provide the URL of each movie image file, since we know that they reside in the application bundle. However, that action demands to break each image file name into the actual name and the extension, therefore we separate those two values using the componentsSeparatedByString: method of the String class. The rest are easy to understand.
Now it’s time to set the keywords we want for spotting data from our app on the Spotlight. Think well before specifying keywords, as your decision is crucial for the discoverability of your app from the Spotlight and the user eventually. In this demo app we’re going to set as keywords both the categories that a movie belongs to and its stars.
func setupSearchableContent() {
    var searchableItems = [CSSearchableItem]()

    for i in 0...(moviesInfo.count - 1) {
        ...

        var keywords = [String]()
        let movieCategories = movie["Category"]!.componentsSeparatedByString(", ")
        for movieCategory in movieCategories {
            keywords.append(movieCategory)
        }

        let stars = movie["Stars"]!.componentsSeparatedByString(", ")
        for star in stars {
            keywords.append(star)
        }

        searchableItemAttributeSet.keywords = keywords
    }
}
Remember that the categories for the movies are represented as a single string value in the MoviesData.plist file, and they are separated by the comma symbol. So it’s necessary to break the categories in single values and let them be stored in the movieCategories array for instant access. Then using an inner loop we append each one to the keywords array. We follow the exact same steps for the stars of the movies, where once again we break the single string value with all stars in separate components, and then we add them to the keywords array.
The important line though is the last one; we set our keywords to the attributes set for each movie. Forgetting this line means that no results will exist on the Spotlight for the app.
Now that we’ve set the attributes and keywords for the Spotlight, it’s time to initialize a searchable item and add it to the searchableItems array:
func setupSearchableContent() {
    var searchableItems = [CSSearchableItem]()

    for i in 0...(moviesInfo.count - 1) {
        ...

        let searchableItem = CSSearchableItem(uniqueIdentifier: "com.appcoda.SpotIt.\(i)", domainIdentifier: "movies", attributeSet: searchableItemAttributeSet)

        searchableItems.append(searchableItem)
    }
}
The above initializer accepts three parameters:
- uniqueIdentifier: This parameter uniquely identifies the current searchable item on the Spotlight. You can compose this identifier in the way you prefer, but note a small detail: In this example we append the index of the current movie to the identifier, because we’ll need it later to display the details of the movie matching to that index. Making that more general, it’s always a good idea to include in the identifier a value that points to the data that should be displayed in details. You’ll better understand the usefulness of the movie index in a while.
- domainIdentifier: Use this parameter to group together searchable items.
- attributeSet: It’s the attributes set object that we assigned values to just right before.
At the end, the new searchable item is added to the searchableItems array.
There’s one last step we have to do, and that is use the Core Spotlight API to index the items. That’s something that takes place out of the for loop:
func setupSearchableContent() {
    ...

    CSSearchableIndex.defaultSearchableIndex().indexSearchableItems(searchableItems) { (error) -> Void in
        if error != nil {
            print(error?.localizedDescription)
        }
    }
}
The above function is complete, but we need to call it. We’ll do that in the viewDidLoad() function:
override func viewDidLoad() {
    ...

    setupSearchableContent()
}
We are now ready to search for movies using the Spotlight for first time. Run the app, exit from it and then use the Spotlight using any of the keywords we set above. You’ll see results appearing in front of your eyes. By tapping on any result, the app will be automatically launched.
Implementing Targeted Landing
Being able to find movies data from our app when searching on the Spotlight is quite impressive, however we can do better than that. Right now, the app gets launched and the ViewController is being presented when selecting a search result, but our goal is also to make it possible to present directly the details view controller and see the information for the selected movie.
Even though it might sounds difficult or complicated to do so, you’ll see that eventually is something actually pretty easy. In this specific demo app things are even easier, as we’ll be based on existing stuff so as to manage to display the details for a selected movie.
The main work here is to override a UIKit function named restoreUserActivityState:, and handle the selected result on the Spotlight. What we ultimately want to achieve, is to extract the index of the movie in the moviesInfo array from the searchable item identifier (if you remember, we created that identifier dynamically in the previous part), and then using it to present the MovieDetailsViewController view controller passing the proper movie dictionary.
The parameter of the above function is a NSUserActivity object. That object has a dictionary property named userInfo, and that dictionary contains the identifier of the selected searchable item on the Spotlight. From the identifier we’ll extract the index of the movie in the moviesInfo array, and we’ll present the details view controller. That’s all.
Let’s see the implementation now:
override func restoreUserActivityState(activity: NSUserActivity) {
    if activity.activityType == CSSearchableItemActionType {
        if let userInfo = activity.userInfo {
            let selectedMovie = userInfo[CSSearchableItemActivityIdentifier] as! String
            selectedMovieIndex = Int(selectedMovie.componentsSeparatedByString(".").last!)
            performSegueWithIdentifier("idSegueShowMovieDetails", sender: self)
        }
    }
}
As you see, it’s necessary to check if the activity type matches to the CSSearchableItemActionType type first. To be totally honest, in this demo app that’s not important, but in case you handle multiple NSUserActivity objects in your app, then it’s something that you should not forget to do (for example, the Handoff feature that was first presented in iOS 8 makes use of the NSUserActivity class). The identifier is a string value in the userInfo dictionary. Once we get it, we break the string value to its components based on the dot symbol, and we access the last object which is the index of the selected movie in the movies collection. The rest is easy: We assign the index in the selectedMovieIndex property, and we perform the segue. Our previously existing implementation will handle the rest.
Now switch to the AppDelegate.swift file. We have to implement one delegate function in it that doesn’t exist so far. That function will be called every time a result regarding our app gets tapped on the Spotlight, and our responsibility is to call the function we implemented right above, passing of course the user activity object. Let’s see the implementation:
func application(application: UIApplication, continueUserActivity userActivity: NSUserActivity, restorationHandler: ([AnyObject]?) -> Void) -> Bool {
    let viewController = (window?.rootViewController as! UINavigationController).viewControllers[0] as! ViewController
    viewController.restoreUserActivityState(userActivity)

    return true
}
In the above snippet, the first thing we have to do is to access the ViewController view controller through the window property prior to restoring the user activity state. Alternatively, instead of doing the above you could use the NSNotificationCenter and post a custom notification, which in turn you should handle in the ViewController class, but the above way is more direct.
That’s all! Our demo app is ready, so run it once again and see what happens when you search for movies on the Spotlight.
Summary
The new search APIs in iOS 9 look quite promising for developers, as they allow apps to become a lot more discoverable and easily accessible by users. In this tutorial we went through all those actions that index an app’s data so they can be found on the Spotlight searches, and how a selected result can be handled by the app so specific data to be displayed to the user. Implementing such features in your apps definitely increase the user experience, so it’s something that you should seriously consider to include in your current and future projects. And as once again we’ve come to the end, I leave you hoping that you found this post useful! Have fun!
For reference, you can download the complete Xcode project from GitHub.


