

Augmented reality is here. It is coming in a BIG way. Remember Pokemon Go? Well, that’s just a taste of augmented reality. Apple is bringing augmented reality to the masses starting with iOS 11. With iOS 11, hundreds of millions of iPhones and iPads are going to be AR capable. This will make ARKit the largest AR platform in the world — overnight. Yes — overnight. If you are interested in building augmented reality Apps for iOS 11, then you are at the right place.
Purpose
This tutorial is written to help you familiarize the fundamentals of ARKit using SceneKit by building out an ARKit Demo App.
It’s time to get your feet wet, have you see the process of building out an ARKit App, and let you interact with the AR world through your device.
The whole idea of this tutorial is to learn the technology and its APIs by building an app. By going through the process, you understand how ARKit works in a real device to interact with the awesome 3D objects you create.
Before getting too fancy, let’s understand the very fundamentals first and that’s what this tutorial aims to do.
Prerequisites
This tutorial recommends that you have a solid understanding of the fundamentals of iOS Development. This is an intermediate tutorial. You will also need Xcode 9 or above.
To test out your ARKit App, you will need one of Apple’s ARKit compatible devices, which are devices having an Apple A9 processors or higher.
Now that you have everything ready and you are suited up. Let’s dive right in! Here are the things I will walk you through:
- Creating a New Project for ARKit apps
- Setting Up ARKit SceneKit View
- Connecting ARSCNView with View Controller
- Connecting IBOutlet
- Configuring ARSCNView Session
- Allowing Camera Usage
- Adding 3D Object to ARSCNView
- Adding Gesture Recognizer to ARSCNView
- Removing Objects from ARSCNView
- Adding Multiple Objects to ARSCNView
Creating a New Project
Go ahead and open up Xcode. In the Xcode menu, select File > New > Project… Choose Single View App, and press next. Xcode has the ARKit template but actually, you can just use the Single View app template to build an AR app.
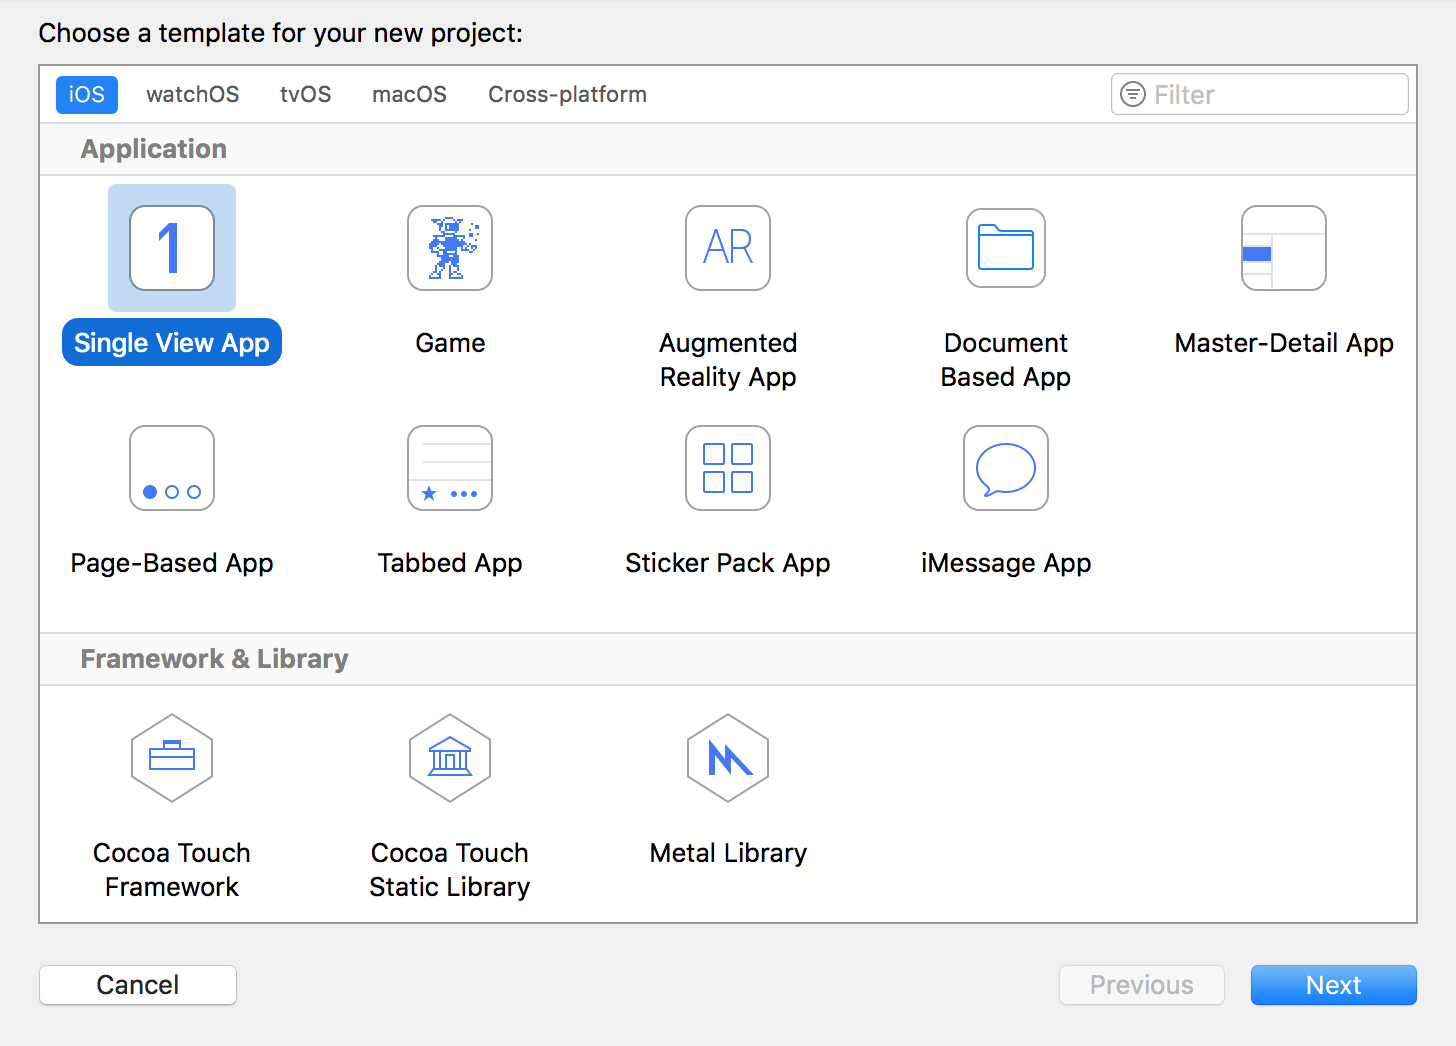
You can name your project whatever you want. I named my project ARKitDemo. And then press next to create your new project.
Setting Up ARKit SceneKit View
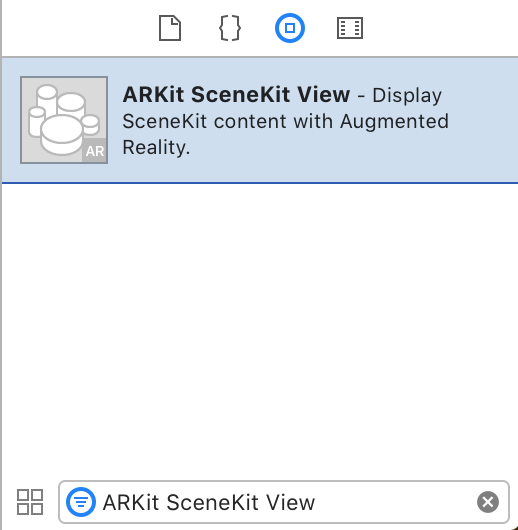
Now open up Main.storyboard. Look inside the Object Library for the ARKit SceneKit View. Drag the ARKit SceneKit View onto your View Controller.
Then give your ARKit SceneKit View constraints to fill out the entire View Controller. It should look something like this:
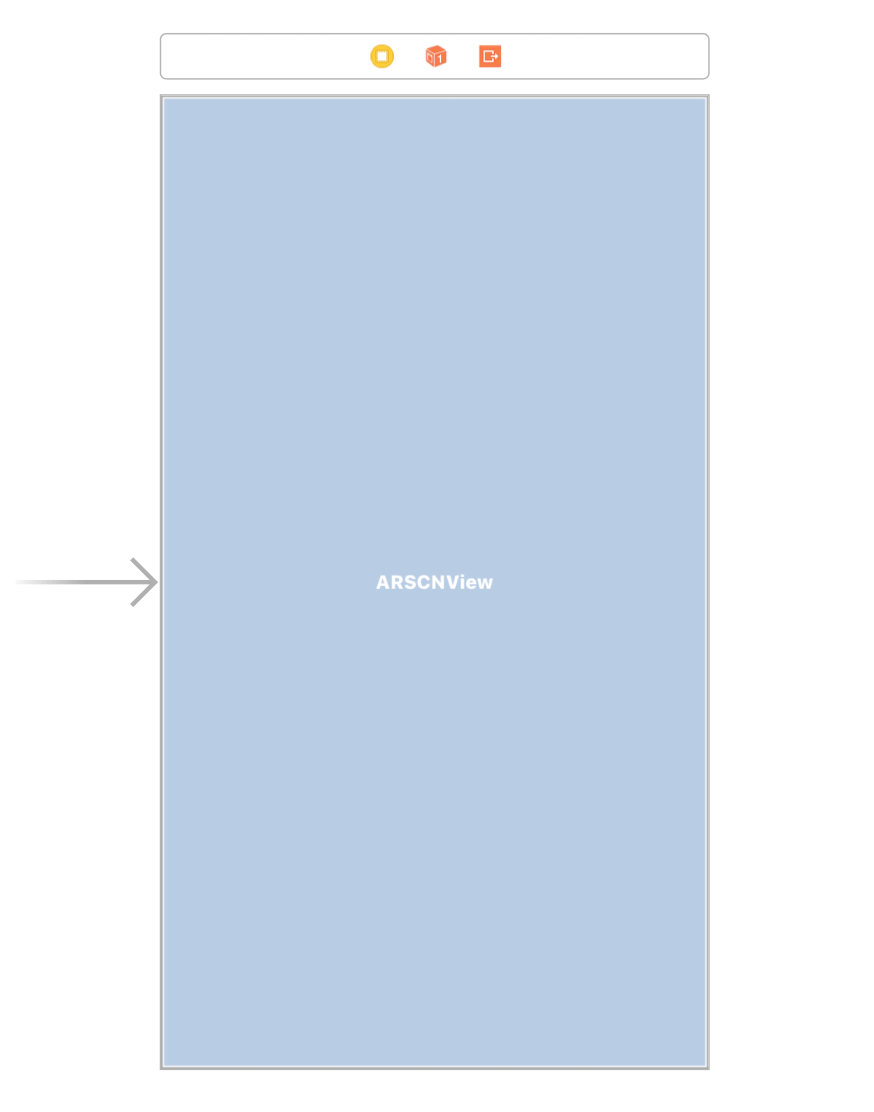
Cool. This ARKit SceneKit View is where we will display SceneKit content with Augmented Reality.
Connecting IBOutlet
We are still on the Main.storyboard file. Go up to the toolbar and open up the Assistant Editor. Add an import statement at the top of the ViewController.swift file to import ARKit:
import ARKit
Then hold control and drag from the ARKit SceneKit View to the ViewController.swift file. When prompte, name the IBOutlet sceneView. Feel free to delete the didReceiveMemoryWarning() method as well. We won’t be needing it in this tutorial.

Configuring ARSCNView Session
We want our app to start looking into the world through the camera lens and start detecting the environment around us. This is quite an insane technology if you think about it. Apple has made augmented reality possible for developers without having to develop the entire technology from the ground up. Thank you Apple for blessing us with ARKit.
Okay. Now it’s time to configure the ARKit SceneKit View. Insert the following codes into the ViewController class:
override func viewWillAppear(_ animated: Bool) {
    super.viewWillAppear(animated)
    let configuration = ARWorldTrackingConfiguration()
    sceneView.session.run(configuration)
}
In the viewWillAppear(_:) method, we initialized the an AR configuration called ARWorldTrackingConfiguration. This is a configuration for running world tracking.
But wait, what is world tracking? According to Apple’s documentation:
“World tracking provides 6 degrees of freedom tracking of the device. By finding feature points in the scene, world tracking enables performing hit-tests against the frame.
Tracking can no longer be resumed once the session is paused.”
— Apple’s Documentation
The world tracking configuration tracks the device’s orientation and position. It also detects real-world surfaces seen through the device’s camera.
Now we set the sceneView’s AR session to run the configuration we just initialized. The AR session manages motion tracking and camera image processing for the view’s contents.
Now add another method in ViewController:
override func viewWillDisappear(_ animated: Bool) {
    super.viewWillDisappear(animated)
    sceneView.session.pause()
}
In the viewWillDisappear(_:) method, we simply tell our AR session to stop tracking motion and processing image for the view’s content.
Allowing Camera Usage
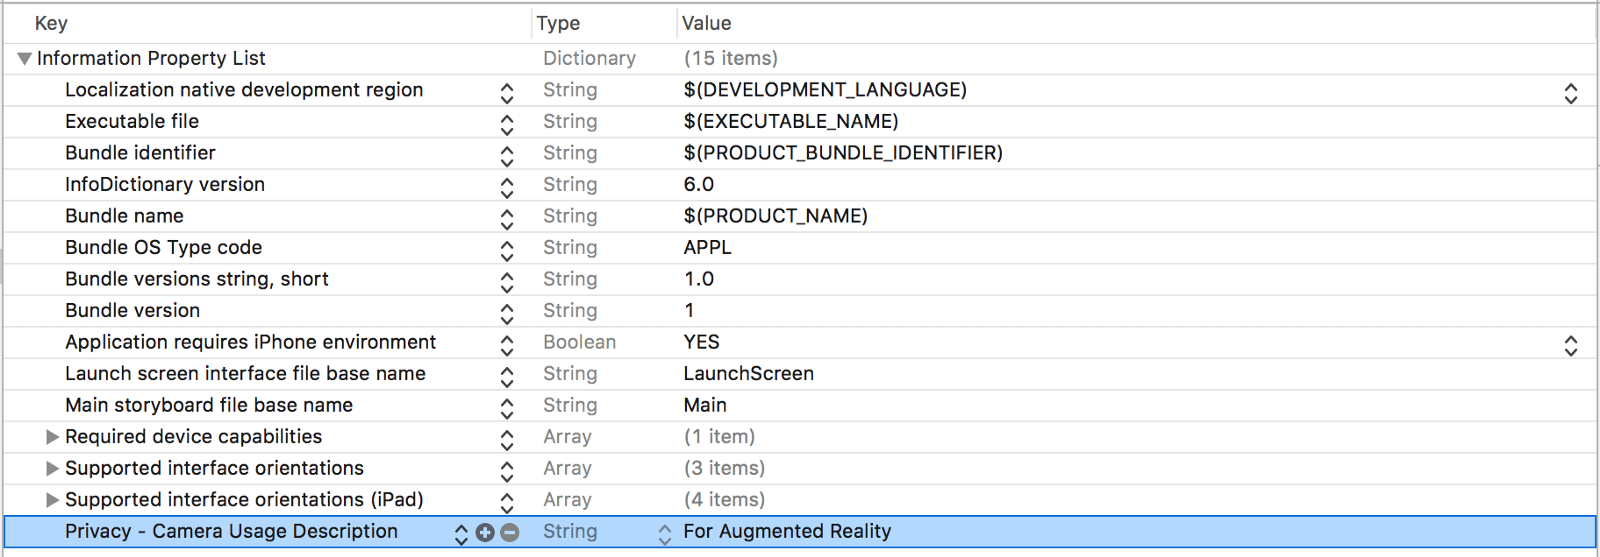
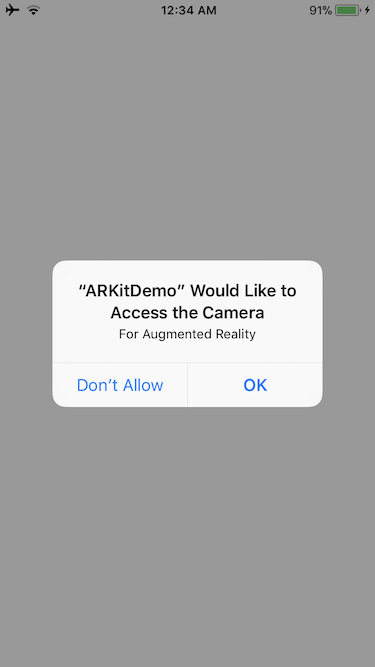
Now before we can run our app, we need to inform our user that we will utilize their device’s camera for augmented reality. This is a requirement since the release of iOS 10. Hence, open up Info.plist. Right-click the blank area and choose Add row. Set the Key to Privacy — Camera Usage Description. Set the Value to For Augmented Reality.
Before moving on, let’s make sure that you have everything set up correctly up to this point.
Take out your device. Hook it up to your Mac. Build and run the project on Xcode. The App should prompt you to allow camera access. Tap OK.
Now you should be able to see your camera’s view.
We have configured our sceneView’s session to run the world tracking configuration. It’s time for the exciting part. Augmented reality!
Adding 3D Object to ARSCNView
The time has come. The moment we have all been waiting for.
Without further ado, let’s augment reality. We are going to begin by adding a box. Insert the following code to your ViewController class:
func addBox() {
    let box = SCNBox(width: 0.1, height: 0.1, length: 0.1, chamferRadius: 0)

    let boxNode = SCNNode()
    boxNode.geometry = box
    boxNode.position = SCNVector3(0, 0, -0.2)

    let scene = SCNScene()
    scene.rootNode.addChildNode(boxNode)
    sceneView.scene = scene
}
Here’s what we did.
We begin by creating a box shape. 1 Float = 1 meter.
After that, we create a node. A node represents the position and the coordinates of an object in a 3D space. By itself, the node has no visible content.
We can give the node a visible content by giving it a shape. We do this by setting the node’s geometry to the box.
Afterwards, we give our node a position. This position is relative to the camera. Positive x is to the right. Negative x is to the left. Positive y is up. Negative y is down. Positive z is backward. Negative z is forward.
Then we create a scene. This is the SceneKit scene to be displayed in the view. We then add our box node to the root node of the scene. A root node in a scene that defines the coordinate system of the real world rendered by SceneKit.
Basically, our scene now has a box. The box is centered to the device’s camera. It is 0.20 meter forward relative to the camera.
Finally, we set our sceneView’s scene to display the scene we just created.
Now call addBox() in viewDidLoad():
override func viewDidLoad() {
    super.viewDidLoad()
    addBox()
}
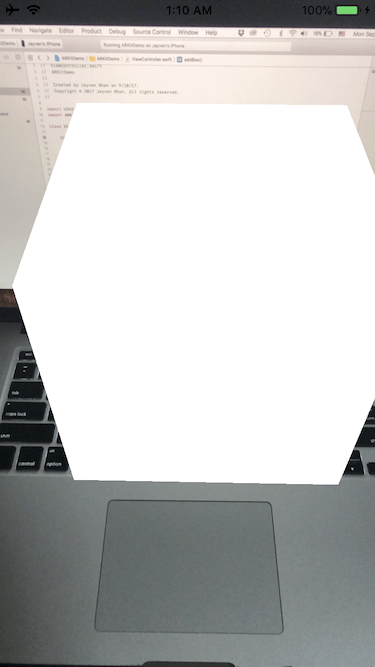
Build and run the App. You should be able to see a floating box!
You can also refactor addBox() to simply:
func addBox() {
    let box = SCNBox(width: 0.05, height: 0.05, length: 0.05, chamferRadius: 0)

    let boxNode = SCNNode()
    boxNode.geometry = box
    boxNode.position = SCNVector3(0, 0, -0.2)

    sceneView.scene.rootNode.addChildNode(boxNode)
}
It is easier to explain some components individually.
Alright. It’s time to add gesture.
Adding Gesture Recognizer to ARSCNView
Right below the addBox() method, add the following codes:
func addTapGestureToSceneView() {
    let tapGestureRecognizer = UITapGestureRecognizer(target: self, action: #selector(ViewController.didTap(withGestureRecognizer:)))
    sceneView.addGestureRecognizer(tapGestureRecognizer)
}
Here, we initialize a tap gesture recognizer with the target set to the ViewController with the action selector set to the didTap(withGestureRecognizer:) callback function. Then we add the tap gesture recognizer onto the sceneView.
Now it’s time to do something with the tap gesture recognizer’s callback function.
Removing Object From ARSCNView
Insert the following method in the ViewController.swift file:
@objc func didTap(withGestureRecognizer recognizer: UIGestureRecognizer) {
    let tapLocation = recognizer.location(in: sceneView)
    let hitTestResults = sceneView.hitTest(tapLocation)
    guard let node = hitTestResults.first?.node else { return }
    node.removeFromParentNode()
}
Here, we created a didTap(withGestureRecognizer:) method. We retrieve the user’s tap location relative to the sceneView and hit test to see if we tap onto any node(s).
Afterward, we safely unwrap the first node from our hitTestResults. If the result does contain at least a node, we will remove the first node we tapped on from its parent node.
Before we test the object removal, update the viewDidLoad() method to add a call to the addTapGestureToSceneView() method:
override func viewDidLoad() {
    super.viewDidLoad()

    addBox()
    addTapGestureToSceneView()
}
Now if you build and run your project, you should be able to tap the box node and remove it from the scene view.
Looks like we are back to ground one.
Ok. Now it’s time to add multiple objects.
Adding Multiple Objects to ARSCNView
Now our box is a bit lonely. Let’s give the box some boxes. We are going to add objects from the detection of feature points.
So what are feature points?
According to Apple, here is the definition of a feature point:
A point automatically identified by ARKit as part of a continuous surface, but without a corresponding anchor.
It is basically the detected points on the surface of real world objects. So back to the implementation of adding boxes. Before we do that, let’s create an extension at the end of the ViewController class:
extension float4x4 {
    var translation: float3 {
        let translation = self.columns.3
        return float3(translation.x, translation.y, translation.z)
    }
}
This extension basically transforms a matrix into float3. It gives us the x, y, and z from the matrix.
Also, we need to modify addBox() to the following:
func addBox(x: Float = 0, y: Float = 0, z: Float = -0.2) {
    let box = SCNBox(width: 0.1, height: 0.1, length: 0.1, chamferRadius: 0)

    let boxNode = SCNNode()
    boxNode.geometry = box
    boxNode.position = SCNVector3(x, y, z)

    sceneView.scene.rootNode.addChildNode(boxNode)
}
We basically added parameters to the initial addBox() function. We also gave it default parameter values. This means that we can call addBox() without having to specify the x, y, and z coordinates like in viewDidLoad().
Cool.
Now we need to modify the didTap(withGestureRecognizer:) method. We want to add an object to the feature point if there is one that can be detected.
So inside of our guard let statement and before our return statement. Add the following code:
let hitTestResultsWithFeaturePoints = sceneView.hitTest(tapLocation, types: .featurePoint)

if let hitTestResultWithFeaturePoints = hitTestResultsWithFeaturePoints.first {
    let translation = hitTestResultWithFeaturePoints.worldTransform.translation
    addBox(x: translation.x, y: translation.y, z: translation.z)
}
This is what we are doing.
First, we perform a hit test, similar to how we hit test the first time around. Except that, we specify a .featurePoint result type for the types parameter. The types parameter asks the hit test to search for real-world objects or surfaces detected through the AR session’s processing of the camera image. There are many types of the result type. However, we will focus on just the feature point in this tutorial.
After the hit test of feature points, we safely unwrap the first hit test result. This is important because there may not always be a feature point. ARKit may not always detect a real world object or a surface in the real world.
If the first hit test result can be safely unwrapped, then we transform the matrix of type matrix_float4x4 to float3. This is possible because of the extension we created earlier. This handily gives us the x, y, and z real world coordinates that we are interested in.
We then take the x, y, and z to add a new box upon tapping on a detected feature point.
Your didTap(withGestureRecognizer:) method should look like this:
@objc func didTap(withGestureRecognizer recognizer: UIGestureRecognizer) {
    let tapLocation = recognizer.location(in: sceneView)
    let hitTestResults = sceneView.hitTest(tapLocation)
    guard let node = hitTestResults.first?.node else {
        let hitTestResultsWithFeaturePoints = sceneView.hitTest(tapLocation, types: .featurePoint)
        if let hitTestResultWithFeaturePoints = hitTestResultsWithFeaturePoints.first {
            let translation = hitTestResultWithFeaturePoints.worldTransform.translation
            addBox(x: translation.x, y: translation.y, z: translation.z)
        }
        return
    }
    node.removeFromParentNode()
}
Trying out the Final App
Build and run your project. In addition to everything you did before, you should now be able to add a box onto a feature point.

Wrap Up
Congratulations for making it this far into the tutorial. ARKit is a huge topic in itself. We have gone through a lot of the fundamentals. Yet, we have only scratched the very surface of ARKit.
I hope you have enjoyed this introduction to ARKit. I can’t wait to see the amazing ARKit App ideas that developers like you are going to build.
For the full demo project, you can find it on GitHub.
If you would like to learn more about ARKit, then let me know by sharing this tutorial with your friends!


