How To Implement Search Bar in iOS 7 Using Storyboard
Editor’s note: Like some of the programming tutorials, you may find the search bar tutorial no longer works in Xcode 5 and iOS 7. We’ve rewritten the tutorial to make it compatible with the latest version of Xcode. On top of that, we enhance the tutorial with custom table cell.
Enter the search bar tutorial.
In most of the iOS apps using table view, it is common to have a search bar at the very top of the screen. How can you implement a search bar for data searching? In this tutorial, we will see how to add a search bar to the recipe app. With the search bar, we’ll enhance the recipe app to let users search through the recipe list by specifying a search term.
Well, it’s not difficult to add a search bar but it takes a little bit of extra work. As usual, we’ll walk you through the concept and implementation by building a sample app. As our focus is on the search bar implementation, you can download this project template to start with. The template is similar to the app we built in the tab bar tutorial.


Understanding Search Display Controller
You can use search display controller (i.e. UISearchDisplayController class) to manage search in your app. A search display controller manages display of a search bar and a table view that displays the results of a search of data.
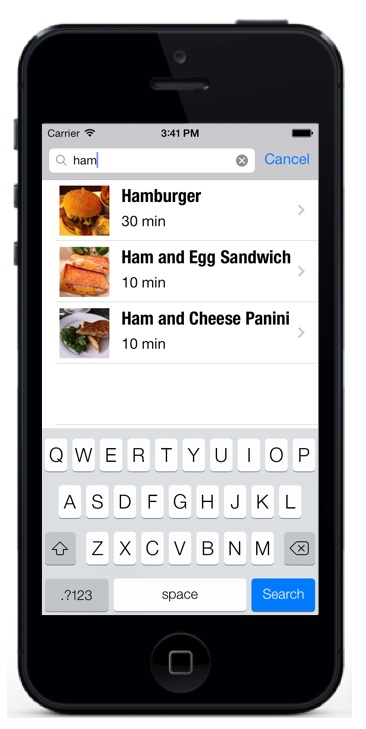
When a user starts a search, the search display controller will superimpose the search interface over the original view and display the search results. Interestingly, the results are displayed in a table view that’s created by the search display controller.


Search Result Table View
Like other view controllers, you can either programmatically create the search display controller or simply add it into your app using Storyboard. In this tutorial, we’ll use the later approach.
Adding a Search Display Controller in Storyboard
In Storyboard, drag and add the “Search Bar and Search Display Controller” right below the navigation bar of Recipe Book View Controller. If you’ve done correctly, you should have a screen similar to the below:


Adding Search Display Controller
Before proceeding, try to run the app and see how it looks. Without implementing any new code, you already add a search bar. Tapping the search bar will bring you to the search interface. However, the search is not working yet.


Search Bar in Table View App (but it’s not working yet)
Why Search Results Show All Recipes?
As mentioned earlier, the search results are displayed in a table view created by the search display controller. When developing the recipe app in earlier tutorial, we implemented the UITableViewDataSource protocol so as to tell the table view the total number of rows to display and the data in each row.
Like UITableView, the table view bundled in the search display controller adopts the same approach. According to the official documentation of UISearchDisplayController, here are the available delegates that let you interact with the search result and search bar:
- The search results table view’s data source, which is needed to provide the data for search result table.
- The search result table view’s delegate, which is used to respond to the user’s selection of a search item.
- The search display controller’s delegate, which responds to the events such as when the search starts or ends and when the search interface is displayed or hidden.
- The search bar’s delegate, which is responsible for responding to changes in the search criteria.
Generally, the original view controller is used as the source object for the search results data source and delegate. You do not need to manually link up the data source and delegate with the view controller. As you insert the search bar into the view of Recipe Table View Controller, the appropriate connections for the search display controller are automatically configured. You can right click on the “Search Display Controller” icon in the dock to reveal the connections.

Search Display Controller Connections
Both table views (i.e. the table view in recipe table view controller and the search result table view) shares the same view controller to handle data population. If you refer to the code, these are the two methods being invoked when displaying table data:
|
1 2 3 4 5 6 7 8 9 10 11 12 13 14 15 16 17 18 19 20 21 22 23 |
- (NSInteger)tableView:(UITableView *)tableView numberOfRowsInSection:(NSInteger)section { return [recipes count]; } - (UITableViewCell *)tableView:(UITableView *)tableView cellForRowAtIndexPath:(NSIndexPath *)indexPath { static NSString *CellIdentifier = @"CustomTableCell"; RecipeTableCell *cell = (RecipeTableCell *)[self.tableView dequeueReusableCellWithIdentifier:CellIdentifier]; // Configure the cell... if (cell == nil) { cell = [[RecipeTableCell alloc] initWithStyle:UITableViewCellStyleDefault reuseIdentifier:CellIdentifier]; } // Display recipe in the table cell Recipe *recipe = [recipes objectAtIndex:indexPath.row]; cell.nameLabel.text = recipe.name; cell.thumbnailImageView.image = [UIImage imageNamed:recipe.image]; cell.prepTimeLabel.text = recipe.prepTime; return cell; } |
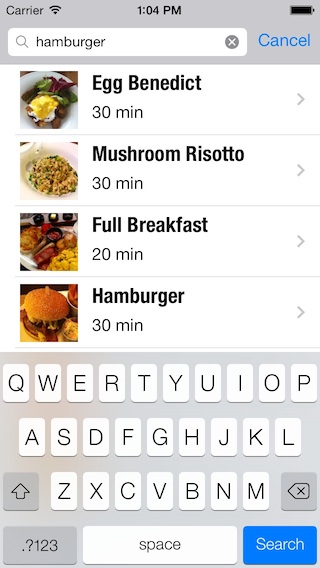
This explains why the search results show a full list of recipes regardless of your search term.
But why is the height of table row in search result table different from that in the recipe table? The original recipe table view was designed in storyboard. We set the height of the prototype cell right within the storyboard. The table view in the search display controller, however, has no idea about the change of cell height. To fix it, we have to change the row height programmatically. Add the following code into RecipeTableViewController.m:
|
1 2 3 4 |
- (CGFloat)tableView:(UITableView *)tableView heightForRowAtIndexPath:(NSIndexPath *)indexPath { return 71; } |
You can change the row height by implementing the tableView:heightForRowAtIndexPath: method of the UITableViewDelegate protocol. Here, we set the height to 71 points.
If you compile and run the app again, the table row in the search result should look better now. Yet, the search still doesn’t work and this is what we’re going to discuss in the next section.


Implementing Search Filter
Obviously, to make the search work, there are a couple of things we have to implement/change:
- Implement methods to filter the recipe names and return the correct search results
- Change the data source methods to differentiate the table views. If the tableView being passed is the table view of Recipe Table View Controller, we show all recipes. On the other hand, if it’s a search result table view, only the search results are displayed.
First, we’ll show you how to implement the filter. Here we have an array to store all recipes. We create another array to store the search results. Let’s name it as “searchResults”.
|
1 2 3 4 5 |
@implementation RecipeTableViewController { NSArray *recipes; NSArray *searchResults; } |
Next, add a new method to handle the search filtering. Filtering is one of the common tasks in iOS app. The straightforward way to filter the list of recipes is to loop through all the names and filter the result with the if-statement. There is nothing wrong with such implementation. But iOS SDK offers a better way known as Predicate to handle search queries. By using NSPredicate, which is an object representation of a predicate, you write less code. With just two lines of code, it searches through all recipes and returns the matched results. Add the following code to RecipeTableViewController.m:
|
1 2 3 4 5 |
- (void)filterContentForSearchText:(NSString*)searchText scope:(NSString*)scope { NSPredicate *resultPredicate = [NSPredicate predicateWithFormat:@"name contains[c] %@", searchText]; searchResults = [recipes filteredArrayUsingPredicate:resultPredicate]; } |
Basically, a predicate is an expression that returns a Boolean value (true or false). You specify the search criteria in the format of NSPredicate and use it to filter data in the array. As the search is on the name of recipe, we specify the predicate as “name contains[c] %@”. The “name” refers to the name property of the Recipe object. NSPredicate supports a wide range of filters including:
- BEGINSWITH
- ENDSWITH
- LIKE
- MATCHES
- CONTAINS
Here we choose to use the “contains” filter. The operator “[c]” means the comparison is case-insensitive.
With the predicate defined, we use the filteredArrayUsingPredicate: method of NSArray that returns a new array containing objects that match the specified predicate.
To learn more about Predicate, check out Apple’s official documentation (https://developer.apple.com/library/mac/#documentation/Cocoa/Conceptual/Predicates/predicates.html).
Implementing Search Display Controller Delegate
Now we’ve created a method to handle the data filtering. But when should it be called? Apparently the filterContentForSearchText: method is invoked when user keys in the search term. The UISearchDisplayDelegate protocol defines a shouldReloadTableForSearchString: method which is automatically called every time when the search string changes. Therefore implement the following method in the RecipeTableViewController.m:
|
1 2 3 4 5 6 7 8 9 |
-(BOOL)searchDisplayController:(UISearchDisplayController *)controller shouldReloadTableForSearchString:(NSString *)searchString { [self filterContentForSearchText:searchString scope:[[self.searchDisplayController.searchBar scopeButtonTitles] objectAtIndex:[self.searchDisplayController.searchBar selectedScopeButtonIndex]]]; return YES; } |
When user keys in the search term in the search bar, this method is invoked automatically with the specified search term. We then call up the filterContentForSearchText: method to do the search.
Displaying Search Results
The last part of the puzzle is to display the search result in the table view of search display controller. As explained earlier, we have to change the data source methods to differentiate the table view in Recipe Table View Controller and the search result table view. Here are the updates of the two data source methods (changes are highlighted in bold):
|
1 2 3 4 5 6 7 8 9 10 11 12 13 14 15 16 17 18 19 20 21 22 23 24 25 26 27 28 29 30 31 32 33 34 |
- (NSInteger)tableView:(UITableView *)tableView numberOfRowsInSection:(NSInteger)section { if (tableView == self.searchDisplayController.searchResultsTableView) { return [searchResults count]; } else { return [recipes count]; } } - (UITableViewCell *)tableView:(UITableView *)tableView cellForRowAtIndexPath:(NSIndexPath *)indexPath { static NSString *CellIdentifier = @"CustomTableCell"; RecipeTableCell *cell = (RecipeTableCell *)[self.tableView dequeueReusableCellWithIdentifier:CellIdentifier]; // Configure the cell... if (cell == nil) { cell = [[RecipeTableCell alloc] initWithStyle:UITableViewCellStyleDefault reuseIdentifier:CellIdentifier]; } // Display recipe in the table cell Recipe *recipe = nil; if (tableView == self.searchDisplayController.searchResultsTableView) { recipe = [searchResults objectAtIndex:indexPath.row]; } else { recipe = [recipes objectAtIndex:indexPath.row]; } cell.nameLabel.text = recipe.name; cell.thumbnailImageView.image = [UIImage imageNamed:recipe.image]; cell.prepTimeLabel.text = recipe.prepTime; return cell; } |
The comparison is pretty straightforward. You can simply compare the tableView object in the data source methods against the searchResultsTableView of the search display controller. If the comparison is positive, we display the search results instead of all recipes.
Cool! It Works!
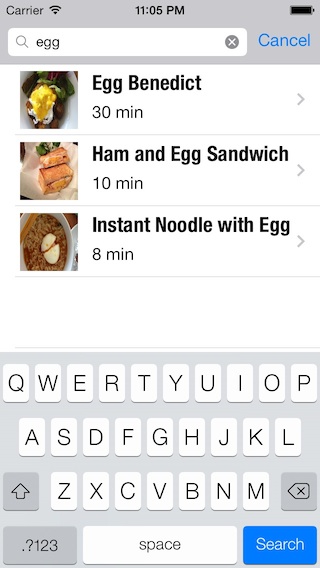
Once you complete the above changes, test your app again. Now the search bar should work properly.


Handling Selection in Search Results
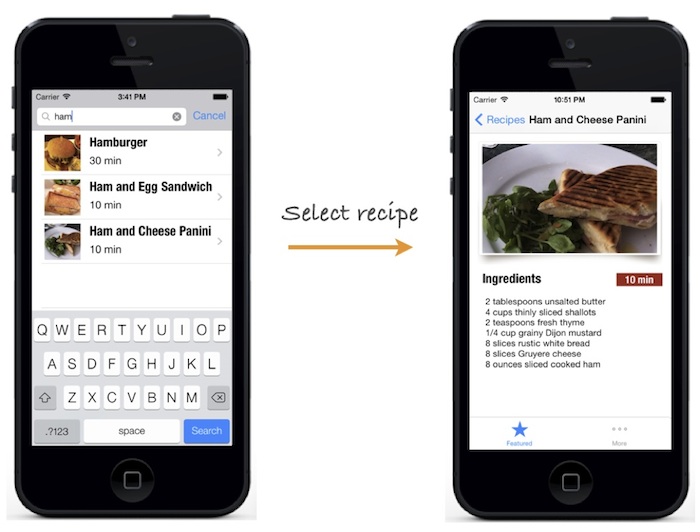
Despite the search works, it doesn’t respond to your selection correctly. No matter what the search results are, the app always displays “Egg Benedict” in the detail view.
Referring to the prepareForSegue: method, we use the indexPathForSelectedRow: method to retrieve the indexPath of the selected row. As mentioned earlier, the search results are displayed in a separate table view. But in our original prepareForSegue: method, we always retrieve the selected row from the table view of Recipe Book View Controller. That’s why we got the wrong recipe in detail view. To make the selection of search results properly, we have to tweak the prepareForSegue: method:
|
1 2 3 4 5 6 7 8 9 10 11 12 13 14 15 16 17 |
- (void)prepareForSegue:(UIStoryboardSegue *)segue sender:(id)sender { if ([segue.identifier isEqualToString:@"showRecipeDetail"]) { NSIndexPath *indexPath = nil; Recipe *recipe = nil; if (self.searchDisplayController.active) { indexPath = [self.searchDisplayController.searchResultsTableView indexPathForSelectedRow]; recipe = [searchResults objectAtIndex:indexPath.row]; } else { indexPath = [self.tableView indexPathForSelectedRow]; recipe = [recipes objectAtIndex:indexPath.row]; } RecipeDetailViewController *destViewController = segue.destinationViewController; destViewController.recipe = recipe; } } |
We first determine if the user is using search by using a built-in active property in UISearchDisplayController. In case of search, we retrieve the indexPath from searchResultsTableView and get the recipe from the searchResults array. Otherwise, we just get the indexPath from the table view of Recipe Table View Controller.
That’s it. Run the app again and the search selection should work as expected.


Summary
By now, you should know how to implement a search bar in iOS app. In this tutorial, we made the Recipe app even better by enhancing it with the search feature. The search feature is particularly important when you need to display tons of information in table view. So make sure you understand the materials we’ve discussed in this tutoral. Otherwise, start over and work on the project again.
For your reference, you can download the complete Xcode project from here.
What do you think about the tutorial? Leave me comment and share your thought. There are more programming tutorials in our free iOS course. Don’t miss it!
