One of the biggest announcements in WWDC 2016 is the introduction of the Message framework in iOS 10. Developers can now create app extensions for Apple’s built-in Messages app. By building an app extension, you let users to interact with your app right in the Messages app. For example, you can build a message sticker extension that allows your users to send stickers while communicating with his/her friends in Messages. Or if you already developed a photo editing app, you can now write an extension for users to edit photos without leaving the Messages app. The support of extension opens up a lot of opportunities for app developers. Apple even introduces App Store for iMessage, so you can sell your app extension through the app store that is dedicated for iMessage.
To build an app extension for Messages, you will need to make use of the new Message framework. The framework supports two types of app extensions:
- Sticker packs
- iMessage apps.
In this tutorial, I will show you how to build a stick pack using the framework. For the tutorial that follows, we will dive a little bit deeper to see how you can develop an iMessage app.
Regardless of the type of app extension you’re going to develop, you’ll need to use Xcode 8. At the time of this writing, Xcode 8 is in beta. If you haven’t installed the tool, grab a copy from Apple and install it on your Mac. Even if you have Xcode 7 installed, you can keep the current version intact and install the new version of Xcode on your machine.
Before moving on, I have to say that Apple makes it very easy for everyone to build sticker packs. Even if you do not have any Swift programming experience, you’ll be able to create your own sticker pack because it doesn’t need you to write a line of code. Follow this tutorial and learn how to create a sticker extension.
Creating a Sticker Pack Project
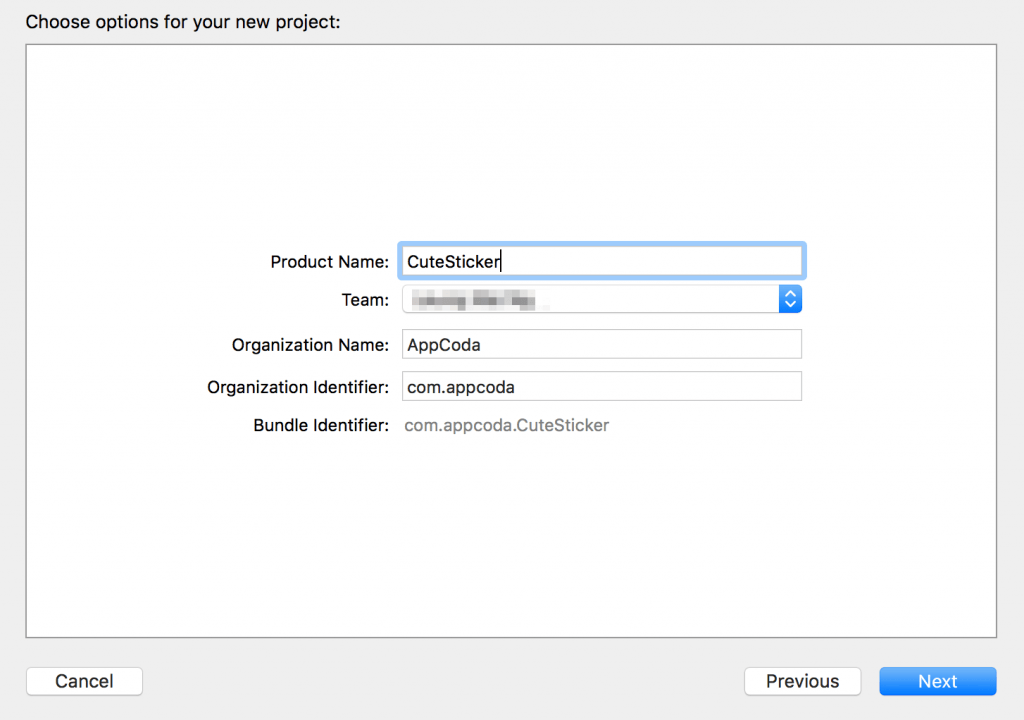
First, fire up Xcode 8 and create a new project. The new version of Xcode 8 has come with several project template for building Messages extensions. For sticker pack, please choose iOS > Application and then select Sticker Pack Application.
Next, fill in the project name. For this demo, I use the name CuteSticker but you can choose whatever name you prefer.
Adding Images for the Sticker Pack
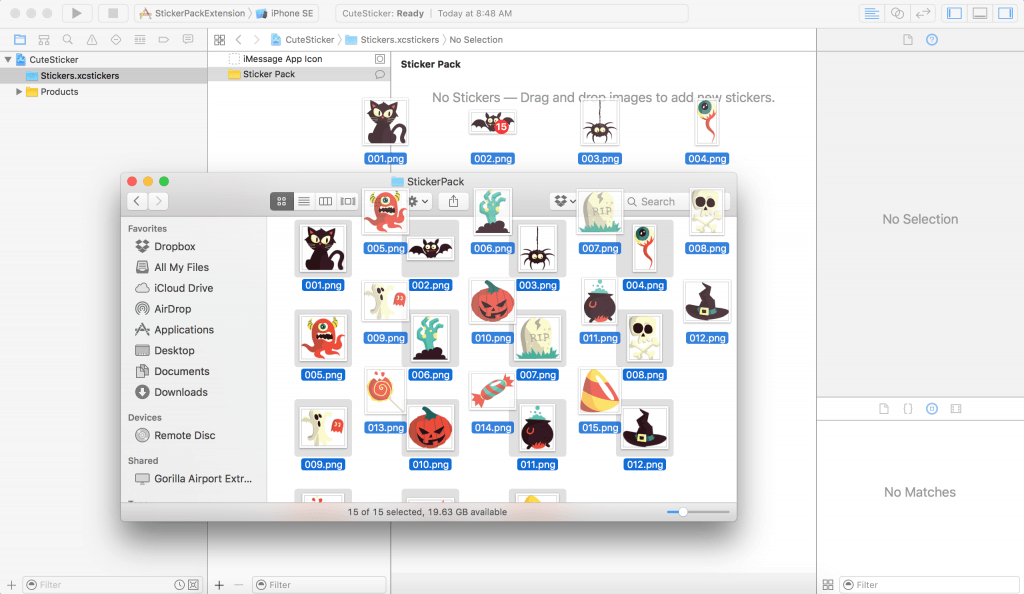
Once your Xcode project is created, you’ll see two files in the project navigator. Click Stickers.xcstickers and then select the Sticker Pack folder. This is where you put your image files. For demo purpose, you can download this image pack. Or simply use your own images. But please note that the image must be in PNG (preferred), APNG, GIF or JPG format with a maximum size of 500KB.
Assuming you’ve downloaded our image pack, unzip it in Finder. Then select all the images and drag them into the Sticker Pack folder.
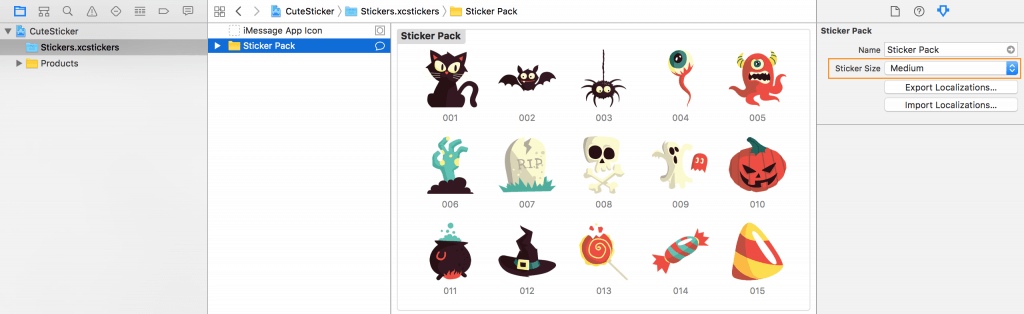
That’s it. Optionally, you can change the preferred size of the stickers. Select the Sticker Pack folder, and then choose the Attributes inspector. By default, the sticker size is set to Medium. You may change it to Small or Large. For this demo, I just use the default setting.
Adding App Icons
Lastly, your sticker pack must have an app icon. Again, for demo purpose, I have prepared a sample app icon and you can download the app icon here. If you prefer to create your own icon, make sure you prepare the icon with different sizes:
- 1024×768 points (@1x) for Messages App Store
- 27×20 points (@1x, @2x, @3x) for Messages
- 32×24 points (@1x, @2x, @3x) for Messages
- 29×29 points (@1x, @2x, @3x) for iPhone/iPad Settings
- 60×45 points (@2x, @3x) for Messages (iPhone)
- 67×50 points (@1x, @2x) for Messages (iPad)
- 74×55 points (@2x) for Message (iPad Pro)
To simplify the icon preparation, you can download iMessage App Icon template from Apple.
After you download our demo app icon pack, unzip the file and drag all the app icon files to iMessage App Icon.
Testing the Sticker Pack
That’s it! Now that you’ve created a sticker pack for Messages, it’s time to test it. You do not need an iOS 10 device to run the test. Xcode provides a built-in simulator to test any iMessage app extension. Choose a simulated device (e.g. iPhone 6) and hit the Run button to start the testing.
Since the sticker pack is an app extension, you can’t execute it as a standalone application. You have to run on the Messages app. So choose Messages when Xcode will prompt you to choose an app to run. Then click Run to proceed.
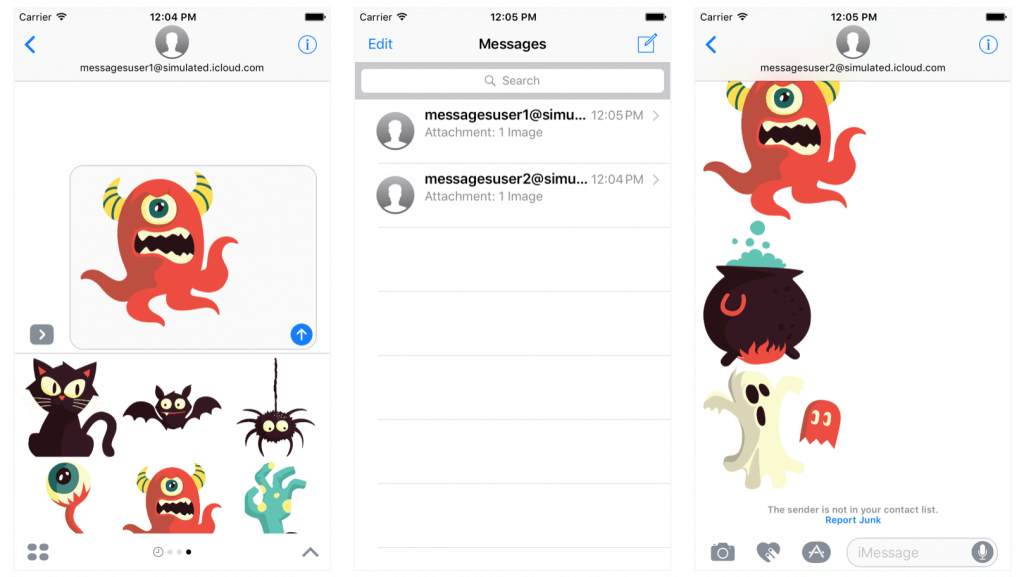
When the simulator is launched, you’ll be directed to the Messages app. Click the extension button and you’ll find your sticker pack. If you click the lower left menu icon, you will reveal your sticker pack, as well as, those built-in.

The Messages app in the simulator has come with two simulated users. Choose a sticker and press return key to send it. Then go to messageuser2. You should find the stickers you’ve just sent.
Enhancing Your Sticker Pack with Animated Images
Not only can you bundle static images in your sticker pack, Apple lets you easily add animated images to the pack. If you already have some animated GIFs or APNGs like this one, simply add the image to the stick pack. Xcode will recognize it and display the animation.
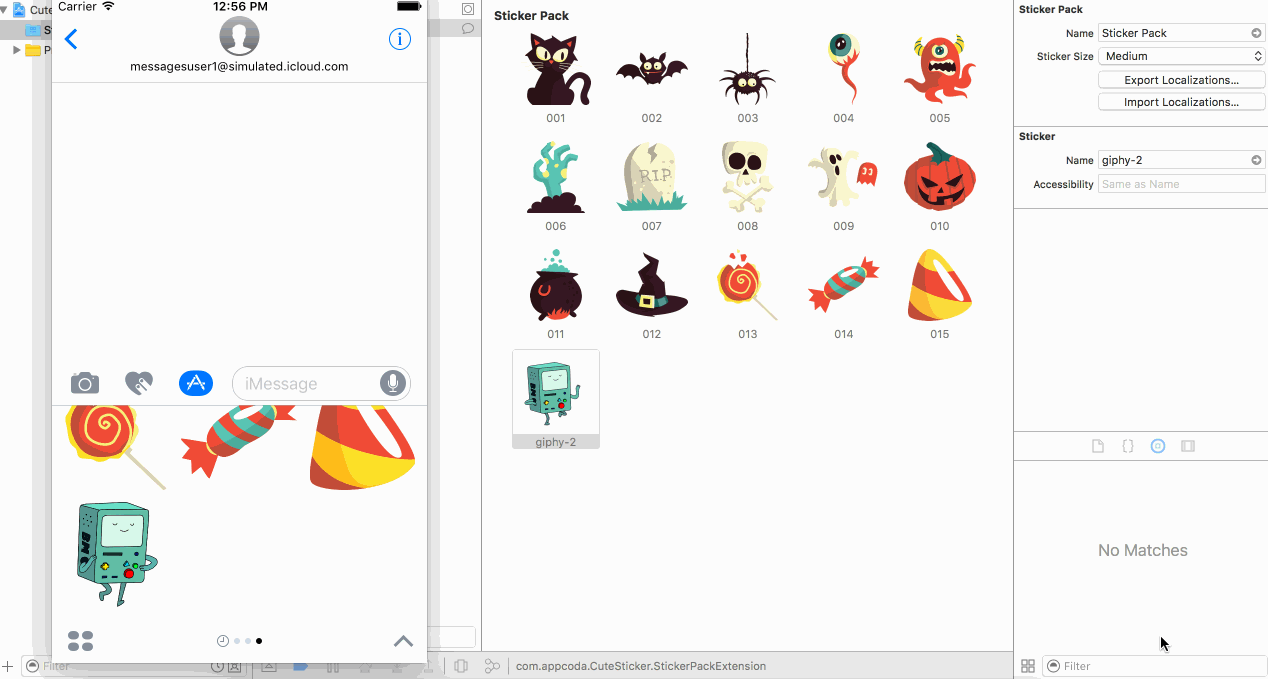
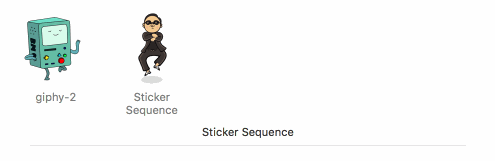
An alternative approach for creating animated images is create a sticker sequence. Go back to your sticker pack. Right click on any blank area to bring up the option menu. Choose Add Assets > New Sticker Sequence. This creates a sticker sequence for you to add a sequence of images.
As an example, you can download this image pack to try it out. Unzip the pack, and drag all the images to the sticker sequence. Xcode allows you to preview the resulting animation right in the sticker pack. Place the cursor over the sticker sequence and click the Play button to preview the animation.
Summary
You have just learned how to create an app extension for the Messages app in Xcode 8. As you see, you don’t even need to write a line of code to create a sticker pack. All you need is prepare your own images (animated or static) and you’re ready to build a sticker pack.
Meanwhile, Xcode 8 and iOS 10 are still in beta. You cannot upload your sticker pack to the Messages App Store yet. But it is a good time to start building your own sticker packs. When iOS 10 is ready to release this fall, you’ll have the first mover advantage.
Sticker pack is just one type of the iMessage app extensions. In the next tutorial, we will see how to create a more complicated extension for Messages. Stay tuned.
For reference, you can download the complete Xcode project on GitHub.
