Creating immersive and interesting user experiences requires more than a nice looking interface and intuitive button placement. A truly immersive experience not only uses the basic visual and auditory senses, but also tactile feedback.
Apple implements haptic feedback throughout almost all elements of iOS from rich-notifications on the lock screen to confirming a successful transaction in Apple Pay, even on scroll wheels and sliders. It is important to make a user more confident in the actions they perform, and using the haptic engine to portray messages is a great way of confirming a message you want the user to receive.
Lucky for us, Apple has made implementing specific feedback patterns really easy for us so this will be a relatively short tutorial. Lets break down some of these different classes we’re supplied:
- UIImpactFeedbackGenerator
- UISelectionFeedbackGenerator
- UINotificationFeedbackGenerator
“Use impact feedback generators to indicate that an impact has occurred. For example, you might trigger impact feedback when a user interface object collides with something or snaps into place.”
“Use selection feedback to communicate movement through a series of discrete values.”
“Use notification feedback to communicate that a task or action has succeeded, failed, or produced a warning of some kind.”
Let’s Dive in
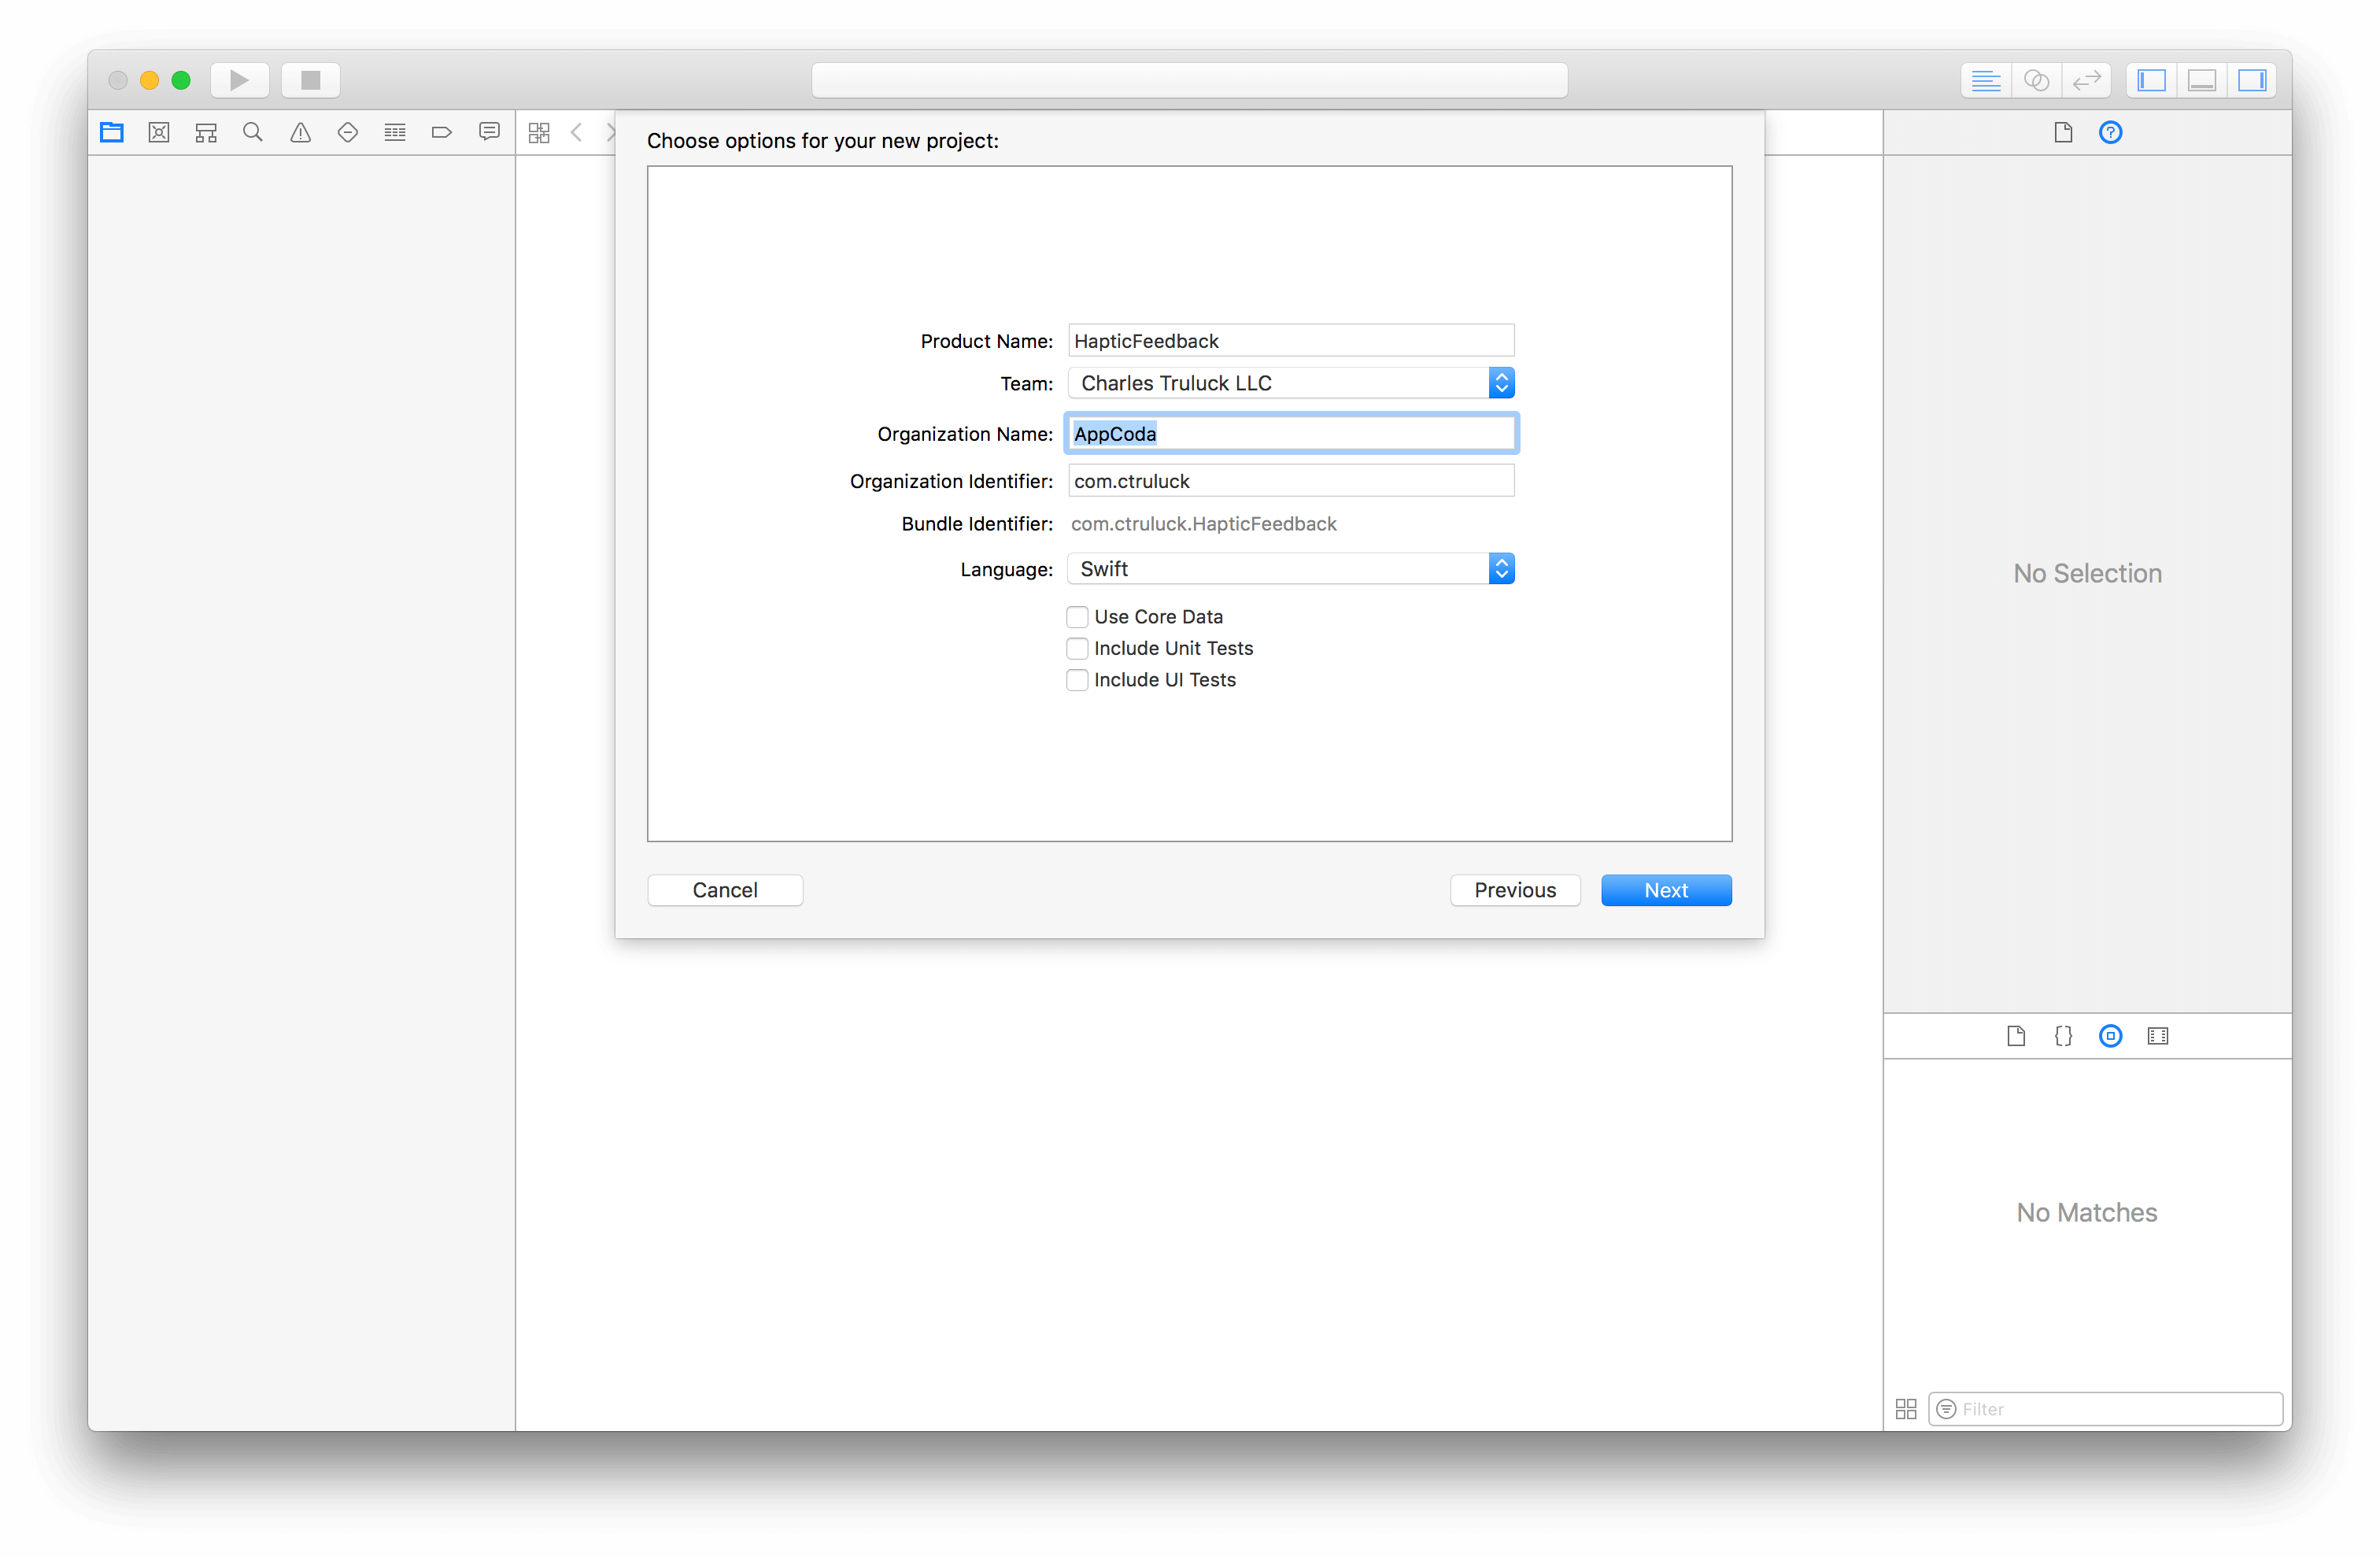
I’m going to cover all 3 different feedback generators. First, we need to create a project. Get started by creating a single-view application, name it whatever you’d like to, and use Swift 4.0 as your main language.
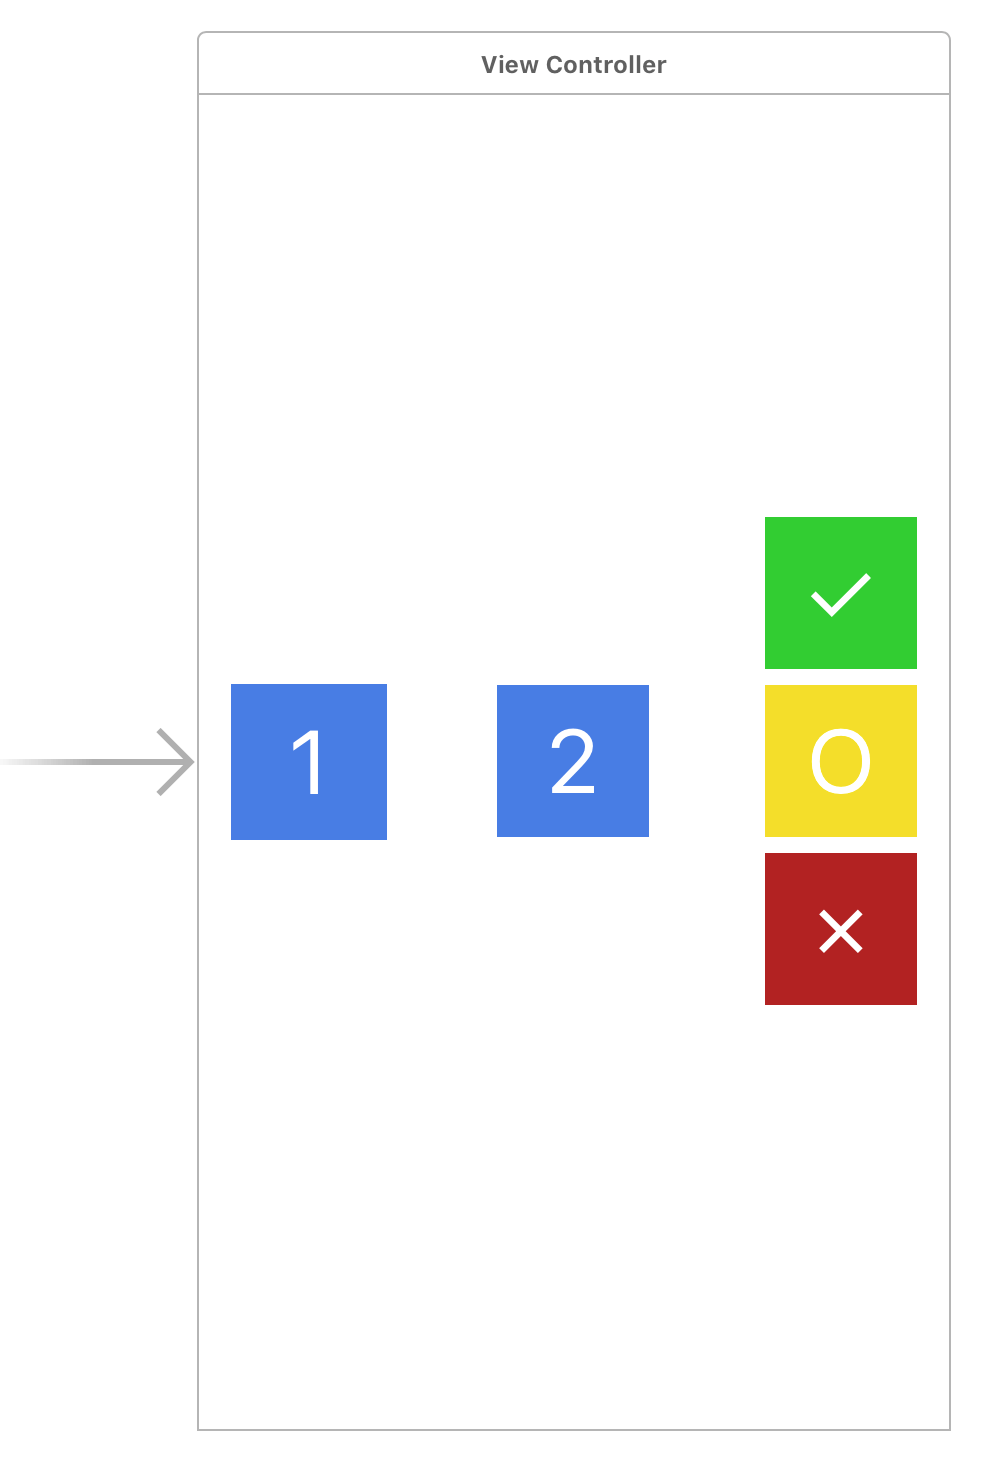
Once we’re in our application, the first thing we need to do is make an interface. I suggest you place five buttons, one for impact generator, one for selection feedback, and three for notifications. You can do this however you’d like, or ignore this section if you’re just here to dive into what the code looks like. I’ve designed my storyboard to look like this:
Another element to note is the layout- though it is not needed in this tutorial, it’s an essential skill if you’re developing for iOS.
Connecting the UI Components
Let’s continue by connecting these buttons to our code. Hover over the “1” button, hold down the control key, click and drag to where I did here:
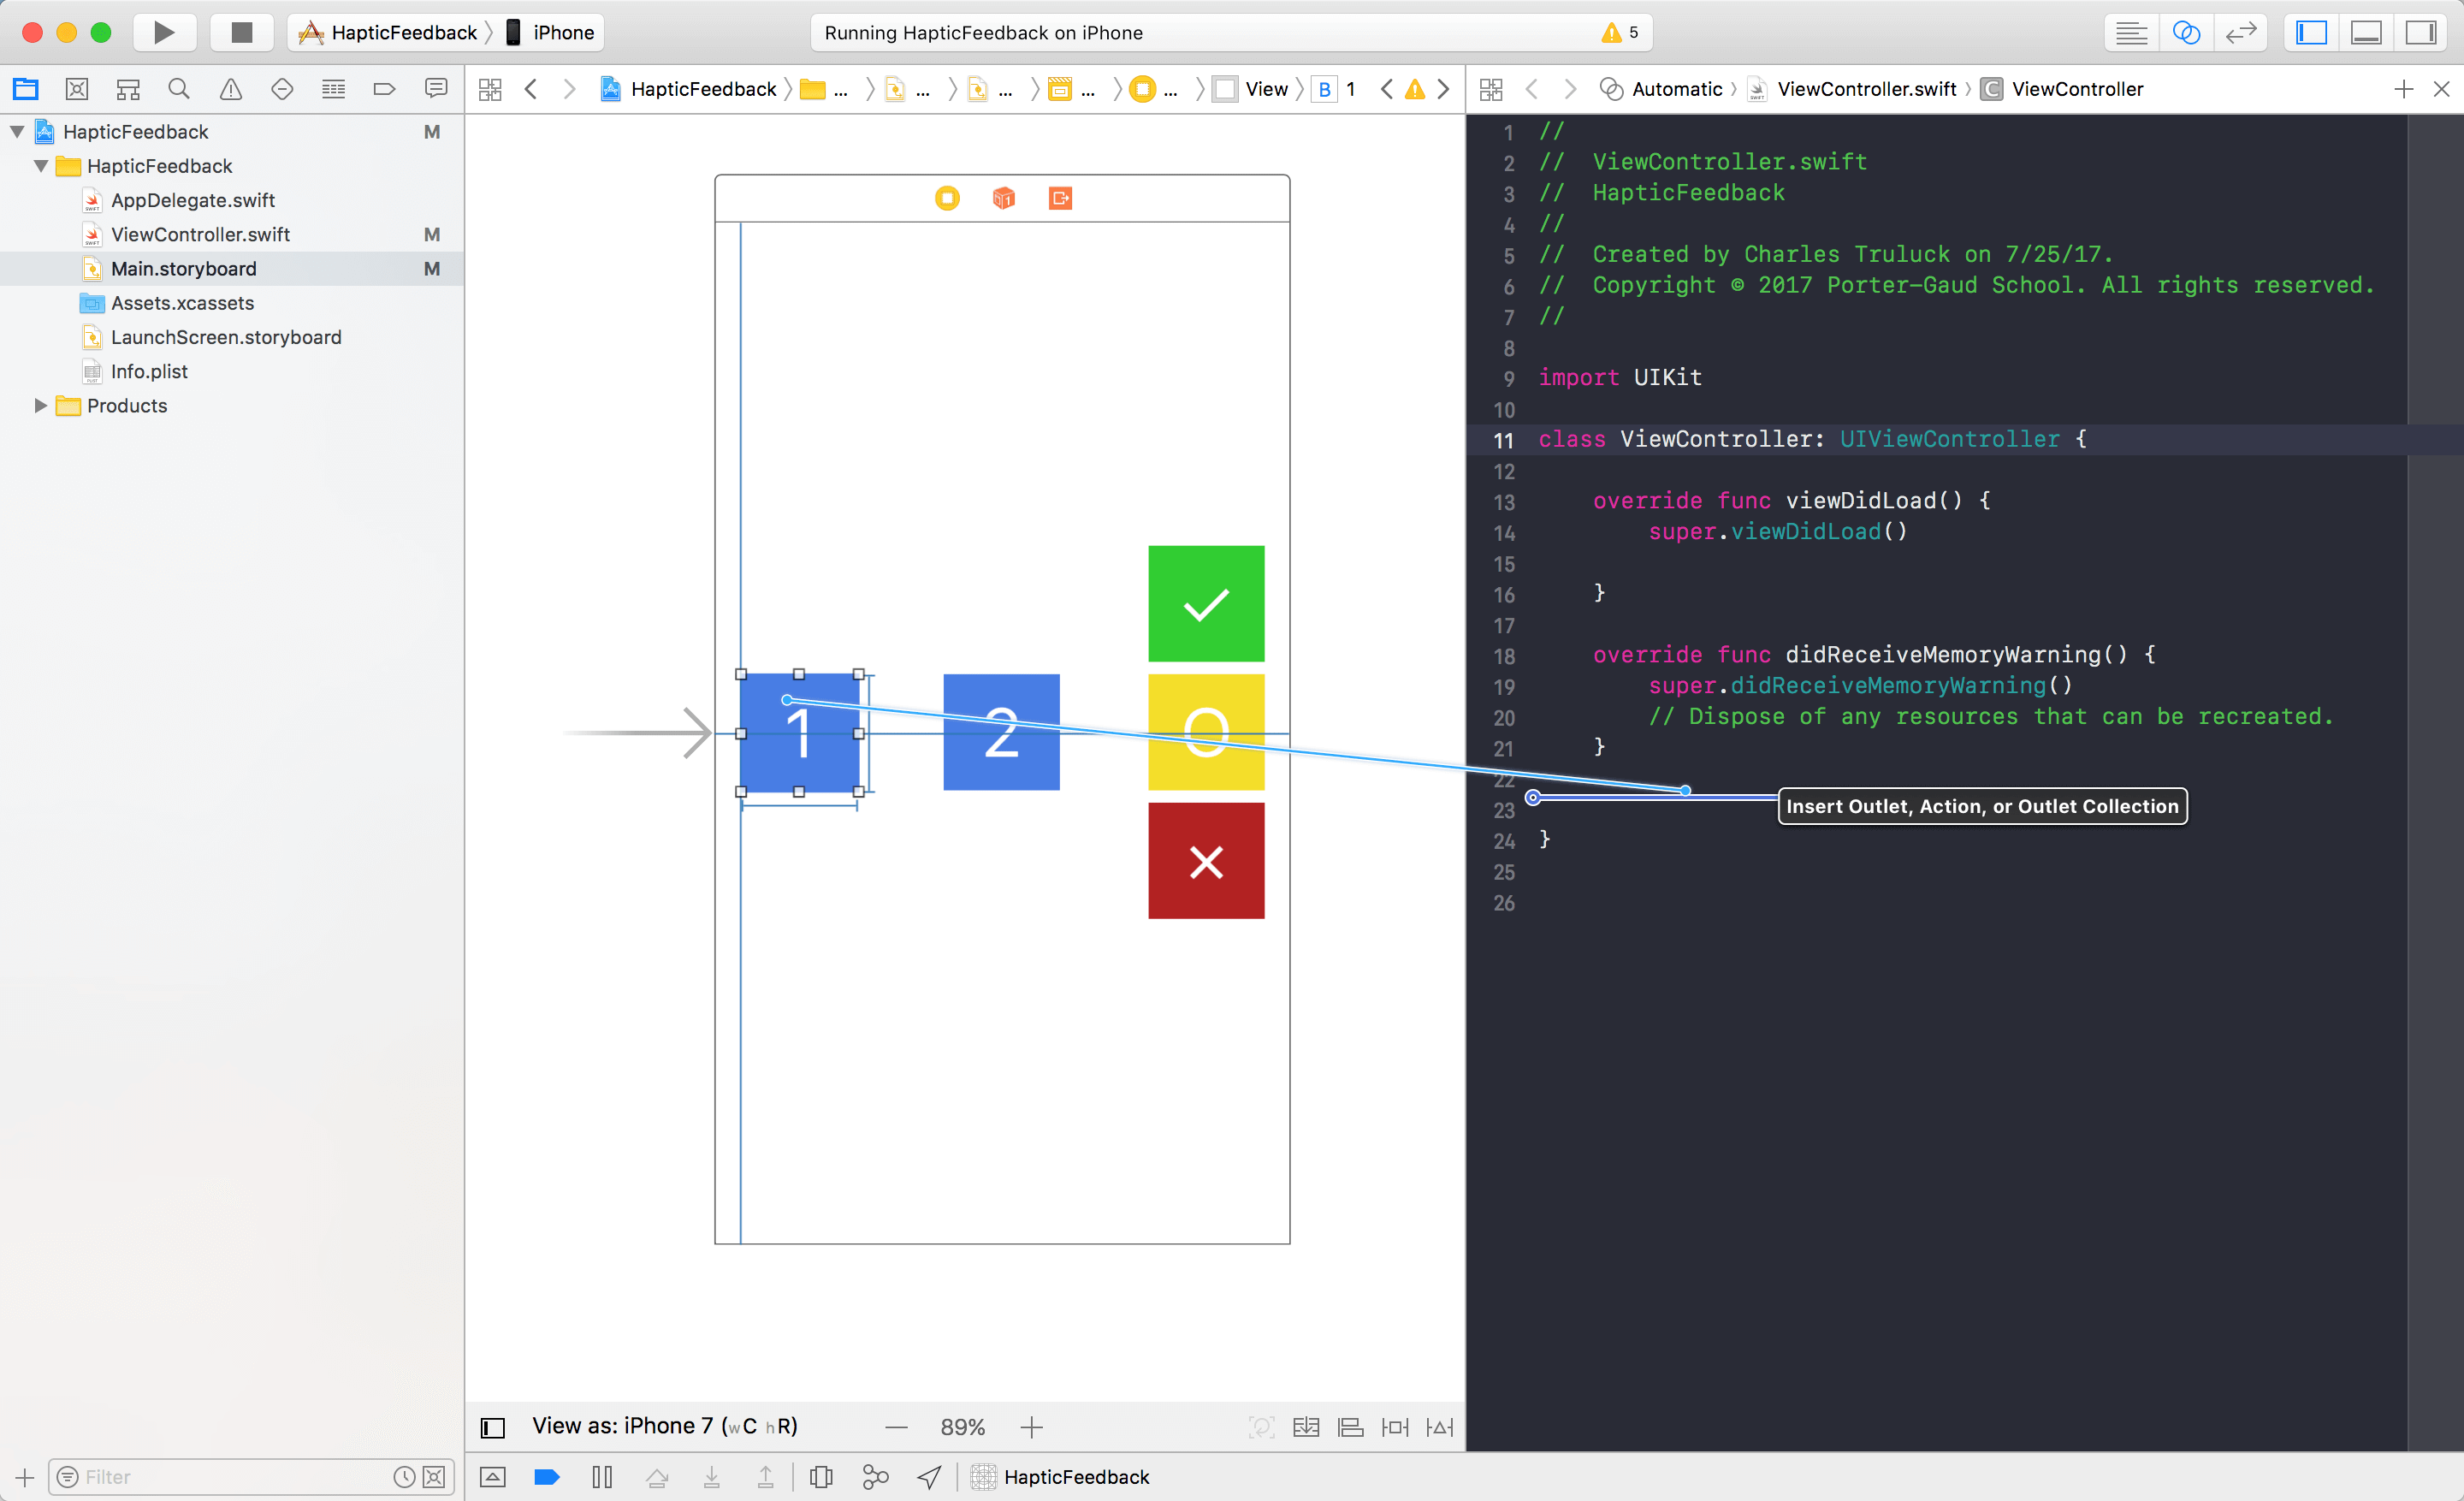
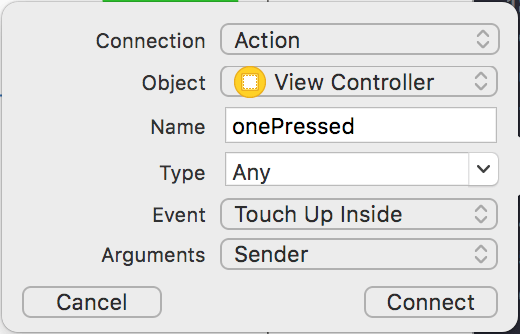
Once you do that, a box should pop up. Select “action” instead of “outlet” in the connection dropdown, and name the action as you please. I named mine onePressed but don’t let that limit you!
Great! Do that with all 4 of the other buttons, and we’ll group up once you finish that.
Implementing the Feedback Generators
This is great! We’ve got a layout for our app. Thanks to Apple, our code is going to be really simple! Let’s dive right in.
No need to import anything, as this is all part of UIKIt. Let’s create a UIImpactFeedbackGenerator:
|
1 2 3 4 5 |
let impact = UIImpactFeedbackGenerator() // 1 @IBAction func onePressed(_ sender: Any) { impact.impactOccurred() // 2 } |
Simple, right?
- Created a constant named
impact, which is aUIImpactFeedbackGenerator. - Triggered the haptic feedback.
Let me mention one unique thing about the UIImpactFeedbackGenerator. You might have noticed when you were declaring your impact variable but there are 3 options for impacts. light, medium, and heavy. You can play around with those depending on your use for it, but I just let mine stay default. The only difference is the intensity of the feedback. Make sure when using these haptics you don’t overdue them. (for instance, if you set it to heavy, every time you got a text would be a bit much. That’s why Apple uses light in the messages app.)
Cool! Run your app and click button 1! It might seem like a useless vibration but apps win Apple Design Awards because of this kind of integration. Trust me.
Let’s try setting up the selection feedback generator.
|
1 2 3 4 5 |
let selection = UISelectionFeedbackGenerator() @IBAction func twoPressed(_ sender: Any) { selection.selectionChanged() } |
Sweet! This one is simple and easy to explain. As the name selection implies, this is for small elements within the app. A good example of this is iOS’s use of the UISelectionFeedbackGenerator: if you have an iPhone 7, you are probably well aware every time you toggle a switch in settings or scroll through a picker view you feel this small “selection” feedback.
The last feedback generator is the most interesting one, and it’s the one you probably want to implement in your app.
|
1 2 3 4 5 6 7 8 9 10 11 12 13 |
let notification = UINotificationFeedbackGenerator() @IBAction func successPressed(_ sender: Any) { notification.notificationOccurred(.success) } @IBAction func warningPressed(_ sender: Any) { notification.notificationOccurred(.warning) } @IBAction func errorPressed(_ sender: Any) { notification.notificationOccurred(.error) } |
I know exactly what you’re thinking: “Charles, this is so simple! Thanks Apple for making this so easy!”
I could not agree with you more. Anyway, run the app! You should feel the 3 different kinds of notifications when you click each corresponding button. A note about these specific haptics, syncing them with sound is highly recommended, Apple does this in Apple Pay and honestly it feels pretty good.
Conclusion
To conclude, we’ve built a simple app using haptics- an important aspect of user experience. Tell me about how you plan to implement haptic feedback into your application, and your thoughts about this tutorial! I’d love to hear what you guys have to say.
For reference, you can check out the complete Xcode project on GitHub.

Charles Truluck is a WWDC ’16/’17 scholarship recipient, and has been programming iOS for around 4 years now. He mostly builds in-house apps for his school, or builds small projects to discover new technologies. Aside from iOS, Charles works with NodeJS, and excels on the command-line. He is also a cyber-security enthusiast and is currently interning at a local cyber-security company. In his spare time, Charles goes rock-climbing and participates in his school’s varsity football team.