This is a guest post by Sean Choo, the developer of Cureto. In this tutorial, he will show us how he implements the app’s article view using custom table view.
Hi everyone, I am Sean Choo, a Malaysian who is currently studying in Hong Kong. What bugs me all the time is: I always have difficulty finding good food to eat in Hong Kong. Back in Malaysia, I don’t have this worry because 1. I grew up there, 2. There are really lots of nice food in Malaysia.
All the apps currently available just couldn’t solve my problem. So I think about it and realize that most of the good food I’ve eaten in Hong Kong are either discovered by myself, or introduced by my friends. And hence I set out to make an app so that my friends and I could introduce and convince each other on good food in Hong Kong. I have just published this iOS app on App Store recently, it’s called Cureto. The website for this app is here. You can also read the design philosophy here.
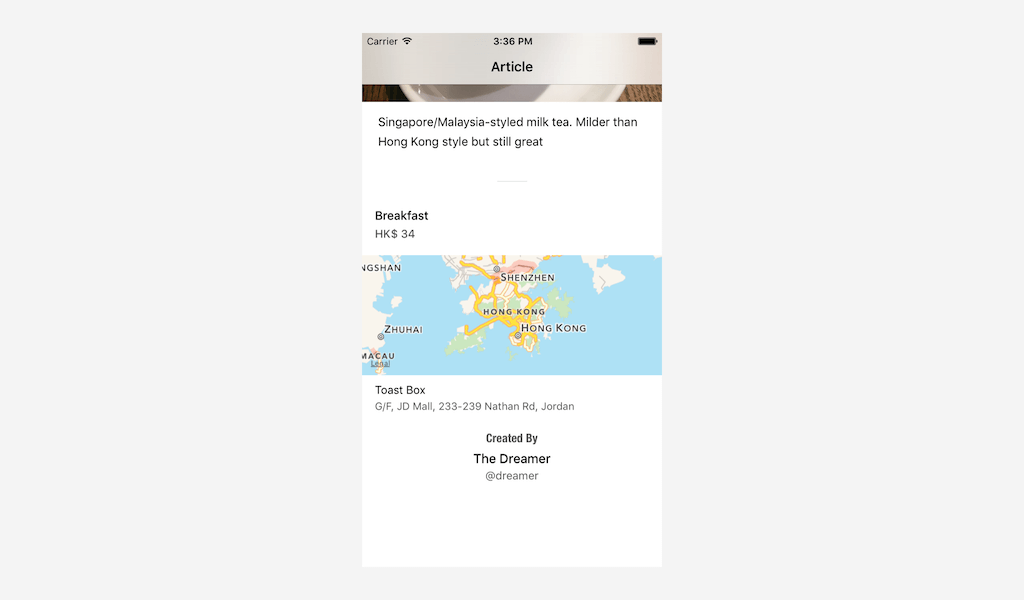
I see this app as an artwork. I want it to be pretty, the experience to be relax and enjoyable. If you have downloaded the app, you can see each food introduction is in fact an article. And to make reading pleasant, I have put in a lot of time designing the article. In this tutorial, I am going to share how I use UITableView to render an article shown below.
First, download the starter project here and open Delicious.xcodeproj. You will need Xcode 7.3 and Swift 2.2 or above.
Dissecting an Article
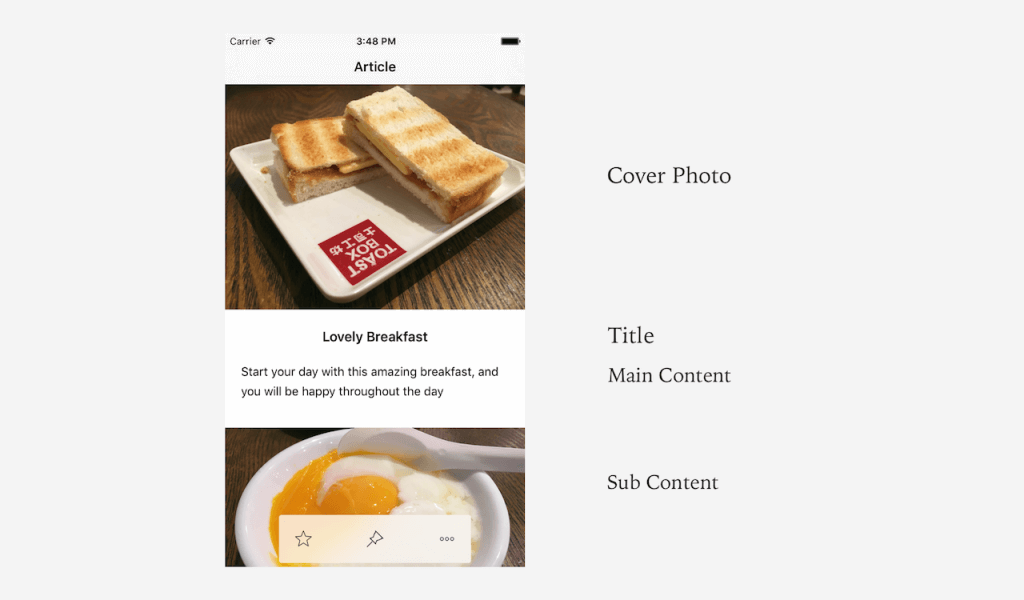
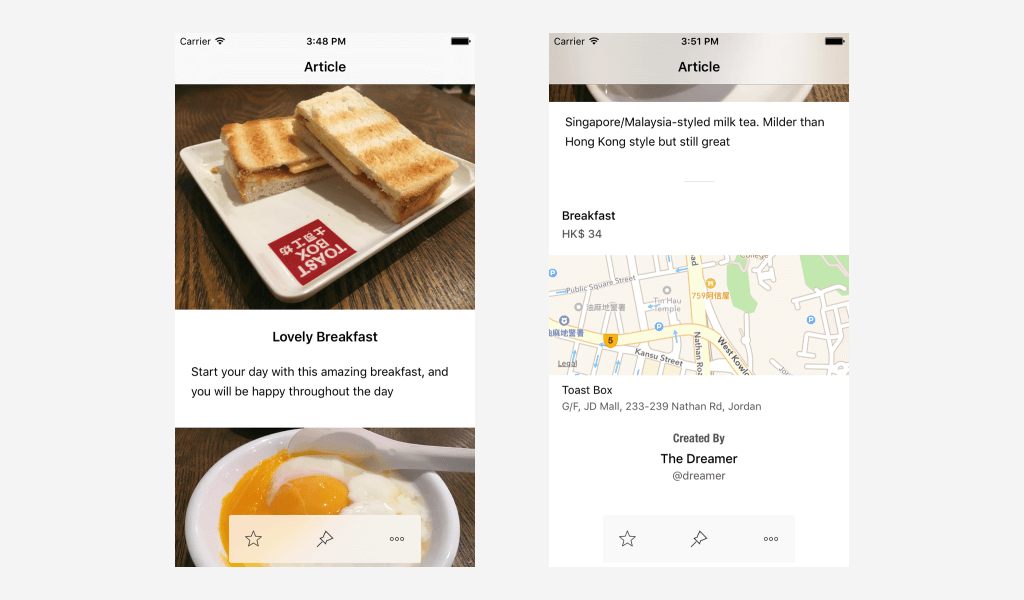
Take a look at the above photo. An article view consists of a Cover Photo, a Title, a Main Content, and a list of Sub Contents. To design a view like this, I use a custom table view, and create three prototype cells for the cover photo, main content, and the sub content.
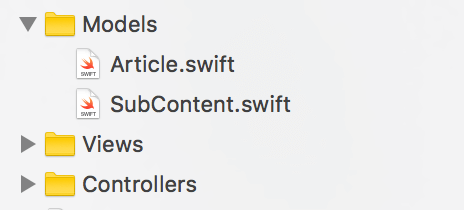
To model this structure, let’s create two files in the Models folder: Article.swift and SubContent.swift. You can right click the Models folder, choose “New File…”, and then create a Swift file.
In Article.swift, insert the following code:
|
1 2 3 4 5 6 7 8 9 10 11 12 13 14 15 16 17 18 19 20 21 22 23 24 25 26 27 28 29 30 31 32 33 34 35 |
import UIKit class Article { var title: String? var mainContent: String? var coverPhoto: String? var coverPhotoWidth: CGFloat? var coverPhotoHeight: CGFloat? var mealType: String? var mealPrice: Int? var authorDisplayName: String? var authorUsername: String? var restaurantName: String? var restaurantAddress: String? var restaurantLatitude: Double? var restaurantLongitude: Double? var subContents = [SubContent]() init(title: String, mainContent: String, coverPhoto: String, coverPhotoWidth: CGFloat, coverPhotoHeight: CGFloat, mealType: String, mealPrice: Int) { self.title = title self.mainContent = mainContent self.coverPhoto = coverPhoto self.coverPhotoWidth = coverPhotoWidth self.coverPhotoHeight = coverPhotoHeight self.mealType = mealType self.mealPrice = mealPrice } } |
The Article class has several properties including title, cover photo, meal type, restaurant location, and sub contents.
In SubContent.swift, insert the following code:
|
1 2 3 4 5 6 7 8 9 10 11 12 13 14 15 16 17 |
import UIKit class SubContent { var photo: String? var photoWidth: CGFloat? var photoHeight: CGFloat? var text: String? init(photo: String, photoWidth: CGFloat, photoHeight: CGFloat, text: String) { self.photo = photo self.photoWidth = photoWidth self.photoHeight = photoHeight self.text = text } } |
Each subcontent contains a photo and paragraphs of text. So we define the corresponding properties.
Next, open ArticleController.swift under the Controllers folder. The ArticleController class, which is used to render an article, is associated with the table view controller in Interface Builder.
In the class, add a currentArticle variable, then create a initializeArticle() method and call it in viewDidLoad().
|
1 2 3 4 5 6 7 8 9 10 11 12 13 14 15 16 17 18 19 20 21 22 23 24 25 26 27 28 29 |
import UIKit class ArticleController: UITableViewController { var currentArticle: Article? override func viewDidLoad() { super.viewDidLoad() initializeArticle() } func initializeArticle() { let mainContent = "Start your day with this amazing breakfast, and you will be happy throughout the day" let article = Article(title: "Lovely Breakfast", mainContent: mainContent, coverPhoto: "Toast", coverPhotoWidth: 1080, coverPhotoHeight: 810, mealType: "Breakfast", mealPrice: 34) article.restaurantName = "Toast Box" article.restaurantAddress = "G/F, JD Mall, 233-239 Nathan Rd, Jordan" article.restaurantLatitude = 22.304864882982680 article.restaurantLongitude = 114.171386361122100 article.authorDisplayName = "The Dreamer" article.authorUsername = "dreamer" let subContentOne = SubContent(photo: "Egg", photoWidth: 1080, photoHeight: 810, text: "Half-boiled eggs is a must") let subContentTwo = SubContent(photo: "Tea", photoWidth: 1080, photoHeight: 810, text: "Singapore/Malaysia-styled milk tea. Milder than Hong Kong style but still great") article.subContents = [subContentOne, subContentTwo] currentArticle = article } } |
The currentArticle variable is used to hold the article being displayed. The initializeArticle() method helps setup the article details, and it initializes a sample article after the view has finished loading.
Now that you’ve finished the implementation of the Article class, we are going to setup the UITableView for the article. First of all, add these 4 lines in ArticleController.swift.
|
1 2 3 4 5 6 7 8 9 10 11 12 13 14 15 16 17 |
import UIKit class ArticleController: UITableViewController { let screenWidth: CGFloat = UIScreen.mainScreen().bounds.width let screenHeight: CGFloat = UIScreen.mainScreen().bounds.height var currentArticle: Article? override func viewDidLoad() { super.viewDidLoad() tableView.rowHeight = UITableViewAutomaticDimension tableView.estimatedRowHeight = 500.0 initializeArticle() } } |
First, we declare two constants for holding the screen width and height of the device. And we make use of the self sizing cell feature by setting the row height to UITableViewAutomaticDimension and giving the table view an estimated row height.
Next, let’s setup the methods for rendering the table view in ArticleController.swift. In the ArticleController class, insert the following method:
|
1 2 3 4 5 6 7 |
override func tableView(tableView: UITableView, numberOfRowsInSection section: Int) -> Int { if let article = currentArticle { return 2 + article.subContents.count } else { return 0 } } |
Each article contains the following sections:
- The first section is for the cover photo.
- The second section is for the article title, plus the main content.
- The rest of the section is for the subcontents.
Therefore, the total number of rows is 2 + article.subContents.count.
|
1 2 3 4 5 6 7 8 9 10 |
override func tableView(tableView: UITableView, heightForRowAtIndexPath indexPath: NSIndexPath) -> CGFloat { if indexPath.row == 0 { if let width = currentArticle?.coverPhotoWidth, height = currentArticle?.coverPhotoHeight { let heightRatio = height / width return screenWidth * heightRatio } } return UITableViewAutomaticDimension } |
For the cover photo row, we have to calculate the row height. For example, if a cover photo is 4w : 3h in ratio, height ratio will be 3 / 4 = 0.75 and row height would be screen width (e.g. 375 for iPhone 6S) * 0.75 = 281.25. For the rest of the rows, it is good enough to use automatic row height.
|
1 2 3 4 5 6 7 8 9 10 11 12 13 14 15 16 17 18 19 20 21 22 23 24 25 26 27 28 29 30 31 32 33 34 35 36 37 38 39 40 41 42 43 44 45 46 47 48 49 50 51 52 53 54 55 56 57 58 59 60 |
func attributedContentFromText(text: String) -> NSMutableAttributedString { let paraStyle = NSMutableParagraphStyle() paraStyle.lineSpacing = 7 let attrs = [NSFontAttributeName: UIFont.systemFontOfSize(15), NSParagraphStyleAttributeName: paraStyle] let attrContent = NSMutableAttributedString(string: text, attributes: attrs) return attrContent } override func tableView(tableView: UITableView, cellForRowAtIndexPath indexPath: NSIndexPath) -> UITableViewCell { var cellForRow: UITableViewCell! if indexPath.row == 0 { let cell = tableView.dequeueReusableCellWithIdentifier("CoverPhotoCell", forIndexPath: indexPath) as! CoverPhotoTableViewCell if let imageName = currentArticle?.coverPhoto { cell.coverImageView.image = UIImage(named: imageName) } cellForRow = cell } else if indexPath.row == 1 { let cell = tableView.dequeueReusableCellWithIdentifier("MainContentCell", forIndexPath: indexPath) as! MainContentTableViewCell cell.titleLabel.text = currentArticle?.title cell.contentLabel.textAlignment = .Left if let text = currentArticle?.mainContent { cell.contentLabel.attributedText = attributedContentFromText(text) } cellForRow = cell } else { let cell = tableView.dequeueReusableCellWithIdentifier("SubContentCell", forIndexPath: indexPath) as! SubContentTableViewCell if let article = currentArticle { let subContent = article.subContents[indexPath.row - 2] if let width = subContent.photoWidth, height = subContent.photoHeight { let heightRatio = height / width cell.subImageViewHeight.constant = screenWidth * heightRatio } if let imageName = subContent.photo { cell.subImageView.image = UIImage(named: imageName) } cell.subContentLabel.textAlignment = .Left if let text = subContent.text { cell.subContentLabel.attributedText = attributedContentFromText(text) } } cellForRow = cell } return cellForRow } |
First, instead of using a normal string for text in the article, we use NSMutableAttributedString, that the article will be more pleasant to read. The attributedContentFromText() method is a helper method for converting a string to a NSMutableAttributedString. The rest of the code is pretty straightforward. We simply configure the cells for cover photo row, title/main content row, and the sub content rows.
Now it’s ready to have a quick test. Run the app, and you should now have something like this:
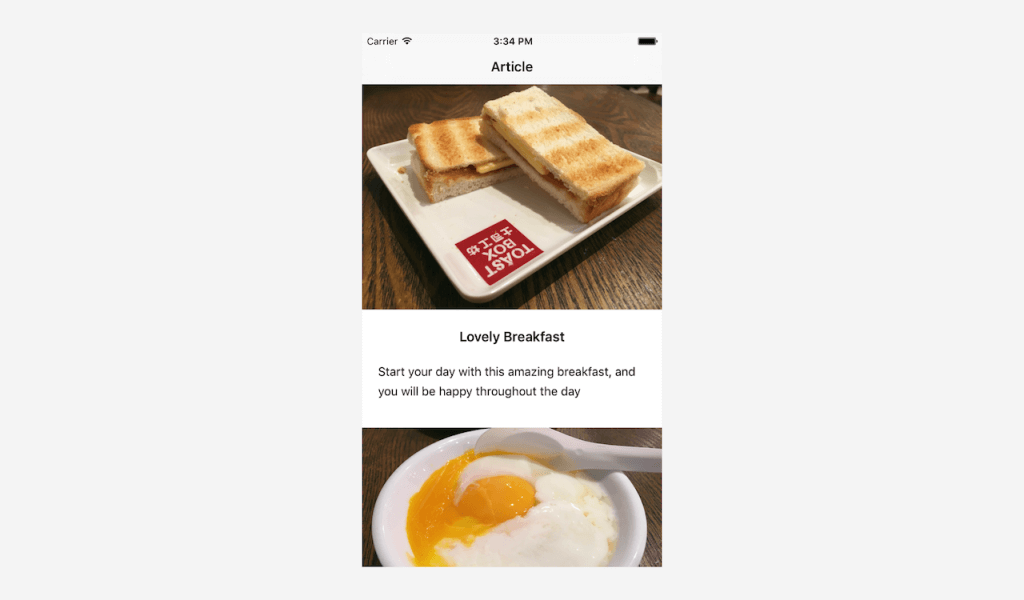
Yay! You have just created a very basic layout of the article. The font size and line spacing is just right to read. Then, you will have the urge to eat at this restaurant. But wait, where is this restaurant? Yes, we need a map, and perhaps also the restaurant name and address. Moreover, we need to acknowledge the author of this article too. To do this, we are going to use a footer for this UITableView.
Adding a Map to the Table View Footer
Now, we are going to add a footer for the UITableView. The starter project already came with the UI design of the table footer. You can refer to ArticleFooterView.xib for details. To implement the footer view, add the following lines of code right below the initializeArticle() method of ArticleController.swift:
|
1 2 3 4 5 6 7 8 9 10 11 12 13 14 15 16 17 18 19 20 21 22 23 |
func addFooterView() { let footerView = NSBundle.mainBundle().loadNibNamed("ArticleFooterView", owner: self, options: nil)[0] as! ArticleFooterView footerView.frame = CGRectMake(0, 0, screenWidth, 486) footerView.separatorHeight.constant = 0.6 if let type = currentArticle?.mealType, price = currentArticle?.mealPrice { footerView.mealTypeLabel.text = type footerView.mealPriceLabel.text = "HK$ \(price)" } if let name = currentArticle?.restaurantName, address = currentArticle?.restaurantAddress { footerView.restaurantNameLabel.text = name footerView.restaurantAddressLabel.text = address } if let name = currentArticle?.authorDisplayName, username = currentArticle?.authorUsername { footerView.displayNameLabel.text = name footerView.usernameLabel.text = "@\(username)" } tableView.tableFooterView = footerView } |
Then, in viewDidLoad(), add the line of code highlighted in yellow to call up the addFooterView() method:
|
1 2 3 4 5 6 7 8 9 |
override func viewDidLoad() { super.viewDidLoad() tableView.rowHeight = UITableViewAutomaticDimension tableView.estimatedRowHeight = 500.0 initializeArticle() addFooterView() } |
Run the app again. Scroll to the bottom and you will have something like this:
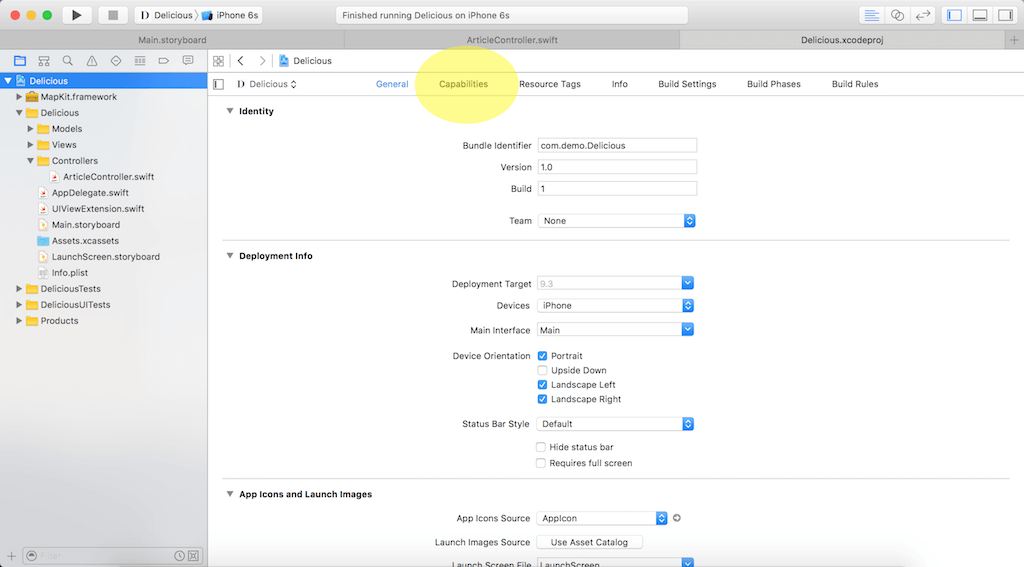
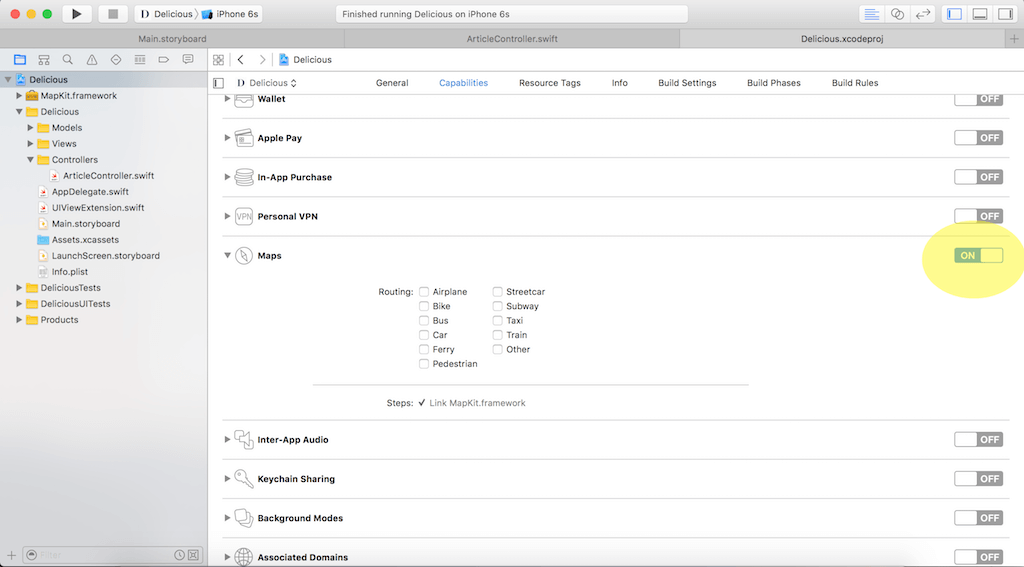
Seems like we’re done! But no, why the map not showing the expected location of the restaurant? Of course, it’s because we haven’t implemented it. You now have an empty MKMapView in the footer. We will now move on to add a pin to the MKMapView. But first you will have to enable Maps in Capabilities.
Back in ArticleController.swift, right below import UIKit add a line of code to import MapKit:
|
1 2 3 4 5 6 |
import UIKit import MapKit class ArticleController: UITableViewController { ... } |
Then, for the method addFooterView(), please update it to the following code so as to add the logic to render the correct location:
|
1 2 3 4 5 6 7 8 9 10 11 12 13 14 15 16 17 18 19 20 21 22 23 24 25 26 27 28 29 30 31 32 33 |
func addFooterView() { let footerView = NSBundle.mainBundle().loadNibNamed("ArticleFooterView", owner: self, options: nil)[0] as! ArticleFooterView footerView.frame = CGRectMake(0, 0, screenWidth, 486) footerView.separatorHeight.constant = 0.6 if let type = currentArticle?.mealType, price = currentArticle?.mealPrice { footerView.mealTypeLabel.text = type footerView.mealPriceLabel.text = "HK$ \(price)" } if let name = currentArticle?.restaurantName, address = currentArticle?.restaurantAddress { footerView.restaurantNameLabel.text = name footerView.restaurantAddressLabel.text = address } if let name = currentArticle?.authorDisplayName, username = currentArticle?.authorUsername { footerView.displayNameLabel.text = name footerView.usernameLabel.text = "@\(username)" } if let lat = currentArticle?.restaurantLatitude, lng = currentArticle?.restaurantLongitude { let location = CLLocation(latitude: lat, longitude: lng) let coordinateRegion = MKCoordinateRegionMakeWithDistance(location.coordinate, 250.0, 250.0) footerView.mapView.setRegion(coordinateRegion, animated: false) let pin = MKPointAnnotation() pin.coordinate = location.coordinate footerView.mapView.addAnnotation(pin) } tableView.tableFooterView = footerView } |
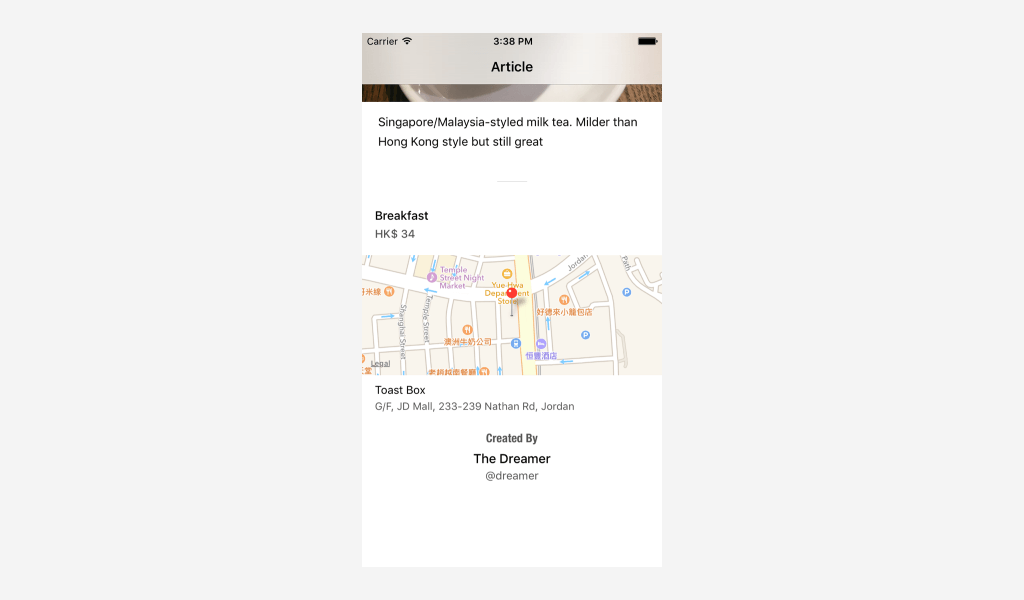
Assuming you have some knowledge of MapKit, here we simply set the region of the map to the location of the restaurant. Then, we put a pin on the exact position of the restaurant.
Great! Let’s run the app again. You should have something like this:
Adding an Action Menu
Now the article looks complete! But I feel one thing is missing: we need an action bar for people to take actions, such as giving a like to this wonderful article. I would also like to share how I use extension in Swift to customize existing class such as UIView to carry out the desired animation, so that you can also write your own extension in the future!
For the starter project, I have created the menu bar in ArticleMenuView.xib. But I want the article menu to swipe up from the bottom of the screen instead of just popping up from no where. Let’s get started to implement it.
First, add these 3 lines (highlighted in yellow) in ArticleController.swift:
|
1 2 3 4 5 6 7 8 9 10 11 12 13 14 15 16 17 |
import UIKit import MapKit class ArticleController: UITableViewController { let screenWidth: CGFloat = UIScreen.mainScreen().bounds.width let screenHeight: CGFloat = UIScreen.mainScreen().bounds.height var currentArticle: Article? var articleMenu: ArticleMenuView? var articleMenuHidden = false var lastContentOffset: CGFloat = 0.0 override func viewDidLoad() { ... } } |
Here we just add:
- A variable to hold the Article Menu
- A boolean to check whether the Article Menu is hidden
- A variable to be used for hiding the menu on scroll later
The Article Menu slides up from the bottom of the screen when the article appears. To do that, we add a custom extension for UIView. Create a new file named UIViewExtension.swift and put it below AppDelegate.swift in the directory.
Next, insert the following code in UIViewExtension.swift:
|
1 2 3 4 5 6 7 8 9 10 11 12 13 14 15 16 17 18 19 20 21 |
import UIKit extension UIView { func slideInFromBottom(duration: NSTimeInterval = 0.1, completionDelegate: AnyObject? = nil) { let slideInFromBottomTransition = CATransition() if let delegate: AnyObject = completionDelegate { slideInFromBottomTransition.delegate = delegate } slideInFromBottomTransition.type = kCATransitionPush slideInFromBottomTransition.subtype = kCATransitionFromTop slideInFromBottomTransition.duration = duration slideInFromBottomTransition.timingFunction = CAMediaTimingFunction(name: kCAMediaTimingFunctionEaseInEaseOut) slideInFromBottomTransition.fillMode = kCAFillModeRemoved self.layer.addAnimation(slideInFromBottomTransition, forKey: "slideInFromBottomTransition") } } |
Then, in ArticleController.swift, add these 4 methods right below addFooterView():
|
1 2 3 4 5 6 7 8 9 10 11 12 13 14 15 16 17 18 19 20 21 22 23 24 25 26 27 28 29 30 31 32 33 34 35 36 37 38 39 40 41 |
func addArticleMenu() { if articleMenu == nil { let appDelegate = UIApplication.sharedApplication().delegate as! AppDelegate let menuView = NSBundle.mainBundle().loadNibNamed("ArticleMenuView", owner: self, options: nil)[0] as! ArticleMenuView menuView.frame = CGRectMake(0, screenHeight - 70, screenWidth, 70) menuView.blurView.layer.cornerRadius = 3 menuView.blurView.layer.masksToBounds = true appDelegate.window?.addSubview(menuView) menuView.slideInFromBottom() articleMenu = menuView } } func hideArticleMenu(menu: UIView) { if !articleMenuHidden { UIView.animateWithDuration(0.3, delay: 0.0, options: UIViewAnimationOptions.CurveEaseInOut, animations: { menu.frame = CGRectMake(0, self.screenHeight, self.screenWidth, 70) }, completion: { finished in self.articleMenuHidden = true }) } } func unhideArticleMenu(menu: UIView) { if articleMenuHidden { UIView.animateWithDuration(0.3, delay: 0.0, options: UIViewAnimationOptions.CurveEaseInOut, animations: { menu.frame = CGRectMake(0, self.screenHeight - 70, self.screenWidth, 70) }, completion: { finished in self.articleMenuHidden = false }) } } func removeArticleMenu() { if let menu = articleMenu { menu.removeFromSuperview() self.articleMenu = nil } } |
After that, right under viewDidLoad(), add the following methods:
|
1 2 3 4 5 6 7 8 9 10 11 12 13 14 15 16 17 18 19 20 |
override func viewDidAppear(animated: Bool) { addArticleMenu() } override func viewWillDisappear(animated: Bool) { removeArticleMenu() } override func scrollViewDidScroll(scrollView: UIScrollView) { if let menu = articleMenu { if lastContentOffset < 0.0 { // do nothing } else if lastContentOffset > scrollView.contentOffset.y { unhideArticleMenu(menu) } else if lastContentOffset < scrollView.contentOffset.y { hideArticleMenu(menu) } lastContentOffset = scrollView.contentOffset.y } } |
In the above code, we invoke the addArticleMenu() method in ViewDidAppear(), so that we bring up the article menu when the article appears. Conversely, we call the removeArticleMenu() method after the article disappears. We also implement the scrollViewDidScroll method to hide the article menu when the user scrolls down the article view. And we will unhide the article menu when the user scrolls up again.
Summary
Cool! You have created a food article using UITableView. I hope you enjoy reading this tutorial, and understand how to implement a simple article view using custom table view. For complete project, you can download it from GitHub.

Sean Choo is an iOS developer from Malaysia. Now studying in Hong Kong and interning at CityU Apps Lab, Sean believes in balance in everything - balance of design and engineering, as well as balance of work and life. iOS, Rails, and Design are what make him happy every day.
Comments
 yoshiboarder
AuthorThanks for the great!! article!
I have a question I want add the pageview i. the table’s subview/header.
Could you advising me? I want layout the pageview at the top of the view.
 Sean Choo
AuthorHi Yoshi. Do you mean a UITableView Section Header?
 yoshiboarder
AuthorYeah right.. like an airbnb apps.
I want know… how do I start making an below..
UITableView Section Header : UIPageViewController (Horizontal Scroll)
UITableView Cell : Vertical Scroll
 Sean Choo
AuthorHi Jeremy. Did you try to re-download the project and build it again?